Ultimate Baked Biscoff Cheesecake with Biscoff Crust
- Time:25 minutes prep + 60 minutes cook + 6 hours chilling = 7 hours 25 minutes total
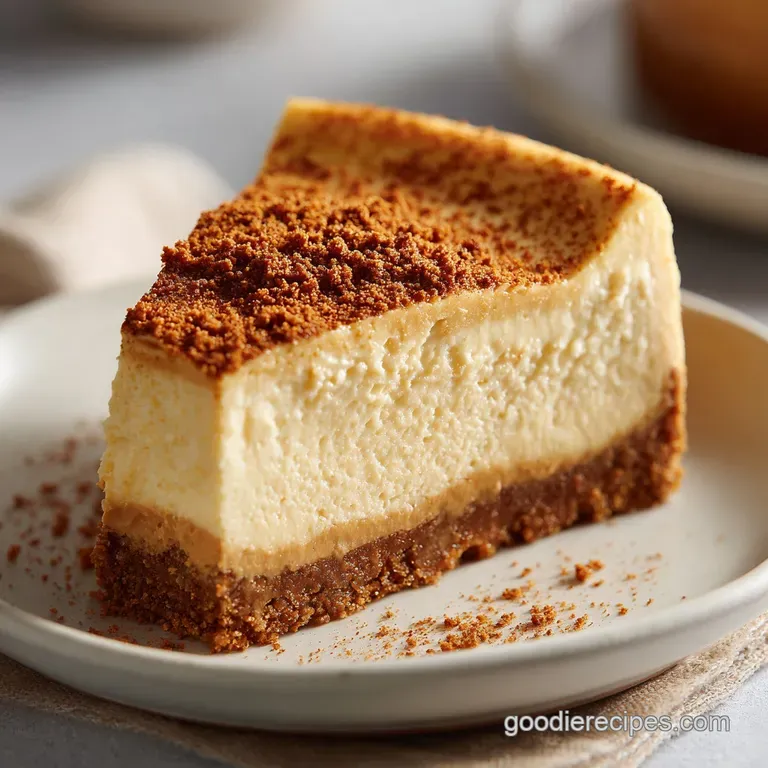
- Flavor/Texture Hook: A buttery, spiced cookie crunch paired with molten cookie butter and a silky, dense cream cheese center.
- Perfect for: Holiday gatherings or when you need a show stopping dessert that can be made a day in advance.
- Mastering The Perfect Creamy Texture
- Official Baking Times and Yields
- Elements for a Spiced Crust
- Essential Tools for Smooth Filling
- Complete Step By Step Baking Guide
- Troubleshooting Your Creamy Dessert
- Simple Dietary Adjustment Options
- Proper Storage and Freezing Tips
- Perfect Presentation and Pairing Ideas
- Recipe FAQs
- 📝 Recipe Card
The first time I really understood the obsession with these little brown cookies was on a red eye flight, of all places. You know that specific snap when you bite into a Biscoff? That deep, almost burnt sugar aroma combined with a hit of cinnamon and ginger?
I remember thinking that the only thing missing was a cooling, tangy counterpoint. That is exactly what this cheesecake provides. It is a study in textures, starting with a base that actually shatters when your fork hits it, leading into a filling that feels like silk on the tongue.
Walking into a kitchen where the crust is blind baking is a sensory experience unlike any other. The smell of toasted flour and brown butter lingers in the air, creating an atmosphere that feels instantly cozy. We are not just making a dessert here; we are building layers of flavor.
Most people treat the crust as an afterthought, but in this version, the salt and the high fat butter make it a standout component. It’s the kind of treat that makes the room go quiet once the first slices are served.
When you finally pour that slightly warmed, molten cookie butter over the chilled surface, the way it settles into a glassy, reflective pool is incredibly satisfying. It looks professional, yet the process is entirely grounded in simple, honest techniques.
There is no magic trick involved, just a commitment to patience and a few clever ways to manage heat. Let's get into the details of why this specific method produces such a consistent, crack free result every single time.
Mastering The Perfect Creamy Texture
Getting that signature "melt in-your mouth" feel requires more than just mixing ingredients. It is about how we handle the fats and the air within the batter. We want a dense, European style consistency rather than a light, fluffy mousse.
- Low Speed Emulsification: Mixing on low speed prevents excess air from being trapped in the cream cheese, which ensures the cake doesn't rise and collapse like a souffle.
- Residual Heat Finishing: Letting the cake sit in the turned off oven allows the proteins to set firmly without the shock of cold air, which often causes the surface to tear.
- Fat to Acid Ratio: The sour cream adds just enough acidity to break down the heavy proteins in the cream cheese, resulting in a velvety finish rather than a grainy one.
- Water Bath Insulation: The hot water acts as a buffer, keeping the edges from cooking faster than the center and maintaining a constant 212°F (100°C) around the pan.
| Method | Time | Texture | Best For |
|---|---|---|---|
| Traditional Oven Bake | 60 minutes | Dense, velvety, and classic | Achieving a smooth, flat top and deep flavor |
| Stovetop Steaming | 50 minutes | Lighter, almost pudding like | Small kitchens or avoiding heating the whole house |
| No Bake Chilling | 0 minutes | Mousse like and very soft | Quick prep when you don't mind a softer set |
The choice of baking method fundamentally changes how the proteins in the eggs and cheese interact. While steaming is fast, the dry heat of the oven followed by the humid water bath provides the most stable environment for a tall, impressive slice.
Official Baking Times and Yields
Understanding the timeline of a cheesecake is vital. This isn't a "whip it up and eat it" situation; it’s a project of patience. We are looking at a total commitment of 7 hours 25 minutes, with the vast majority of that being completely hands off while the cake sets in the fridge.
The yield for this recipe is 12 generous servings. Because the Biscoff cookie butter is quite rich, a smaller slice often goes a long way. If you are looking for a different spin on the classic, check out my Vanilla Cheesecake recipe for that traditional silky finish.
| Component Analysis | Science Role | Pro Secret |
|---|---|---|
| Full fat Cream Cheese | Structural base and fat source | Always use block style, never the spreadable tub version |
| Biscoff Cookie Butter | Flavor and fat stabilizer | Warm it slightly so it ribbons into the batter without lumps |
| Large Eggs | Binding agent and lift | Add them last to minimize the amount of air beaten in |
| Sour Cream | Moisture and tang | Use room temperature cream to prevent the fats from seizing |
Using the right ingredients is only half the battle; the temperature at which they enter the bowl is the other half. When ingredients are cold, they don't bond. You end up with tiny "beads" of cream cheese in your batter that will never smooth out, no matter how much you stir.
Elements for a Spiced Crust
The foundation of this dish is the 250g of Biscoff cookies. These aren't your average graham crackers. They have a high sugar content which means they caramelize further when baked. To balance this, we use 60g of unsalted butter and a pinch of salt to sharpen the flavor.
- 250g Biscoff cookies, finely crushed
- 60g unsalted butter, melted
- 1 pinch salt
- 680g full fat cream cheese, softened
- 150g granulated sugar
- 200g Biscoff cookie butter, slightly warmed (for filling)
- 120g sour cream, room temperature
- 1 tsp vanilla extract
- 3 large eggs, room temperature
- 150g Biscoff cookie butter, for topping
- 6 whole Biscoff cookies, for garnish
| Original Ingredient | Substitute | Why It Works |
|---|---|---|
| Biscoff Cookies | Ginger Snaps | Similar spice profile, though slightly more "bite" and less caramel. |
| Sour Cream | Full fat Greek Yogurt | Similar acidity and moisture level. Note: Result may be slightly tangier. |
| Granulated Sugar | Light Brown Sugar | Adds a molasses depth that complements the speculoos flavor. |
Essential Tools for Smooth Filling
To achieve that professional look, you need a 9 inch springform pan. This allows you to remove the sides without disturbing the delicate crust. A food processor is also non negotiable for the crust; you want fine, sandy crumbs that pack down tightly.
If the crumbs are too large, the crust will crumble the moment you try to slice it.
You will also need heavy duty aluminum foil. Standard foil is often too thin and can develop tiny pinholes that let water seep into your crust. I recommend using two or three layers of the wide, heavy duty stuff to create a truly waterproof cradle for your pan.
A large roasting pan is also required to act as the water bath vessel.
Complete step-by-step Baking Guide
1. The Foundation (Crust)
Preheat your oven to 350°F (175°C). Pulse the 250g of cookies in a food processor until they look like fine sand. Mix in the 60g of melted butter and salt until it feels like wet sand. Press this firmly into the bottom of your 9 inch springform pan.
Bake for 10 minutes until the kitchen smells like toasted cinnamon. Set it aside to cool completely.
2. The Filling Phase
In a stand mixer with the paddle attachment, beat the 680g of softened cream cheese and 150g of sugar. Do this on medium low speed until the mixture looks like thick, glossy paint. Don't rush this; you want every lump gone before moving forward.
3. The Water Bath & Bake
Fold in the 200g of warmed cookie butter, 120g of sour cream, and vanilla. Add the 3 eggs one at a time, mixing only until the yellow streaks vanish. Wrap the pan in foil, place it in the roasting pan, and add hot water halfway up the sides. Bake for 60 minutes.
4. The "Slow Cool" Finishing Touch
When the edges are set but the middle still has a slight "jiggle" like Jell O, turn off the oven. Prop the door open with a wooden spoon and leave it for an hour. This step is the secret to a flat, crack free surface. Remove it from the water and chill in the fridge for at least 6 hours.
5. The Topping
Melt the remaining 150g of cookie butter in the microwave for 20-30 seconds. Pour it over the cold cheesecake, tilting the pan to let it run to the edges. Garnish with the whole cookies and serve.
Troubleshooting Your Creamy Dessert
One of the most common issues is a soggy crust. This usually happens because the water bath leaked. If you see water when you remove the foil, don't panic. Sometimes the moisture is just condensation.
If the crust is truly wet, you can sometimes "save" it by letting it sit uncovered in the fridge longer to dry out, though it may lose its snap.
The Surface Crack
Cracks happen when the cheesecake cools too quickly or when it sticks to the sides of the pan as it shrinks. To prevent this, always run a thin knife around the edge of the cake after it has cooled in the oven for an hour but before it goes into the fridge. This releases the tension.
| Problem | Root Cause | Solution |
|---|---|---|
| Lumpy Filling | Cold cream cheese | Ensure cheese is room temp; beat thoroughly before adding liquids. |
| Soggy Crust | Water bath leak | Use three layers of heavy duty foil and check for holes. |
| Cracked Top | Overbaking or rapid cooling | Pull the cake when the center is still jiggly; use the "oven door" cooling method. |
Common Mistakes Checklist
- ✓ Never skip the water bath; the steam is what keeps the cake from drying out.
- ✓ Avoid over mixing once the eggs are in, as air bubbles will cause the cake to crack.
- ✓ Ensure the 200g of cookie butter is warmed; cold cookie butter will stay in clumps.
- ✓ Be patient with the 6 hour chill; the fats need time to solidify for a clean slice.
- ✓ Use a hot, wet knife to slice the cake, cleaning it between every single cut.
Simple Dietary Adjustment Options
If you need to make this for someone with dietary restrictions, it is surprisingly adaptable. For a fall inspired twist, you might also like this Pumpkin Cheesecake recipe which brings in those same warm spices while using different base ingredients.
The Nut Free Shift
While Biscoff cookies are nut free, always double check the labels on the cookie butter. If you can't find it, a sunbutter based alternative with extra cinnamon and brown sugar can mimic the flavor, though the iconic speculoos taste is hard to replace exactly.
gluten-free Biscoff Style
You can find gluten-free speculoos cookies in many specialty stores now. Use those for the crust in the same 250g quantity. The filling itself is naturally gluten-free as long as you ensure your vanilla extract and cookie butter are certified.
| Servings | Ingredient Adjustments | Pan Size | Cook Time |
|---|---|---|---|
| 6 people | Halve all ingredients; use 2 eggs | 6 inch springform | 45-50 minutes |
| 12 people | Use quantities as listed | 9 inch springform | 60 minutes |
| 24 people | Double all ingredients; bake two cakes | Two 9 inch pans | 60 minutes (side-by-side) |
Proper Storage and Freezing Tips
Cheesecake is the ultimate make-ahead dessert because it actually tastes better on day two. The spices in the Biscoff cookies have time to migrate into the cream cheese, and the texture becomes even more cohesive. Keep it in the fridge, tightly covered, for up to 5 days.
Chef's Note: If you have leftovers, Biscoff cheesecake freezes beautifully. Slice it into individual portions, wrap them tightly in plastic wrap, and then a layer of foil. They will stay fresh for up to 2 months. To eat, just let a slice thaw in the fridge for a few hours.
For zero waste, if you have extra crust crumbs, don't throw them away! They make an incredible topping for vanilla ice cream or can be stirred into a morning bowl of oatmeal for a bit of crunch. The extra cookie butter in the jar can be drizzled over pancakes or used as a dip for apple slices.
Perfect Presentation and Pairing Ideas
Slicing a cheesecake can be stressful if you want those perfect, clean edges. The trick is to use a large chef's knife dipped in a tall glass of hot water. Wipe the blade dry, make one clean downward cut (don't saw!), and then wipe the blade clean and re dip it before the next slice.
This ensures the melted cookie butter topping doesn't smear into the white filling.
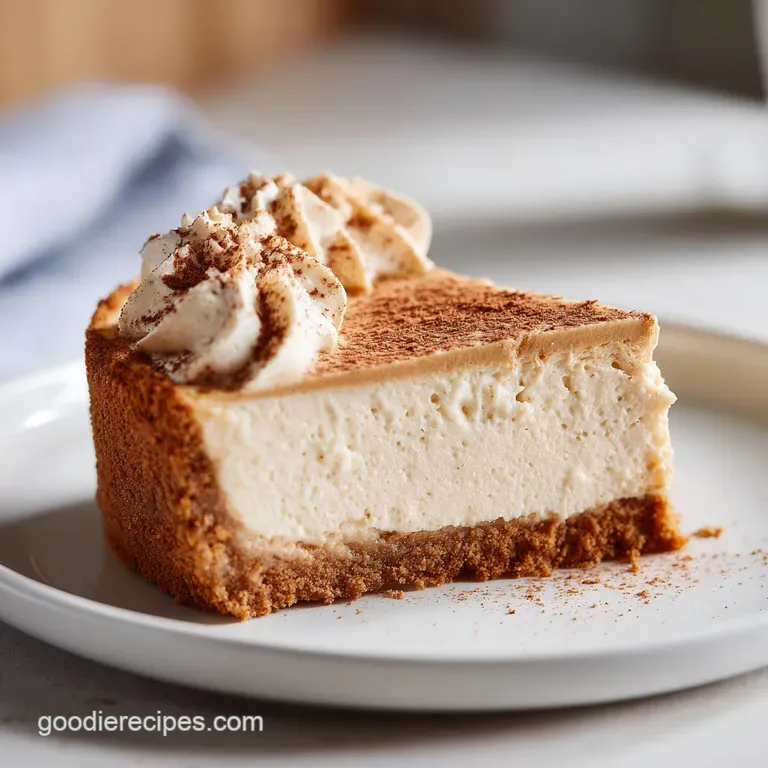
A dollop of unsweetened whipped cream on the side helps cut through the richness of the Biscoff. If you want to get fancy, a few fresh raspberries add a tart pop of color and flavor that balances the heavy caramel notes perfectly. For a drink pairing, a dark roast coffee or a spicy chai tea works wonders.
Myths About Biscoff Baking
A common misconception is that the cookie butter will "sink" to the bottom of the batter. In reality, because the cookie butter has a high fat and sugar content, it incorporates perfectly into the cream cheese emulsion as long as both are at similar temperatures.
Another myth is that you need a special "cheesecake" setting on your oven. A standard bake setting is actually better as it provides the consistent, even heat needed for the water bath to do its job.
The idea that you must use a water bath is technically a myth you can bake without one but your results will vary wildly. Without the steam, the edges will likely be puffed and browned, and the center will almost certainly crack.
For this specific Biscoff version, the water bath is what keeps that top layer of cookie butter looking like a smooth, professional mirror. Trust the process, take your time, and you'll end up with a dessert that people will be talking about for weeks.

Recipe FAQs
What is Biscoff cheesecake made of?
It combines a buttery Biscoff cookie base with a rich cream cheese filling. The filling is flavored with warmed Biscoff cookie butter, sour cream, and vanilla, then topped with an extra layer of melted cookie butter and whole cookies.
Is there a 3-ingredient version of this cheesecake?
No, this is a common misconception. A proper, creamy Biscoff cheesecake requires specific emulsifiers and structure from the cream cheese, eggs, and sour cream to set correctly without turning into a dense mess.
Is cheesecake good for heart patients?
No, it is a high calorie, indulgent dessert. With 606 kcal per serving and significant amounts of full fat cream cheese and butter, it should be consumed sparingly as an occasional treat.
What is the flavour of a Biscoff?
It features a distinct caramelized, spiced flavor. Think of a blend of warm notes like cinnamon, nutmeg, and ginger, finished with a deeply toasted brown sugar sweetness.
How to prevent the crust from becoming soggy?
Wrap the springform pan in multiple layers of heavy duty aluminum foil to ensure a watertight seal. If moisture does seep into the crust during the water bath, chilling the cheesecake uncovered for an extended period can help draw out excess condensation.
How to achieve a perfectly smooth cheesecake surface?
Beat the softened cream cheese and sugar using a paddle attachment only until just emulsified. Avoid over mixing once you add the eggs, as incorporating too much air creates bubbles that cause the surface to crack or ripple during the 60-minute bake.
How to tell when the cheesecake is finished baking?
Look for edges that are fully set while the center retains a slight, uniform jiggle. Once it reaches this stage, turn off the oven and let it sit with the door slightly ajar for one hour to cool slowly, which prevents the structure from collapsing.
Baked Biscoff Cheesecake

Ingredients:
Instructions:
Nutrition Facts:
| Calories | 606 kcal |
|---|---|
| Protein | 7.6 g |
| Fat | 42.6 g |
| Carbs | 49.6 g |
| Fiber | 0.8 g |
| Sugar | 34.8 g |
| Sodium | 318 mg |
