Classic Crepes: Silky and Buttery
- Time: Active 15 minutes, Passive 15 minutes, Total 30 minutes
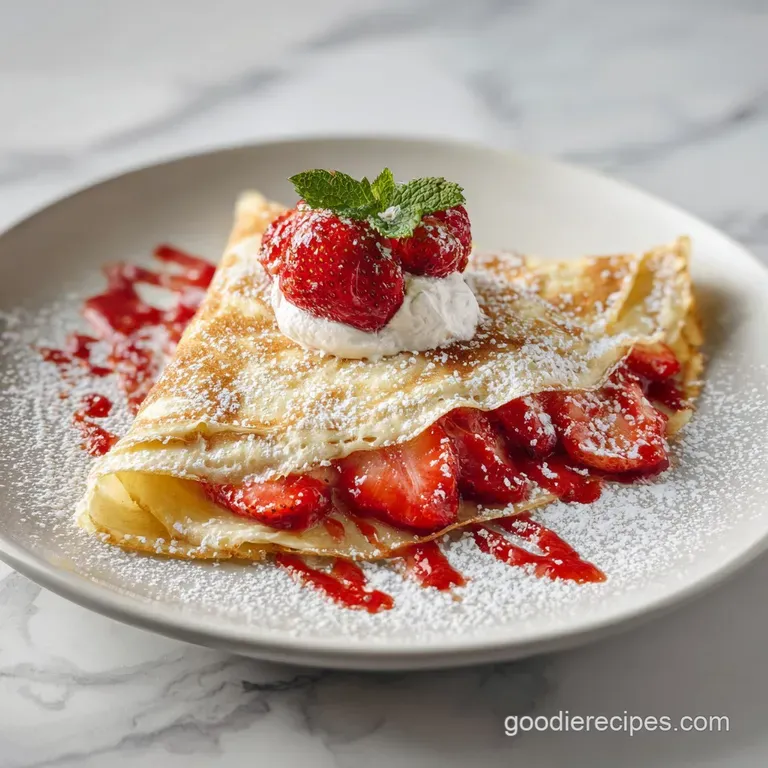
- Flavor/Texture Hook: Silky, lace edged, and golden brown
- Perfect for: Slow family brunches or quick weeknight dessert cravings
- How to Make Foolproof Classic Crepes
- Essential Batter Techniques Explained
- Recipe Specs and Critical Checkpoints
- Key Ingredient Component Deep Dive
- Essential Tools for Success
- Step by Step Cooking Process
- Fixing Common Batter Failures
- Smart Scaling for Large Groups
- Kitchen Myths Debunked
- Smart Storage and Waste Tips
- Creative Serving and Topping Ideas
- Recipe FAQs
- 📝 Recipe Card
How to Make Foolproof Classic Crepes
Ever wonder why restaurant crepes are paper thin and lacy, while home versions often end up like rubbery pancakes? It usually comes down to one tiny detail that most people ignore in their rush to get breakfast on the table.
When I first started making these for my family, I thought I needed a fancy copper pan and a degree in French pastry. I spent hours whisking by hand, only to end up with lumpy batter and thick, sad circles that tasted more like tortillas than treats.
The secret isn't in the equipment, though. It’s actually in your blender. Most of us think of a blender for smoothies, but for these thin delights, it's a total game changer. It shears the ingredients together so perfectly that you don't get a single pocket of dry flour.
My kids now expect a stack of these every Sunday morning, and honestly, we’ve found that using the most basic pantry staples actually produces the most authentic flavor. It’s a budget friendly win that feels like a luxury hotel breakfast.
We're going to walk through the exact steps to get that "shatter at-the edge" texture every single time. Whether you're stuffing them with savory ham and cheese or keeping it classic with lemon and sugar, the base remains the same.
This isn't about being a professional chef; it's about knowing how the batter behaves once it hits the heat. You'll see that once you master the swirl, you’ll never go back to boxed mixes again.
Essential Batter Techniques Explained
Gluten Relaxation: Letting the batter rest for 10 minutes allows the flour proteins to settle, ensuring the texture is tender rather than chewy or "bouncy."
Thermal Equilibrium: Using room temperature eggs prevents the melted butter from seizing into tiny waxy clumps when it hits the cold milk.
Aeration Control: A short 30 second pulse in the blender creates just enough bubbles for lightness without making the batter too foamy to spread.
Fat Distribution: Incorporating melted butter directly into the liquid phase ensures every square inch of the crepe is naturally non stick and velvety.
| Method | Cook Time | Texture | Best For |
|---|---|---|---|
| Stovetop Skillet | 15 minutes | Crispy edges, tender center | Traditional, quick batches |
| Oven (Sheet Pan) | 12 minutes | Soft, uniform, thicker | Large crowds, "square" crepes |
| Electric Griddle | 20 minutes | Very even browning | Cooking multiple at once |
Finding the right heat is the most important part of the process. I usually find that a medium setting works best, but every stove has its own personality. If the pan is too hot, the batter sets before you can swirl it. If it's too cold, the crepe will stick and become tough.
It’s a bit of a balancing act, but after the first "test" crepe, you'll find the rhythm.
Recipe Specs and Critical Checkpoints
When we talk about precision, we aren't just being fussy for the sake of it. In my kitchen, I’ve realized that a few grams here or there can turn a silky batter into a thick paste. We are aiming for a consistency that looks exactly like heavy cream. If it looks like pancake batter, it’s too thick.
If it looks like skim milk, it’s too thin.
The three numeric checkpoints you need to watch are 10 minutes for the rest, 15 minutes for the total cooking time, and approximately 3 tablespoons of batter per crepe. This specific volume ensures that the 8 inch pan is covered but the layer remains translucent.
Any more than that, and you're making a thin pancake, not a crepe.
| Component | Science Role | Pro Secret |
|---|---|---|
| Whole Milk | Liquid base & fat | Use full fat for a richer, more supple fold |
| Large Eggs | Structure & binding | Room temp eggs emulsify faster in the blender |
| All Purpose Flour | Carbohydrate frame | Sift it if you aren't using a high speed blender |
| Melted Butter | Tenderizer & flavor | Let it cool slightly so it doesn't scramble the eggs |
Using whole milk is one of those small budget tips that makes a huge difference. While you can use 2% or even water in a pinch, the fat in whole milk provides a "stretch" that prevents the crepe from snapping when you fold it into triangles. It’s the difference between a brittle snack and a soft, pillowy meal.
Key Ingredient Component Deep Dive
For the most consistent Classic Crepes, stick to these specific amounts. I've tried tweaking them, but this ratio provides the best structural integrity.
- 125g all purpose flour: This provides the necessary structure without being too heavy. Why this? Lower protein than bread flour keeps the texture light and airy.
- 300ml whole milk: The primary hydrator that creates the "pourable" consistency. Why this? The lactose helps with beautiful golden browning during the short cook time.
- 2 large eggs: These act as the glue and provide that signature eggy flavor. Why this? They provide enough lift so the crepes don't feel like flat lead.
- 42g unsalted butter: Adds fat for flavor and prevents sticking. Why this? Unsalted allows you to control the seasoning with the sea salt.
- 0.25 tsp fine sea salt: Sharpens all the other flavors.
- 2 tbsp granulated sugar: Just enough for a hint of sweetness.
- 1 tsp vanilla extract: Provides that bakery style aroma.
| Original Ingredient | Substitute | Why It Works |
|---|---|---|
| Whole Milk | Oat Milk (Unsweetened) | Similar viscosity. Note: Browns faster due to sugar content in oats. |
| Unsalted Butter | Neutral Oil (Canola/Grapeseed) | Stays liquid at room temp. Note: Misses that classic nutty aroma. |
| Granulated Sugar | Honey or Maple Syrup | Adds moisture. Note: Use half the amount to avoid sticking to the pan. |
If you decide to go the savory route, you can actually omit the sugar and vanilla entirely. In those cases, I often add a pinch of dried herbs like thyme or chives directly into the batter. If you're looking for a different breakfast project, these skills also translate well if you're making Homemade Cinnamon Rolls because both rely on understanding how fat and flour interact.
Essential Tools for Success
You don't need a specific "crepe pan" to get this right. I actually prefer a standard 8 inch non stick skillet. The high sides make it easier to flip the crepe without it sliding out of the pan too early. A blender is your best friend here because it removes all the manual labor of whisking.
A small silicone spatula is also helpful for lifting the edges. I used to use a butter knife, but that’s a quick way to ruin the coating on your pans. If you have a ladle that holds exactly 3 tablespoons, keep it handy. Consistency in the amount of batter is what keeps the stack looking uniform and professional.
step-by-step Cooking Process

- Combine liquids. Add the milk, eggs, melted butter, salt, sugar, and vanilla extract into a high speed blender. Note: Adding liquids first prevents flour from sticking to the bottom.
- Add the flour. Pour the flour on top of the liquid mixture to ensure a clean mix.
- Blend the batter. Pulse for 20 30 seconds until the mixture is completely smooth with a few bubbles on top.
- Allow the rest. Let the batter sit in the blender for 10 minutes at room temperature. Note: This step is non negotiable for a tender result.
- Heat the skillet. Place an 8 inch non stick skillet over medium heat and lightly brush with a tiny bit of butter.
- Pour the batter. Lift the pan off the heat and pour approximately 3 tablespoons of batter into the center.
- Swirl the pan. Quickly tilt and swirl the pan in a circular motion until the batter thinly covers the entire surface.
- Cook the first side. Return to heat and cook for about 1 minute until the edges are golden and the center is set.
- Flip the crepe. Use a spatula to gently flip and cook the other side for 30 seconds until lightly spotted brown.
- Stack and repeat. Move the finished crepe to a plate and repeat with the remaining batter.
Fixing Common Batter Failures
The most common issue I hear about is the first crepe being a total disaster. Don't worry, even professionals expect the "sacrificial crepe." It’s usually because the pan hasn't reached the perfect temperature or the butter hasn't coated the surface evenly.
If your crepes are tearing, it's almost always a sign that they haven't cooked long enough on the first side.
Preventing the Rubber Texture
If your crepes feel like rubber bands, you likely over mixed the batter or skipped the resting period. Over mixing develops too much gluten, which is great for bread but terrible for crepes. The 10 minute rest allows those gluten strands to relax back into a soft state.
Fixing the Lumpy Batter
Lumps happen when you try to whisk flour into a large amount of liquid by hand. If you don't have a blender, the trick is to make a thick paste with the flour and a tiny bit of milk first, then slowly thin it out. If it's already lumpy, just pour the batter through a fine mesh strainer to catch the dry bits.
| Problem | Root Cause | Solution |
|---|---|---|
| Crepe is too thick | Too much batter or batter too cold | Use exactly 3 tbsp; whisk in 1 tbsp milk to thin |
| Holes in the batter | Swirling too slowly | Move faster and ensure the pan is hot enough to "grab" |
| Center is soggy | Heat is too high | Lower heat so the center sets before the edges burn |
Common Mistakes Checklist
- ✓ Always let the batter rest for at least 10 minutes to avoid a "bouncy" texture.
- ✓ Use a non stick pan to ensure the edges release without tearing.
- ✓ Don't use too much butter for greasing - a light brush is plenty.
- ✓ Wait for the edges to visibly curl and brown before attempting the flip.
- ✓ Keep the finished crepes covered with a clean towel to stay soft and pliable.
Smart Scaling for Large Groups
When you need to feed a crowd, scaling up is relatively simple. For a double batch (22 servings), you can double all ingredients directly. However, I suggest keeping the salt and sugar at 1.5x the original amount to avoid over seasoning, as flavors tend to concentrate in larger volumes.
If you are scaling down for just one or two people, it gets a little tricky with the eggs. I recommend beating one egg in a small bowl, then using exactly half of it by weight or volume. You’ll want to use a smaller pan if possible, or just accept that you'll have a few extra crepes for the fridge.
Crepes are actually better the next day anyway!
Kitchen Myths Debunked
Many people believe you need a special "crepe turner" or a wooden T shaped spreader to get thin results. This is a myth. A simple tilt and swirl motion with a standard skillet works just as well for home cooks and is much easier to control.
Another common misconception is that you must chill the batter in the fridge for hours. While a long rest doesn't hurt, 10 to 15 minutes at room temperature is actually sufficient for the gluten to relax and the bubbles to settle.
Chilling the batter can actually make the butter seize, which might lead to those tiny lumps we’re trying to avoid.
Smart Storage and Waste Tips
Storage: You can keep cooked crepes in the fridge for up to 3 days. I find it's best to stack them with a small piece of parchment paper between each one, then wrap the whole stack tightly in plastic wrap. This prevents them from drying out or sticking together into a giant block.
To reheat, just pop them in a dry skillet for 15 seconds per side.
Freezing: These freeze beautifully for up to 2 months. Again, use the parchment paper trick between layers and place them in a heavy duty freezer bag. Defrost them in the fridge overnight before using. They shouldn't be microwaved from frozen, as they tend to get soggy.
Zero Waste: If you have leftover batter that you don't want to cook right away, it makes a great base for a small Dutch baby pancake. Or, if you have leftover crepes that are starting to get a bit dry, slice them into thin ribbons.
These "crepe noodles" are amazing dropped into a bowl of hot soup or tossed with a little cinnamon sugar as a quick snack.
Creative Serving and Topping Ideas
The beauty of this recipe is its versatility. For a classic sweet treat, I love a simple squeeze of fresh lemon and a dusting of powdered sugar. If you're feeling indulgent, a spread of hazelnut cocoa cream and sliced bananas is always a hit with the kids. It’s a bit like making Mozzarella Biscuit Bombs in that the filling is where you can really get creative with what's in your pantry.
On the savory side, try a "complete" crepe. Crack an egg into the center while the crepe is still in the pan, add a slice of ham and some shredded Gruyere, then fold the edges in to create a square. The heat from the crepe will cook the egg white while keeping the yolk runny.
It’s a sophisticated brunch dish that costs pennies to make but looks like a million bucks.
If you want a truly crispy experience, you can return the filled crepe to a buttered pan and grill it for a minute on each side. This creates a "crunch" that contrasts perfectly with a soft filling like ricotta or jam. Honestly, there are no wrong answers here.
Just have fun with it and enjoy the process of mastering the swirl!

Recipe FAQs
How to make crepes step-by-step?
Combine milk, eggs, melted butter, salt, sugar, and vanilla in a blender, then add flour and pulse for 20 30 seconds. Let the batter rest for 10 minutes to allow gluten to relax.
Heat an 8 inch non-stick skillet over medium heat, brush lightly with butter, swirl in 3 tablespoons of batter, and cook until the edges turn golden before flipping for 30 seconds.
What ingredients are in crepes?
This classic recipe uses 125g all-purpose flour, 300ml whole milk, 2 large room temperature eggs, 42g melted unsalted butter, 0.25 tsp fine sea salt, 2 tbsp granulated sugar, and 1 tsp vanilla extract.
Is it possible to make crepes with only 3 ingredients?
No, this is a common misconception. While you can reduce the flavorings, you fundamentally require flour, milk, and eggs to create the necessary structure and thin, pliable texture of a traditional crepe.
Is a crepe just a thin pancake?
No, they are distinct due to the lack of leavening agents like baking powder. If you enjoyed mastering egg-based textures here, you will notice that crepes rely solely on the protein structure of eggs and flour to achieve their signature delicate finish.
How to prevent crepes from tearing during the flip?
Wait for the edges to visibly curl and turn golden brown before attempting to flip. Using a non-stick skillet and ensuring the batter rests for the full 10 minutes are critical to maintaining the structural integrity of the crepe.
Why is my crepe batter bubbly?
Bubbly batter is a result of the high speed blending process. Letting the batter sit in the blender for 10 minutes at room temperature allows those air bubbles to settle, which ensures a smooth, uniform crepe without holes.
How to keep crepes soft after cooking?
Stack your finished crepes on a plate and keep them covered with a clean, dry kitchen towel. This traps residual heat and moisture, preventing the edges from drying out and becoming brittle while you finish cooking the rest of the batch.
Classic Crepes Recipe

Ingredients:
Instructions:
Nutrition Facts:
| Calories | 108 calories |
|---|---|
| Protein | 3.3 g |
| Fat | 4.9 g |
| Carbs | 12.3 g |
| Fiber | 0.4 g |
| Sugar | 2.8 g |
| Sodium | 55 mg |
