Stuffed Peppers: Classic Ground Beef Filling
- Time: Active 15 minutes, Passive 30 minutes, Total 45 minutes
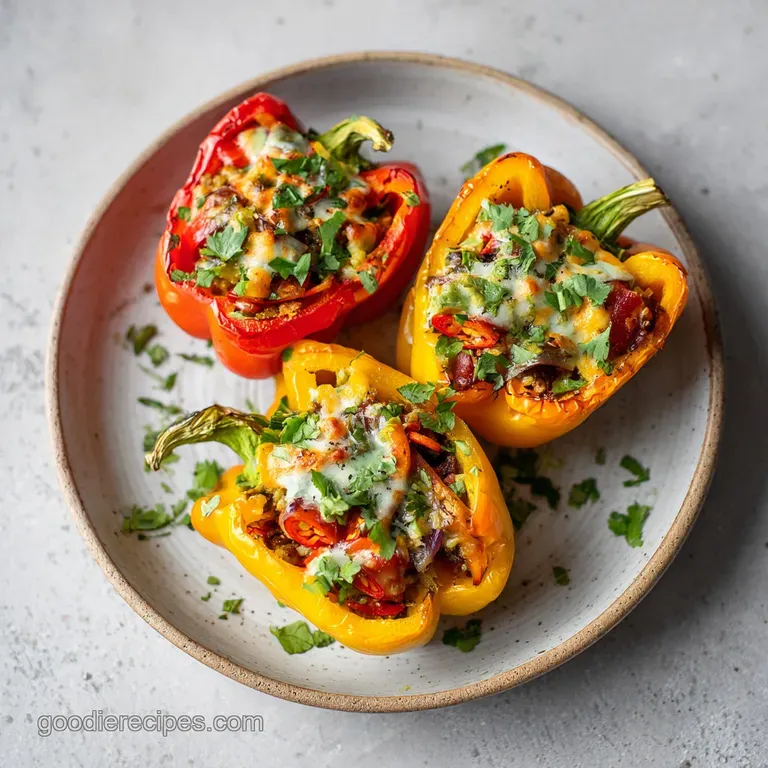
- Flavor/Texture Hook: Velvety beef and rice filling inside a tender crisp roasted shell
- Perfect for: Busy weeknights, family gatherings, or meal prep Sunday
- Mastering the Classic Comfort of Oven Baked Stuffed Peppers
- Why This Works
- Essential Specs for Making Perfect Stuffed Peppers Every Time
- Gathering the Components for a Hearty Savory Filling
- Component Analysis and Selection
- Simple Kitchen Tools for a Stress Free Cooking Experience
- From Prep to Plate with These Easy Assembly Steps
- Avoiding Common Pitfalls for the Most Tender Stuffed Peppers
- Scaling for Larger Groups or Smaller Households
- Flavor Variations to Try for Every Dietary Preference
- Freezing and Reheating Guide for Busy Weeknight Meals
- Kitchen Myths About Stuffed Peppers
- How to Serve and Enjoy Your Colorful Culinary Creation
- Recipe FAQs
- 📝 Recipe Card
Mastering the Classic Comfort of Oven Baked Stuffed Peppers
I still remember the first time I tried to make these for a dinner party. I wanted that perfect "snap" when the fork hit the pepper, but instead, I served up something that looked like a deflated balloon and tasted like a dry brick.
The kitchen smelled like charred garden hose, and my friends were politely pushing the beef around their plates. It was a disaster, but it was also the day I realized that stuffed peppers aren't just about throwing leftovers into a vegetable they're about moisture management and heat control.
Since that crunchy, dry meat debacle, I've spent years obsessing over the physics of the pepper wall. I found that the secret isn't just in the spices, but in how you treat the meat before it ever touches the oven.
We're going for a filling that feels almost like a silkier version of a meatball, nestled inside a bell pepper that has softened just enough to lose its raw bite without turning into mush. It's a delicate balance, but once you nail it, this becomes the dish your family asks for every single week.
The aroma that fills your house while these bake is something special. It’s that sweet, roasting scent of the bell peppers mingling with the herbal notes of Italian seasoning and the savory sizzle of browning beef.
It feels like home, even on a rainy Tuesday when you’ve only got 45 minutes to get food on the table. We're going to use simple tools and reliable steps to make sure your version comes out with that perfect, melt in-your mouth texture every single time.
Why This Works
The pH Shift Secret
Adding a pinch of baking soda to the ground beef raises the pH level, preventing the proteins from bonding too tightly and keeping the meat velvety even after a long bake.
- Alkaline Tenderization: The 0.5 tsp of baking soda prevents the meat from squeezing out its juices, ensuring the filling stays moist rather than becoming a dense, rubbery puck.
- Rice as a Sponge: Using 1.5 cups of cooked rice allows the grains to soak up the tomato sauce and beef drippings, creating a cohesive, flavor packed interior.
- Enclosed Steaming: The bell pepper acts as a natural Dutch oven, trapping moisture inside the cavity to cook the filling while the exterior roasts.
- Osmotic Balance: Salting the inside of the peppers before filling draws out just enough moisture to prevent the "watery puddle" effect at the bottom of the dish.
| Method | Time | Texture | Best For |
|---|---|---|---|
| Oven Roasting | 30-35 mins | Roasted skin, slightly charred edges | Maximum flavor and sweet pepper notes |
| Stovetop Braise | 20-25 mins | Fully steamed, very soft and pale | Speed and keeping the kitchen cool |
| Slow Cooker | 4-6 hours | Falling apart tender, very juicy | Hands off prep for busy workdays |
Choosing the right method depends on how much you value that roasted "char" on the pepper skin. I personally find the oven provides the best structural integrity for the Stuffed Peppers.
Essential Specs for Making Perfect Stuffed Peppers Every Time
Getting the timing right is the difference between a gourmet meal and a soggy mess. We are aiming for a specific internal temperature and a visual cue that tells us the cheese has reached its peak.
- Precision Oven Temp:180°C (350°F) is the sweet spot for softening the peppers without burning the tops.
- Meat Weight: Exactly 1 lb (approx. 450g) of lean ground beef ensures the ratio of meat to rice is balanced.
- The 30 Minute Mark: This is when the peppers transition from "crunchy" to "tender crisp."
Chef's Tip: The Grating Trick
Instead of buying pre shredded cheese, freeze your block of mozzarella for 10 minutes before grating it yourself. The fresh shreds melt much more evenly and create those long, velvety cheese pulls that pre bagged stuff (coated in potato starch) just can't manage.
Gathering the Components for a Hearty Savory Filling
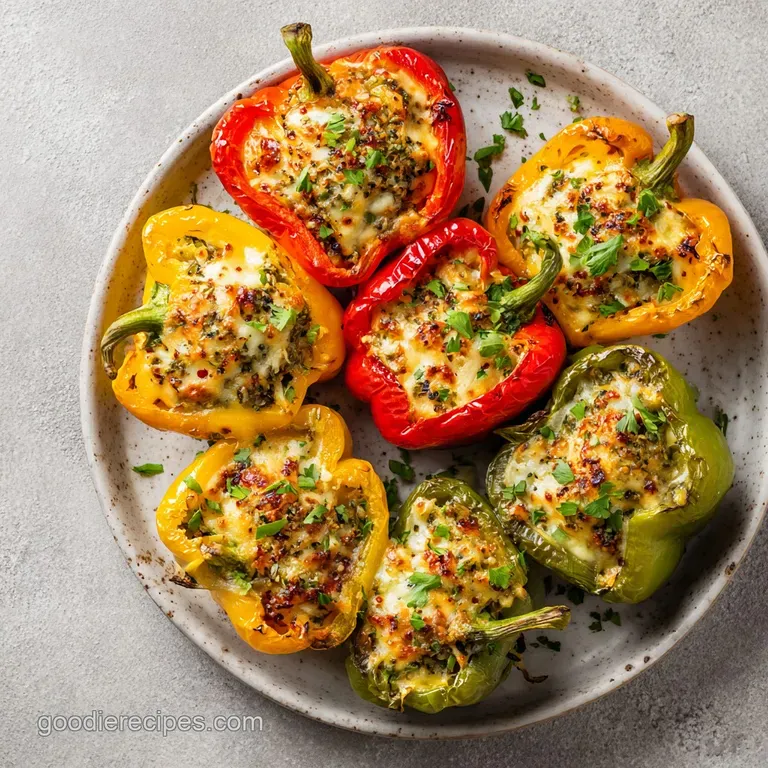
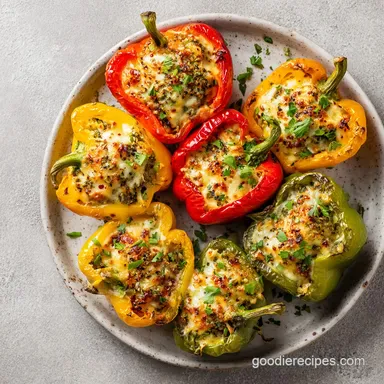
For this recipe, we are using 6 large bell peppers. I prefer a mix of red, yellow, and orange because they have a higher sugar content than green ones, which leads to better caramelization in the oven.
- 6 Large Bell Peppers: Remove seeds and membranes carefully to create a wide "bowl" for the filling.
- 1 lb Lean Ground Beef (90/10): Lean is better here so the peppers don't sit in a pool of grease. Why this? Keeps the dish light while providing essential protein structure.
- 1.5 cups Cooked Long Grain White Rice: Make sure it's cooled or at room temperature. Why this? Acts as a binder and absorbs the savory tomato juices.
- 15 oz Tomato Sauce: Use a no salt added version so you can control the seasoning. Why this? Provides the necessary hydration for the meat and rice.
- 1 tbsp Italian Seasoning: A blend of oregano, basil, and thyme. Why this? Offers a complex herbal backbone with zero prep time.
- 0.5 tsp Baking Soda: Our secret weapon for texture. Why this? Keeps the beef tender by preventing protein denaturation.
- 1 cup Shredded Mozzarella: High moisture for a good melt. Why this? Adds a salty, creamy finish to balance the acidity.
| Original Ingredient | Substitute | Why It Works |
|---|---|---|
| Ground Beef (1 lb) | Ground Turkey (1 lb) | Lean protein; needs an extra tsp of oil for moisture. |
| White Rice (1.5 cups) | Quinoa (1.5 cups) | Higher protein, nutty flavor; does not absorb sauce as much. |
| Tomato Sauce (15 oz) | Crushed Tomatoes | Chunkier texture; adds more rustic "garden" feel to the filling. |
Adding a splash of beef broth to the bottom of your baking dish is another trick I love. It creates a small steam chamber that helps the peppers soften faster without needing to par boil them in a separate pot.
Component Analysis and Selection
| Ingredient | Science Role | Pro Secret |
|---|---|---|
| Bell Peppers | Structural Vessel | Choose peppers with 4 "feet" at the bottom so they stand up straight in the pan. |
| Baking Soda | Protein Relaxant | Mix it into the raw beef with a tablespoon of water 5 mins before cooking to maximize tenderness. |
| Sea Salt | Moisture Drawer | Salt the inside of the empty peppers to "sweat" them before adding the filling. |
| Garlic/Onion | Aromatics | Sauté them until the onion is translucent to remove the sulfurous bite. |
Simple Kitchen Tools for a Stress Free Cooking Experience
You don't need a professional kitchen to pull off the ultimate Stuffed Peppers. In fact, keeping the toolset minimal makes the cleanup much faster, which is always a win in my book.
- 9x13 Inch Baking Dish: A glass or ceramic dish works best for even heat distribution.
- Large Skillet: You'll need this to brown the beef and sauté the aromatics before stuffing.
- Small Paring Knife: This is much easier for navigating the inside of a pepper than a large chef's knife.
- Mixing Bowl: Large enough to combine the beef, rice, and sauce without making a mess.
Chef's Tip: The Spoon Method
Use a grapefruit spoon (the one with the jagged edges) to scoop out the seeds and white membranes from the peppers. It’s faster and much cleaner than using a knife, and it ensures you don't accidentally poke a hole through the bottom of your pepper.
From Prep to Plate with These Easy Assembly Steps
- Prepare the Oven: Preheat your oven to 180°C (350°F). Note: This ensures the peppers start cooking immediately.
- Clean the Peppers: Cut the tops off the 6 bell peppers and remove all seeds. until the interior is smooth and hollow.
- Pre Season: Rub 1 tbsp olive oil and 0.5 tsp sea salt inside the peppers. Note: This prevents them from being bland.
- Sauté Aromatics: In a skillet, cook the diced onion and minced garlic with the beef until the meat is browned and the onions are translucent.
- Mix Filling: Combine the cooked meat mixture, 1.5 cups cooked rice, 15 oz tomato sauce, Italian seasoning, red pepper flakes, and the 0.5 tsp baking soda.
- Stuff the Peppers: Spoon the filling into each pepper, pressing down gently until the filling reach the very top edge.
- Bake: Place the peppers in your baking dish and cover with foil. Bake for 30 minutes until the peppers feel tender when pierced with a fork.
- Add Cheese: Remove the foil and sprinkle the 1 cup of mozzarella over the tops.
- Final Melt: Return to the oven for 5 minutes until the cheese is bubbling and golden.
- Rest and Garnish: Let the peppers sit for 5 minutes before topping with fresh parsley. until the juices have settled.
Avoiding Common Pitfalls for the Most Tender Stuffed Peppers
Even with a simple recipe, things can go sideways. The most common complaint I hear is about "crunchy" peppers or a "watery" filling. Let's look at how to fix those issues before they happen.
Resolving Issues with Crunchy Pepper Walls
If your peppers are still too firm after the bake time, it usually means the oven temperature fluctuated or the peppers were particularly thick walled. Next time, try adding 1/4 cup of water or beef broth to the bottom of the pan and covering it tightly with foil.
This creates a steam cook environment that softens the skin much faster than dry heat alone.
Techniques to Prevent a Soggy Interior
A soggy filling is usually caused by using rice that is too wet or beef that has too high a fat content. Always drain the excess grease after browning your 1 lb of beef. If you're using 90/10 lean beef as suggested, this shouldn't be much of an issue.
Also, ensure your 1.5 cups of rice is fully cooked and slightly "dry" before mixing it into the sauce.
| Problem | Root Cause | Solution |
|---|---|---|
| Filling is bland | Not enough salt in the rice | Season the rice water with salt or a bouillon cube while cooking. |
| Peppers falling over | Uneven pepper bases | Slice a tiny sliver off the bottom bumps to create a flat surface. |
| Cheese is burnt | Added too early | Only add the cheese in the last 5-10 mins of baking. |
Common Mistakes Checklist
- ✓ Don't skip the baking soda; it's the key to the velvety texture of the beef.
- ✓ Always cover the dish with foil for the first 30 minutes to trap steam.
- ✓ Ensure the rice is pre cooked; raw rice will not cook through inside the pepper.
- ✓ Pat the peppers dry after washing to prevent the oil from sliding off.
- ✓ Let the dish rest for 5 mins after baking so the filling sets and doesn't spill out.
Scaling for Larger Groups or Smaller Households
Reducing the recipe is easy. For a 3 person meal, use 3 peppers and halve all ingredients. Since the recipe calls for 1 lb of beef, you can use the other half pound for tacos the next day.
If you need to use half an egg for binding (though this recipe doesn't strictly require it), beat a whole egg and measure out two tablespoons.
When doubling the recipe for 12 people, don't just double the spices. Use 1.5x the Italian seasoning and salt first, then taste the filling. Spices can become overwhelming when scaled linearly.
You will likely need two 9x13 dishes, and you may need to increase the bake time by about 10 minutes since the oven will be much fuller, leading to a slight drop in ambient temperature.
Flavor Variations to Try for Every Dietary Preference
- What If I Want a Zesty Mexican Twist? Swap the Italian seasoning for cumin and chili powder. Use black beans instead of half the rice and top with pepper jack cheese instead of mozzarella.
- Adapting the Recipe for Vegetarian Diets: Replace the ground beef with 1 lb of chopped mushrooms or a meat substitute. Increase the garlic and add a dash of soy sauce to the filling to maintain that "umami" depth.
- The Low Carb Alternative: Replace the 1.5 cups of white rice with riced cauliflower. Since cauliflower releases more water, reduce the tomato sauce by 2 ounces to keep the filling from getting sloppy.
| If you want... | Then do this... |
|---|---|
| A Crispy Top | Mix 1/4 cup Panko breadcrumbs with the cheese. |
| Extra Spice | Double the red pepper flakes and add diced jalapeños to the onion sauté. |
| More Veggies | Fold in 1/2 cup of frozen peas or finely chopped spinach to the filling. |
Freezing and Reheating Guide for Busy Weeknight Meals
Storage: These peppers keep beautifully in the fridge for up to 4 days. Store them in an airtight container once they have cooled completely.
Freezing: You can freeze these for up to 3 months. I recommend freezing them before the final bake. Wrap each stuffed (but unbaked) pepper tightly in plastic wrap, then foil.
To cook from frozen, let them thaw in the fridge overnight and bake as directed, adding 10-15 minutes to the covered bake time.
Zero Waste Tip: Don't throw away the pepper tops! Dice the edible parts around the stem and sauté them with the onions and garlic to add extra flavor and nutrition to the filling.
If you have leftover filling but no peppers, it makes an incredible "stuffed pepper soup" when simmered with a little extra broth.
Kitchen Myths About Stuffed Peppers
One common misconception is that you have to boil the peppers in a pot of water before stuffing them. People think this is the only way to get them soft. The truth is, if you use the foil and steam method in the oven, you get a much better texture. Boiling often makes the peppers waterlogged and flavorless.
Another myth is that you can put raw meat in the peppers and let it cook in the oven. While it will cook, you miss out on the Maillard reaction that beautiful browning that happens in the skillet.
Sautéing the beef with the onions and garlic first creates a foundation of flavor that baking alone can't replicate. It also allows you to drain away excess fat, which keeps your Stuffed Peppers from becoming greasy.
How to Serve and Enjoy Your Colorful Culinary Creation
When you pull these out of the oven, the cheese should be a beautiful mottled gold and white, and the peppers should have a slight "slump" to them, indicating they are perfectly tender. I love serving these as a standalone meal because they already have protein, carbs, and veggies all in one "bowl."
If you want to stretch the meal further, a crisp green salad with a sharp vinaigrette provides a nice acidic contrast to the rich, savory filling. A side of crusty bread is also a great idea for mopping up any tomato sauce that escapes the peppers. Just remember to let them rest!
That five minute wait is crucial for the filling to firm up so you get a perfect cross section when you cut into it. Enjoy the "shatter" of the roasted skin and the velvety interior it's a classic for a reason.

Recipe FAQs
Should peppers be cooked before stuffing?
No, parboiling is unnecessary. Covering the dish tightly with foil for the initial 30 minutes of baking traps steam, which cooks the peppers perfectly inside the oven.
What's the filling for stuffed peppers?
A mixture of browned ground beef, cooked white rice, tomato sauce, and seasonings. A crucial addition is 0.5 tsp of baking soda mixed into the meat to ensure the filling stays velvety during the bake.
What's the best thing to stuff peppers with?
A balanced mix of meat, rice, and sauce providing structure and moisture. Lean ground beef (90/10) yields the best texture, while the cooked rice acts as an essential binder and juice absorber.
What are some common mistakes when making stuffed peppers?
Skipping the initial browning of the beef or failing to cover the dish with foil. Browning the meat first creates flavor depth, and the foil is necessary to trap steam for proper pepper softening.
Is it true I must use a Dutch oven or cover them to prevent dryness?
No, this is a common misconception. The bell pepper acts as its own natural vessel; covering the baking dish with aluminum foil achieves the necessary enclosed steaming environment for moisture retention.
How do I ensure the meat filling stays tender and not dense?
Add 0.5 teaspoon of baking soda to the raw ground beef mixture. This alkaline tenderizer prevents the meat proteins from bonding too tightly, resulting in a much silkier texture after baking.
How long should I bake stuffed peppers at 180°C (350°F)?
Bake covered for 30 minutes, then uncovered for 5 to 10 minutes. The initial covered time softens the pepper walls, and the final uncovered time is just to melt and lightly brown the cheese topping.
Classic Stuffed Peppers Recipe
Ingredients:
Instructions:
Nutrition Facts:
| Calories | 318 kcal |
|---|---|
| Protein | 21.8 g |
| Fat | 11.2 g |
| Carbs | 21.5 g |
| Fiber | 3.2 g |
| Sugar | 4.5 g |
| Sodium | 342 mg |
