Parmesan Crusted Chicken: Golden and Crispy
- Time: Active 20 minutes, Passive 15 minutes, Total 35 minutes
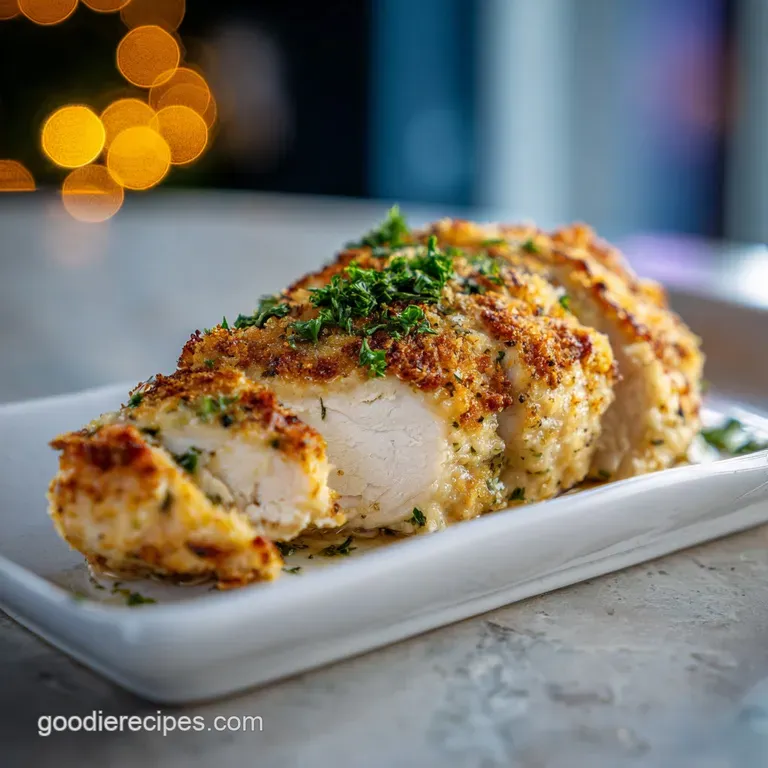
- Flavor/Texture Hook: A velvety, cheesy binder topped with a shattering panko parmesan crunch
- Perfect for: A busy weeknight dinner that feels like a fancy weekend treat
- Achieving the Perfect Crunch with This Parmesan Crusted Chicken
- Cooking Times and Temperature Precision for Juicy Results
- The Magic of Mayo and Fresh Cheese Component Analysis
- Why Your Cast Iron Skillet is the Secret Weapon
- Layering Flavors and Textures for a Shattering Golden Crust
- Avoiding Soggy Breadcrumbs and Overcooked Dry Chicken Breasts
- Swapping Spices and Flavorful Alternatives for Every Diet
- Keeping Your Leftovers Crispy and Reducing Kitchen Waste
- Pairing Your Crispy Chicken with the Best Comfort Sides
- Very High in Sodium
- Recipe FAQs
- 📝 Recipe Card
Achieving the Perfect Crunch with This Parmesan Crusted Chicken
There is a specific sound in my kitchen that always lets me know dinner is going to be legendary. It is that rhythmic, muffled thwack thwack thwack of the meat mallet hitting the counter, followed by the aggressive hiss of a hot cast iron skillet.
I remember the first time I tried to recreate that famous steakhouse chicken at home. I thought I could just throw some cheese on top and call it a day, but the result was a soggy, sad mess.
I realized then that the magic is not just in the cheese, but in the specific way we layer the ingredients to protect the meat while the top gets that iconic, deep mahogany color.
The real hero of this dish is the freshly grated parmesan cheese. If you have ever used the stuff from a green shaker can, you know it tastes like salty dust. But when you grate a block of real Parmigiano Reggiano or even a high-quality domestic parmesan, it transforms.
Under the broiler, those little shards of cheese melt just enough to bind with the panko, creating a lace like structure that is incredibly crisp. It provides a sharp, nutty punch that balances the richness of the mayo and ranch.
This isn't just a topping; it's a structural component that defines the entire experience of eating this dish.
We are going for a texture that is absolutely shattering. When your knife hits that crust, it should make a sound like stepping on dry leaves in autumn. Beneath that, you find a velvety layer of melted provolone and a tangy sauce that keeps the chicken breast from ever feeling dry or "woody." It is the ultimate comfort food for those nights when you want something substantial but don't want to spend two hours hovering over a stove.
Let's get into how we make this happen using the most reliable steps I have learned through trial and error in my own messy kitchen.
Cooking Times and Temperature Precision for Juicy Results
One of the biggest mistakes home cooks make with chicken breast is treating it like a steak that can handle "eyeballing." Chicken is notoriously unforgiving. If you cook it too long, it turns into something resembling a pencil eraser. In this version, we use a two stage cooking process.
We start on the stovetop to get that initial sear and build flavor through browning, then move to the broiler to finish the internal cooking while simultaneously crisping the top. This prevents the bottom of the chicken from getting tough while waiting for the cheese to melt.
The timing here is calculated to ensure the meat stays at that sweet spot of 165°F (74°C). We actually pull the chicken off the direct heat when it hits 150°F (65°C) because the intense heat of the broiler and the carryover cooking during the resting period will do the rest of the work.
If you wait until it is 165°F on the stove before adding your toppings, you'll end up with dry chicken by the time the panko is golden. Precision is your best friend when you want that restaurant quality finish at home.
| Method | Total Time | Texture | Best For |
|---|---|---|---|
| Searing + Broiling | 35 minutes | Shattering crust, juicy interior | Maximum flavor and speed |
| Baking Only (400°F) | 45 minutes | Softer crust, even cooking | Hands off preparation |
| Air Fryer | 25 minutes | Ultra crispy edges, firmer meat | Small batches or quick lunches |
The transition from the stove to the broiler is where the magic happens. By using an oven safe skillet, we keep all those flavorful brown bits (the fond) right under the chicken, which helps season the bottom of the meat while the top is being blasted with heat. This is why a cast iron skillet is the preferred tool for this job. It holds onto heat like a champ and provides a consistent sear that a thin non stick pan just cannot replicate. If you're looking for another way to use your skillet, you might enjoy my juicy grilled chicken which uses similar heat control principles.
The Magic of Mayo and Fresh Cheese Component Analysis
When I first heard about putting mayo on chicken, I was skeptical. It sounded heavy and, frankly, a little strange. But once I understood the "why," I never looked back. Mayo is essentially an emulsion of oil and egg. When it hits the heat, the oil stays on the surface of the meat, acting as a moisture barrier.
It prevents the water inside the chicken from evaporating, which is the main cause of dryness. The ranch dressing adds that hit of acidity and herb flavor that cuts right through the richness of the cheese.
The Heat Shield: The mayo and ranch mixture creates a protective layer that keeps the lean chicken breast from drying out under the high heat of the broiler.
Fat Based Binder: Unlike a traditional flour and egg wash, the melted butter and mayonnaise provide a fat rich environment that allows the panko to "fry" in place on top of the chicken.
Proteolysis Prevention: The salt in the ranch and seasoning acts as a dry brine, slightly breaking down the protein fibers so they can hold onto more moisture during the sear.
Maillard Reaction Support: The sugars in the dairy (mayo and ranch) help the crust achieve that deep mahogany color much faster than breadcrumbs alone would.
| Component | Science Role | Pro Secret |
|---|---|---|
| Real Mayonnaise | Moisture sealant and fat source | Use full fat for the best "shield" effect |
| Panko Breadcrumbs | Structural crunch and surface area | Don't crush them; keep the jagged flakes intact |
| Provolone Cheese | Insulating layer and "glue" | Use thin slices to ensure they melt quickly |
| Fresh Parmesan | Umami boost and saltiness | Grate it yourself to avoid anti caking cellulose |
The combination of provolone and white cheddar is a deliberate choice. Provolone provides that classic "stretch" and a mild, creamy base, while the white cheddar offers a sharp bite that stands up to the garlic and onion powders. If you use only one type of cheese, you lose the complexity.
The cheese isn't just there for flavor; it acts as a literal glue, holding that thick mountain of panko and parmesan in place so it doesn't slide off the moment you go to take a bite.
Why Your Cast Iron Skillet is the Secret Weapon
To make this recipe properly, you really only need a few basic tools, but the quality of those tools makes a massive difference. A heavy bottomed skillet is non negotiable. I prefer a 12 inch cast iron skillet because it can go from the high heat of a gas burner straight into the broiler without warping or releasing toxic fumes from a non stick coating.
If you don't have cast iron, a heavy stainless steel pan will work, just make sure the handle is metal and not plastic.
You will also need a meat mallet. I know, it's tempting to skip the pounding step, but please don't. Chicken breasts are naturally uneven thick at one end and thin at the other.
If you don't pound them to a consistent 3/4 inch thickness, the thin end will be dry as a bone by the time the thick end is safe to eat. Plus, the flat side of the mallet helps tenderize the meat by breaking up some of those tougher connective tissues.
Chef Tip: If you don't have a meat mallet, a heavy rolling pin or even the bottom of a small cast iron saucepan works in a pinch. Just be sure to put the chicken between sheets of plastic wrap so you don't make a mess of your kitchen!
Finally, a reliable instant read thermometer is your best insurance policy against a ruined dinner. We are aiming for very specific temperature windows here: 150°F after the sear and 165°F after the broil. Trusting a timer is risky because every stove and broiler is different.
A quick probe into the thickest part of the meat will tell you exactly when it's time to move to the next step.
Layering Flavors and Textures for a Shattering Golden Crust

Now, let's get into the actual building of this masterpiece. Follow these steps closely, especially the layering order. The order matters because it determines how the heat interacts with each ingredient. If you put the mayo under the cheese, the crust won't stay attached.
If you forget the butter in the panko, the topping will just burn instead of turning golden and crispy.
- Pound the chicken. Place your 4 chicken breasts between plastic wrap. Use the flat side of a meat mallet to pound them to a consistent 3/4 inch thickness. Note: This ensures even cooking and tenderizes the meat.
- Season the protein. Pat the chicken dry with paper towels. Season both sides with 1 tsp garlic powder, 1/2 tsp onion powder, 1/2 tsp salt, and 1/2 tsp pepper.
- Sear the meat. Heat 2 tbsp olive oil in your skillet over medium high heat. Sear the chicken for 5–6 minutes per side until deep golden brown and 150°F inside.
- Apply the cheese base. Remove the skillet from the heat. Place 1/2 cup grated provolone and 2 tbsp shredded white cheddar evenly over the four breasts.
- Add the creamy binder. In a bowl, whisk 1/4 cup mayo and 1/4 cup ranch. Spread about one generous tablespoon of this mixture over the cheese on each breast.
- Mix the crunch. In another bowl, combine 1/2 cup panko, 1/2 cup grated parmesan, 3 tbsp melted butter, and 1 tsp dried parsley.
- Press the topping. Press a thick, even layer of the panko mixture onto the top of each chicken breast. Press firmly so it sticks to the mayo.
- Broil to finish. Place the skillet under the broiler for 2-3 minutes until the crust is mahogany colored and the meat hits 165°F.
- Rest the meat. Let the chicken sit in the pan for 3-5 minutes before serving. Note: This allows the juices to redistribute so they don't run out when you slice it.
When you are searing the chicken in step 3, resist the urge to move it around. Let it sit there and develop a crust. That golden brown color is actually flavor being created through the browning of proteins. If you flip it too early, you'll lose that beautiful base layer of taste. Also, make sure your skillet is truly hot before the chicken goes in; you should hear a loud sizzle immediately. If you're looking for a different flavor profile that still uses a similar baking technique, you might like this creamy chicken bake for a pasta based alternative.
Avoiding Soggy Breadcrumbs and Overcooked Dry Chicken Breasts
The most common frustration with Parmesan Crusted Chicken is the "slide off" effect, where the delicious crust falls off the moment you try to serve it. This usually happens for two reasons: either the chicken was too wet when you started, or the mayo ranch binder was too thin.
By patting the chicken bone dry with paper towels before seasoning, you ensure the spices and subsequent layers have a dry surface to cling to.
Why Your Topping Is Not Staying Crispy
If your crust is soggy, it's usually because moisture from the chicken is steaming up through the breadcrumbs. This happens if the broiler isn't hot enough or if the chicken is releasing too much water. To prevent this, always ensure your panko is well coated in the melted butter.
The butter creates a barrier that prevents the crumbs from absorbing the moisture from the sauce below, keeping them crisp and light.
| Problem | Root Cause | Solution |
|---|---|---|
| Topping falls off | Surface was too wet or binder was thin | Pat chicken dry; press panko firmly into the mayo |
| Chicken is dry | Internal temp exceeded 165°F | Use a thermometer; pull from stove at 150°F |
| Crust is burnt but meat is raw | Broiler rack was too close to the heat | Move rack to the middle position; lower the broiler heat |
Common Mistakes Checklist
- ✓ Forgetting to pound the chicken (leads to unevenly cooked meat)
- ✓ Using "fake" parmesan from a can (it won't melt or brown properly)
- ✓ Overcrowding the skillet (this steams the meat instead of searing it)
- ✓ Skipping the resting period (causes all the moisture to leak out on the plate)
- ✓ Not drying the chicken with paper towels (prevents the seasoning from sticking)
One trick I've learned is to move my oven rack to the upper middle position rather than the very top. If the chicken is too close to the broiler element, the parmesan will burn in seconds before the panko has a chance to toast.
By giving it about 5 or 6 inches of space, you get a much more even, golden brown finish that looks exactly like the restaurant version.
Swapping Spices and Flavorful Alternatives for Every Diet
While the "Longhorn" style is the gold standard for many, you can easily adapt this recipe to fit what you have in your pantry or your specific dietary needs. The beauty of the mayo ranch binder is that it's incredibly stable, so you can mix in different herbs or spices without breaking the emulsion.
If you aren't a fan of ranch, you can use a thick Greek yogurt or even a bit of Dijon mustard mixed with the mayo for a sharper, more European flavor profile.
For those watching their carb intake, you can swap the panko breadcrumbs for crushed pork rinds. I know it sounds wild, but crushed pork rinds provide an incredible crunch and are naturally zero carb. They also have a high fat content, which means they brown beautifully under the broiler.
Just be sure to reduce the added salt in your seasoning, as pork rinds are already quite salty.
| Original Ingredient | Substitute | Why It Works |
|---|---|---|
| Panko Breadcrumbs | Crushed Pork Rinds | Provides a keto friendly crunch with high fat for browning |
| Ranch Dressing | Blue Cheese Dressing | Adds a funkier, bolder flavor that pairs well with steakhouse sides |
| Olive Oil | Avocado Oil | Higher smoke point, which prevents the kitchen from getting smoky during the sear |
Decision Shortcut for Flavor Profiles
- If you want a Tuscan feel: Swap the parsley for dried basil and add a pinch of sun dried tomato bits to the panko.
- If you want it Spicy: Add 1/2 tsp of cayenne pepper to the dry rub and use a "spicy ranch" variant for the binder.
- If you want it Extra Garlicky: Grate two cloves of fresh garlic directly into the melted butter before mixing it with the panko.
When making these changes, always keep the fat ratios similar. The melted butter and mayo are what keep the crust from being a dry, sandy mess. If you try to use a "low-fat" mayo or a fat free yogurt, the science falls apart, and you'll end up with a chalky topping that doesn't brown.
Trust the fat it's what makes the magic happen here!
Keeping Your Leftovers Crispy and Reducing Kitchen Waste
Let's be honest, chicken breast is usually terrible the next day. It gets that "reheated chicken" taste and becomes tough. However, because of the fat content in the mayo and cheese, this Parmesan Crusted Chicken actually holds up better than most. The key is how you reheat it.
Never, ever use the microwave if you want to keep that crust. The microwave will turn your beautiful panko topping into a mushy, sad sponge.
Instead, use your air fryer or toaster oven. Set it to 350°F and heat the chicken for about 5-8 minutes. This will re melt the cheese and re crisp the panko without further overcooking the interior of the meat.
If you're using a standard oven, put the chicken on a wire rack over a baking sheet so the hot air can circulate around the bottom, preventing the "soggy bottom" syndrome.
- Fridge
- Store in an airtight container for up to 3 days. Make sure the chicken is completely cool before sealing the lid to prevent steam from softening the crust.
- Freezer
- This recipe doesn't freeze well after cooking because the mayo/ranch sauce can break and become oily when thawed. It's best enjoyed fresh!
- Zero Waste Tip
- If you have leftover panko parmesan mixture, don't throw it out! Toss it with some melted butter and bake it on a tray for 10 minutes, then sprinkle it over roasted broccoli or a side salad for an instant texture upgrade.
If you find yourself with extra provolone or cheddar, you can chop it up and save it for a morning omelet. The chicken itself, if you have a piece left over, makes an incredible cold sandwich.
Slice it thin and put it on a toasted ciabatta roll with some extra greens the crust is still tasty even when chilled, though you won't get that same shattering crunch.
Pairing Your Crispy Chicken with the Best Comfort Sides
To truly lean into that steakhouse vibe, you need the right sides. This chicken is quite rich, so I like to pair it with something that has a bit of acidity or freshness to balance the palate.
A crisp green salad with a lemon vinaigrette is the perfect "reset" button for your taste buds between bites of cheesy, crunchy chicken. Alternatively, if you're going for full blown comfort, a pile of garlic mashed potatoes is the classic choice.
I often serve this with roasted asparagus or steamed broccoli. The green vegetables look beautiful against the golden brown chicken, and you can even use some of the extra parmesan topping to season the veggies.
If you're feeling adventurous, a side of pasta with a light garlic and oil sauce (Aglio e Olio) works wonderfully. The chicken is the star of the show, so keep your sides simple and let that parmesan crust do the heavy lifting.
The "Perfect Bite" Strategy
For the best experience, try to get a little bit of everything in one forkful: a piece of the juicy meat, a stretch of the melted provolone, and a healthy chunk of the golden crust. The contrast between the soft, yielding chicken and the sharp, brittle topping is what makes this dish so addictive.
It's a recipe I've made dozens of times for guests, and it never fails to impress.
Remember, the goal isn't just to make a meal; it's to create a texture experience. By following these steps pounding the meat, searing properly, and layering the "heat shield" you are essentially engineering the perfect bite.
Whether it's a Tuesday night with the kids or a small dinner party with friends, this chicken always delivers. Happy cooking, and may your crust be forever crispy!

Very High in Sodium
985 mg 985 mg (43% 43% of daily value)
The American Heart Association recommends limiting sodium intake to less than 2,300mg per day, aiming for an ideal limit of less than 1,500mg per day for most adults.
Tips to Reduce Sodium
-
Choose Lower Sodium Cheeses-15%
Opt for low-sodium or reduced sodium versions of provolone and white cheddar. You can also reduce the total amount of cheese used slightly.
-
Reduce Added Salt-12%
Cut the added salt in half, from 1/2 tsp to 1/4 tsp. The flavors from other ingredients will compensate significantly.
-
Swap Ranch Dressing-10%
Replace the ranch dressing with a low-sodium or homemade version. Many commercial ranch dressings are high in sodium.
-
Boost Flavor with Herbs
Increase the use of dried parsley and other dried herbs and spices like oregano, thyme, or basil. This adds flavor without sodium.
-
Use Unseasoned Breadcrumbs-5%
Ensure your panko breadcrumbs are unseasoned. Many pre-seasoned breadcrumbs contain added salt.
-
Lighten Up Mayonnaise-5%
Use a light or reduced sodium mayonnaise instead of regular mayonnaise to decrease sodium content.
Recipe FAQs
Is it required to pound the chicken breasts before cooking?
Yes, this is essential for even cooking. Pounding the meat to a consistent 3/4 inch thickness ensures the edges don't dry out before the center reaches a safe 165°F.
How to ensure the crust turns out perfectly golden brown?
Use only freshly grated parmesan cheese instead of the canned variety. Pre-grated cheese contains anti caking agents that prevent it from melting and forming that signature mahogany crust under the broiler.
Why is my chicken coming out soggy instead of seared?
You are likely overcrowding the skillet. Searing requires enough space for moisture to evaporate, so cook in batches if your pan isn't large enough to keep the breasts from touching.
How to keep the chicken from drying out after searing?
Always pat the chicken dry with paper towels before seasoning. Excess surface moisture causes the meat to steam rather than sear, and if you enjoy the searing technique here, you can apply similar heat control when preparing lemon herb chicken.
Is it true I can use a standard oven setting instead of the broiler?
No, this is a common misconception. The broiler is specifically required to brown the panko and parmesan crust in just 2-3 minutes without overcooking the chicken underneath.
How to prevent the parmesan crust from burning?
Position your oven rack in the upper middle slot. Placing the skillet too close to the direct flame of the broiler can scorch the breadcrumbs before the cheese fully sets.
How to tell when the chicken is fully cooked?
Use an instant read thermometer to verify an internal temperature of 165°F. Relying on visual cues alone is risky, so check the thickest part of the breast to ensure it is cooked through while remaining juicy.
Copycat Parmesan Crusted Chicken
Ingredients:
Instructions:
Nutrition Facts:
| Calories | 642 kcal |
|---|---|
| Protein | 43.8 g |
| Fat | 45.2 g |
| Carbs | 11.4 g |
| Fiber | 0.6 g |
| Sugar | 1.2 g |
| Sodium | 985 mg |
