Easter Bunny Cake Recipe: Classic Comfort
- Time: Active 30 minutes, Passive 30 minutes, Total 1 hour
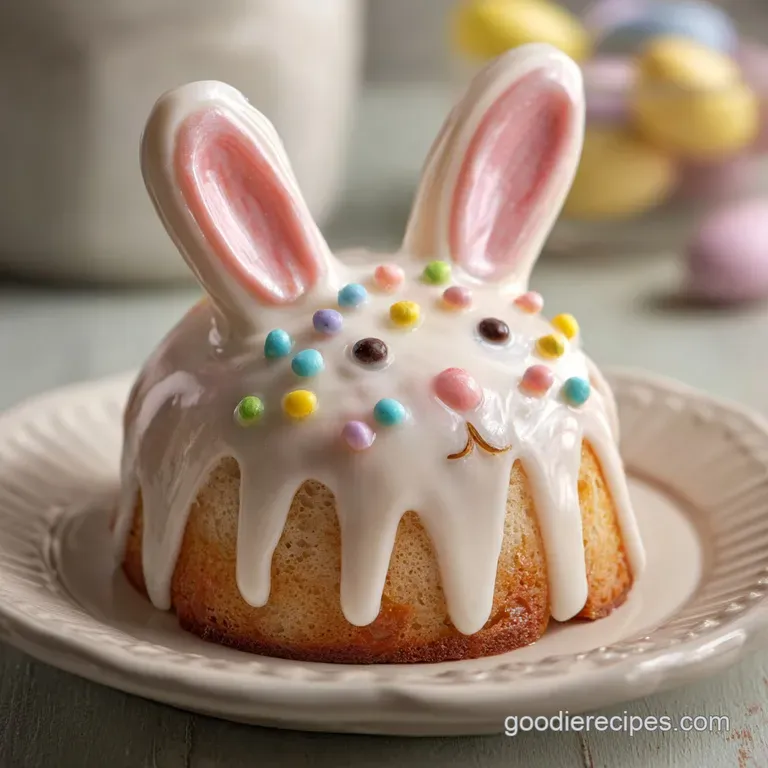
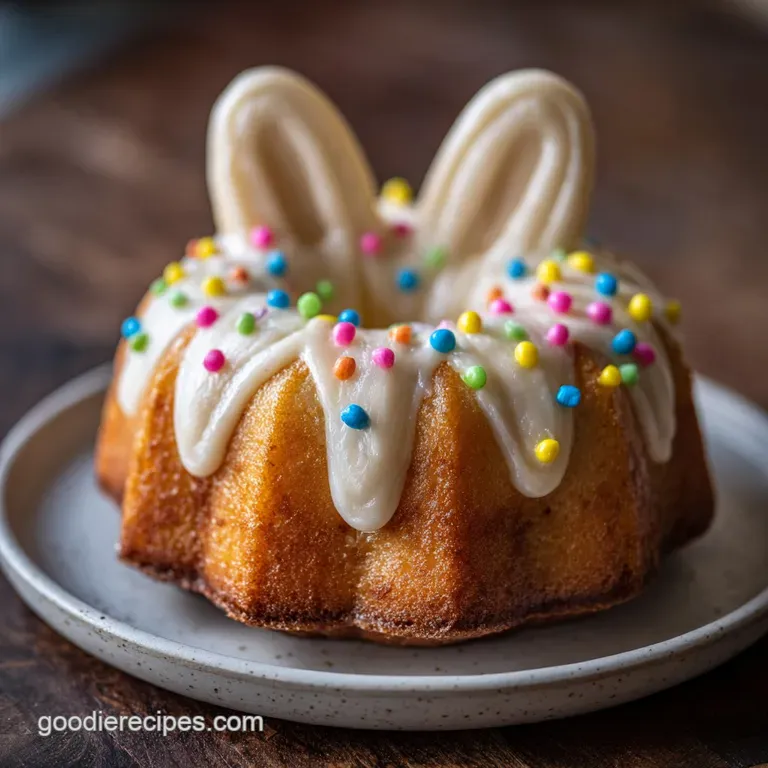
- Flavor/Texture Hook: Velvety vanilla crumb with a snowy, textured coconut finish
- Perfect for: Family Easter brunch, budget conscious holiday hosting, or a fun baking project with kids
- Baking the Most Nostalgic Easter Bunny Cake
- Achieving Structural Success with Kitchen Science
- Selecting the Right Component Elements
- The Essential Grocery List
- Professional Tools for Success
- Step-by-Step Assembly Instructions
- Solving Common Bunny Blunders
- Resizing Your Rabbit
- Debunking Cake Myths
- Storage and Sustainable Tips
- Coordinating Your Dessert Table
- Recipe FAQs
- 📝 Recipe Card
Baking the Most Nostalgic Easter Bunny Cake
Do you remember that specific scent of a warm kitchen in April? I'm talking about the hit of sweet vanilla hitting a cloud of shredded coconut. My first attempt at this was a total disaster the ears fell off because I didn't use enough "frosting glue," and the bunny looked more like a very confused sheep.
But honestly, that's the charm of a homemade Easter Bunny Cake. It doesn't have to be gallery worthy; it just has to be made with a little bit of love and a lot of sugar.
We’re skipping the fancy 3D metal pans today because, let’s be real, who has the storage space for a pan you use once a year? We’re going old school with two 8 inch rounds and a clever bit of "cake surgery." It's a budget smart move that lets you spend more on the good jelly beans rather than a piece of hardware that’ll just gather dust in the pantry.
Trust me, there is something so satisfying about seeing that pile of white coconut turn a plain cake into a fluffy character. It’s the ultimate low stress, high reward dessert.
You’ll get that velvety texture in the cake and a frosting that’s sturdy enough to hold everything together without breaking the bank on "premium" pre made kits. Let’s get the oven preheated and jump into the magic of the bunny.
Achieving Structural Success with Kitchen Science
For a Stable, Topple Free Structure
Protein Alignment: Using three large eggs provides the structure needed to support the heavy weight of the "ears" and the thick coating of coconut. The proteins set during the bake, creating a sturdy enough scaffold so the cake doesn't crumble when you're cutting out the bow tie shape.
For That Iconic Fluffy Fur
Moisture Barrier: The heavy cream in the buttercream creates a silky, tacky surface that grabs onto the shredded coconut instantly. Without that specific fat content, the coconut would simply slide off the sides, leaving your bunny looking a bit patchy and bald.
For a Perfectly Sliced Crumb
Starch Gelatinization: Baking until the internal temperature hits exactly 205°F ensures the flour starches have fully absorbed the milk. This creates a tight, velvety crumb that slices cleanly without throwing off a million crumbs that would otherwise muddy your white frosting.
| Method | Time | Texture | Best For |
|---|---|---|---|
| From Scratch | 1 hour | Velvety and dense | Stability and flavor |
| Box Mix Shortcut | 45 minutes | Airy and light | Last minute prep |
| Pound Cake Swap | 1 hour 15 mins | Very firm/buttery | Easy carving |
Getting the right texture is the difference between a cake that stands tall and one that sags by the time dessert rolls around. While a box mix is a great budget hack, I always recommend the scratch version if you have the 10 extra minutes to measure the flour it just holds up so much better under the weight of the decorations.
Selecting the Right Component Elements
| Ingredient | Science Role | Pro Secret |
|---|---|---|
| All purpose flour | Provides the structure | Sift it with the baking powder to prevent "tunnels" in your cake. |
| Unsalted butter | Delivers fat and flavor | Keep it at 65°F; it should dent when pressed but not look shiny. |
| Whole milk | Hydrates the starches | Use room temp milk so it doesn't seize the creamed butter. |
The Essential Grocery List
- 2.5 cups All purpose flour (315g): The base of our structure. Why this? Provides the perfect balance of strength and softness. (Substitute: 1:1 gluten-free flour blend)
- 1.5 cups Granulated sugar (300g): For sweetness and browning. Why this? Essential for a tender, moist crumb. (Substitute: Caster sugar)
- 1 tbsp Baking powder: Our lifting agent. Why this? Creates a reliable rise every time. (Substitute: 1 tsp baking soda + 2 tsp cream of tartar)
- 0.5 tsp Salt: Enhances all other flavors. Why this? Cuts through the heavy sweetness of the frosting. (Substitute: Sea salt)
- 0.75 cup Unsalted butter, softened (170g): For the cake batter. Why this? Adds that classic, rich bakery flavor. (Substitute: Margarine for a cheaper option)
- 3 Large eggs: The "glue" of the batter. Why this? Room temperature eggs emulsify better into the fats. (Substitute: 0.75 cup unsweetened applesauce)
- 1 cup Whole milk (240ml): For moisture and tenderness. Why this? High fat content keeps the cake from drying out. (Substitute: Oat milk)
- 1 tbsp Vanilla extract: For that nostalgic aroma. Why this? Elevates the simple white cake flavor profile. (Substitute: Vanilla bean paste)
- 1 cup Unsalted butter, softened (225g): For the frosting base. Why this? Creates a sturdy, pipeable buttercream. (Substitute: Half shortening for higher heat stability)
- 4 cups Powdered sugar, sifted (500g): The bulk of the frosting. Why this? Sifting ensures a velvety, lump free finish. (Substitute: store-bought canned frosting)
- 3 tbsp Heavy cream: For frosting consistency. Why this? Thins the frosting while adding a rich mouthfeel. (Substitute: Whole milk)
- 1 tsp Vanilla bean paste: Specks of flavor in the frosting. Why this? Adds a premium look to a simple cake. (Substitute: Vanilla extract)
- 2 cups Sweetened shredded coconut: The "fur." Why this? Sweetened coconut is more pliable and sticks better. (Substitute: White chocolate shavings)
- Pink jelly beans: For the nose and eyes.
- Black licorice strings: For the whiskers.
- Marshmallows: For the ears.
Professional Tools for Success
For the Sturdy Vanilla Base
You'll want two 8 inch round cake pans for this. If you only have one, you’ll have to bake in batches, which can be a bit of a faff. I also highly recommend using parchment paper rounds at the bottom of the pans.
There is nothing more heartbreaking than a cake sticking to the pan when you’re trying to make a cute bunny. A stand mixer like a KitchenAid makes creaming the butter and sugar a breeze, but a handheld electric mixer works just as well if you’re on a budget.
For the Velvety Buttercream & Decoration
A long offset spatula is your best friend here. It helps you spread the frosting smoothly without dragging your knuckles through the cake. You’ll also need a sharp serrated knife for the "surgery" part a dull knife will just tear the crumb and make a mess.
Finally, grab a large cutting board or a flat serving platter to assemble the bunny on. Since this cake is long, it won't fit on a standard round cake stand.
step-by-step Assembly Instructions
1. For a Flawless Bake
Preheat your oven to 350°F (180°C). Cream the 0.75 cup butter and 1.5 cups sugar until pale and fluffy, which usually takes about 3 to 5 minutes. Add the 3 eggs one at a time.
Alternately add the 2.5 cups flour (mixed with baking powder and salt) and the 1 cup milk. Divide into two greased 8 inch pans. Bake 30 minutes until a toothpick comes out clean and the edges pull away slightly.
2. For the Strategic "Bunny Cut"
Let the cakes cool completely on a wire rack. Take one whole cake this is the bunny head. Place it on your platter. Take the second cake and cut two convex "ears" from the sides, leaving a bow tie shape in the middle. Note: Think of it like cutting two crescent moons off the sides of a circle.
3. For the Assembly Phase
Place the whole round cake in the center of your board. Position the two "ear" pieces at the top of the head. Place the "bow tie" piece at the bottom of the head. Use a small amount of the buttercream (made from the 1 cup butter, 4 cups powdered sugar, cream, and vanilla) to "glue" these pieces together.
Press them firmly so they don't shift.
4. For the Snowy Coating
Cover the entire surface of the bunny with a generous layer of buttercream. Don't worry about it being perfectly smooth; the coconut will hide everything. Immediately toss the 2 cups shredded coconut over the top and sides.
Press the coconut gently with your palms so it sticks into the velvety frosting.
5. For the Final Character Details
Slice the marshmallows diagonally to create long ear shapes and place them on the cake ears. Use pink jelly beans for the nose and eyes. Carefully press the black licorice strings into the frosting around the nose to create whiskers.
If you want to get fancy, you can use the leftover frosting to pipe a little pink bow on the bow tie piece.
Solving Common Bunny Blunders
To Fix a Crumbly Surface
If your cake is throwing off too many crumbs while frosting, you probably skipped the "crumb coat." This is just a very thin layer of frosting that you spread over the cake and then chill for 15 minutes. It locks the crumbs in place so your final layer stays bright white and clean.
To Prevent the Coconut from Falling Off
If the coconut isn't sticking, your frosting might have crusted over. Use a spray bottle with a tiny bit of water to lightly mist the frosting, or just add a fresh dab of buttercream. You really have to "shatter" the coconut over the cake while the frosting is still tacky.
| Problem | Root Cause | Solution |
|---|---|---|
| Cake layers domed | Oven was too hot | Trim the tops flat with a serrated knife before cutting shapes. |
| Ears won't stay put | Frosting is too thin | Add 1/4 cup more powdered sugar to stiffen the "glue." |
| Coconut looks yellow | Over toasted or old | Use fresh, bright white sweetened coconut for a snowy look. |
Chef's Tip: If you find the coconut is too long and "shaggy," pulse it in a food processor for 5 seconds. It creates a finer, more realistic "fur" texture that is much easier to apply to the vertical sides of the cake.
Common Mistakes Checklist
- ✓ Never try to cut the cake while it’s still warm; it will disintegrate into a pile of crumbs.
- ✓ Don't forget to grease AND flour your pans; this cake needs to be perfectly round for the cuts to work.
- ✓ Avoid using low-fat milk; the fat is what gives the bunny its sturdy, velvety structure.
- ✓ If you’re using construction paper for ears, don't put them on until right before serving so they don't get soggy.
Resizing Your Rabbit
Scaling Down
If you only need 6 servings, you can make a "Mini Bunny." Use 4 inch or 6 inch pans and reduce the baking time by about 8 to 10 minutes. Use a single egg and halve the rest of the ingredients. It’s adorable for a small household!
Scaling Up
For a huge crowd (24 servings), bake four 8 inch rounds. You can make two bunnies, or place two bunnies side-by-side on a large sheet pan. If you double the recipe, only use 1.5x the salt and baking powder to ensure the rise stays consistent.
Debunking Cake Myths
"You have to use a specialty bunny pan for a good shape." Honestly, the two round cake method is often better because the cake bakes more evenly. In those deep 3D pans, the ears often overbake while the center is still raw.
"Room temperature ingredients don't really matter." This is a big one. If you use cold eggs and cold milk, your butter will clump up, and you’ll end up with a greasy, heavy cake rather than a velvety one. Take the time to let them sit on the counter for 30 minutes.
Storage and Sustainable Tips
Keeping It Fresh
This cake stays moist in the fridge for up to 4 days if you cover it loosely with plastic wrap. Because of the butter in the frosting, it will get quite firm when cold, so let it sit at room temperature for 20 minutes before serving.
You can also freeze the un frosted cake layers for up to 3 months just wrap them tightly in foil and plastic.
Zero Waste Ideas
Don't throw away the tiny cake scraps left over from trimming the ears! Crumble them up, mix with a spoonful of leftover frosting, and roll them into "bunny tail" cake balls. Dip them in white chocolate and more coconut for a bonus treat that uses every single bit of the recipe.
Coordinating Your Dessert Table
This Easter Bunny Cake is a standout on its own, but it looks even better when surrounded by a few friends. If you want to keep the theme going, these Carrot Cake Cookies recipe are a great budget friendly addition that mimics the "bunny food" vibe.
If you’re hosting a full brunch and want to offer a variety of treats, these Easter Sugar Cookies recipe are fantastic because you can decorate them in the same pastel colors as your jelly bean decorations. Setting the bunny on a bed of green tinted coconut "grass" really ties the whole presentation together!
If You Want X, Do Y
- If you want a vibrant look, tint your coconut with a few drops of green food coloring to create "grass" around the base.
- If you want to save money, use pink construction paper for the ears instead of marshmallows and jelly beans.
- If you want a richer flavor, toast the coconut in a dry pan for 2 minutes before applying (note: the bunny will be tan, not white).

Recipe FAQs
Can I bake the cake layers the day before assembly?
Yes, this is highly recommended. Cool the layers completely, wrap them tightly in plastic wrap, and refrigerate for up to 24 hours; this firms them up, making the required "bunny surgery" cuts much cleaner.
What is the best method to make the coconut fur stick firmly?
Use a tacky, high fat buttercream layer and press the coconut on immediately. The heavy cream in the buttercream creates the necessary surface tension to grab the coconut shreds before the frosting crusts over.
How do I ensure my cake ears don't collapse after cutting them out?
Bake the layers until the internal temperature reaches 205°F, ensuring the starches are fully set for structural integrity. If you enjoyed mastering this temperature precision here, apply the same concept to your [Roast Chicken recipe] for perfect doneness.
Can I use a boxed cake mix instead of scratch for this shape?
Yes, but you must stiffen the batter slightly. A standard box mix is often too airy; add one extra egg yolk and use slightly less liquid than directed to increase stability for carving.
Is it true that using room temperature ingredients makes a big difference?
Yes, this is crucial for smooth blending. Cold ingredients cause the creamed butter to seize, resulting in a lumpy batter that won't achieve the velvety crumb needed to support the 3D shape.
How do I achieve the fluffy, non-melting white frosting outdoors?
Substitute half the butter in the buttercream with high ratio vegetable shortening. Shortening has a higher melting point than butter, keeping your bunny looking pristine even on a warm patio during your Easter gathering.
What should I do with the cake scraps left after cutting the ears?
Roll the trimmed cake pieces with leftover frosting to create "bunny tail" cake pops. This zero waste technique is a quick bonus treat that minimizes cleanup and maximizes flavor.
Easy Easter Bunny Cake Recipe

Ingredients:
Instructions:
Nutrition Facts:
| Calories | 715 kcal |
|---|---|
| Protein | 5.7 g |
| Fat | 34.9 g |
| Carbs | 97.7 g |
| Fiber | 1.1 g |
| Sugar | 75.2 g |
| Sodium | 192 mg |
