Easy Mint Brownies Recipe
- Achieving the Decadent Fudgy Texture in Mint Brownies
- Crucial Specs for Your Bake
- Analyzing the Ingredient Deep Dive
- Selecting Your Pantry Essentials
- Essential Tools for the Home Baker
- Bringing the Layers Together
- Common Mistakes & Troubleshooting
- Flavor Variations to Try
- Scaling for Large Gatherings
- Myths Regarding Mint Chocolate
- Storage and Zero Waste Tips
- Recipe FAQs
- 📝 Recipe Card
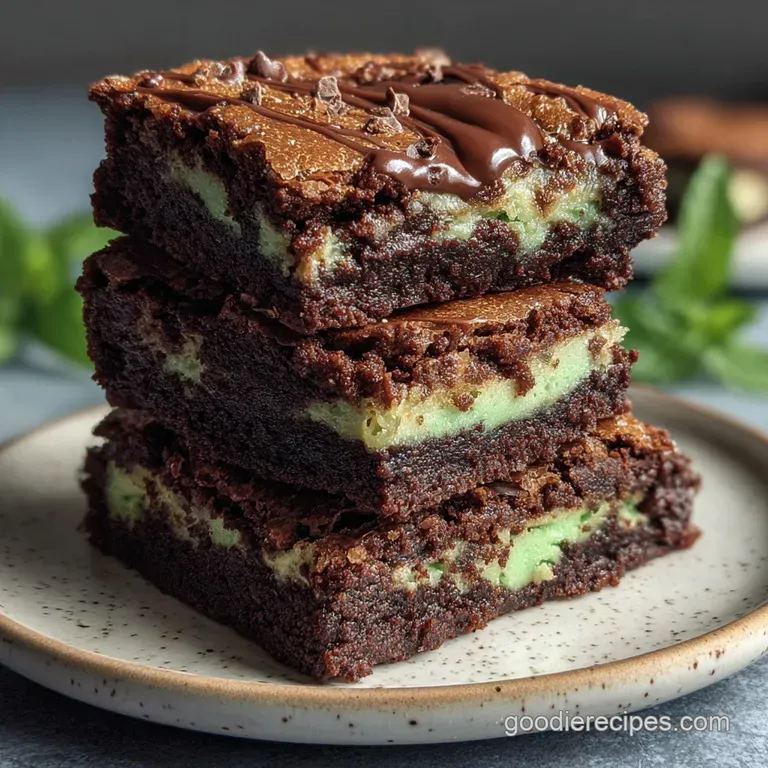
Achieving the Decadent Fudgy Texture in Mint Brownies
I remember the first time I pulled a tray of these brownies out of the oven during a frantic holiday bake sale. The kitchen was thick with the aroma of dark chocolate, but it was the sharp, cooling scent of peppermint that really cut through the heat.
My first batch was actually a total disaster I’d rushed the cooling process, and the mint frosting melted into a swampy green puddle on top of the warm chocolate. It wasn't pretty, but the flavor? It was absolutely transformative.
We’ve all been there, trying to balance that rich, heavy cocoa base with a light, airy frosting. Over the years, I’ve learned that the secret isn’t in fancy equipment but in the patience of the "set." These mint brownies are a staple in my family now, specifically because they hit that nostalgic note of a thin mint cookie but with the density of a high end truffle.
You don't need to be a pastry chef to get that clean, tri color layer look; you just need a few practical tricks that I’ve picked up through trial and many, many errors.
The Physics of the Fudgy Crumb
Alkaline Reaction: Dutch processed cocoa powder has a neutral pH, which allows the chocolate flavor to bloom without the acidic bite of natural cocoa, resulting in a velvety mouthfeel.
The high fat to flour ratio prevents gluten development, ensuring the base remains dense and fudgy rather than bread like or cakey.
| Method | Time | Texture | Best For |
|---|---|---|---|
| Fresh Scratch | 45 minutes | Ultra dense and rich | Special family gatherings |
| Box Mix Hack | 30 minutes | Lighter, more aerated | Quick weeknight cravings |
| No Bake Version | 20 minutes | Heavy and fudge like | Hot summer days |
Choosing between a scratch made base and a shortcut usually comes down to how much time you have before the family starts hovering in the kitchen. While a box mix is convenient, the scratch made version uses 1/2 cup unsalted butter and Dutch processed cocoa to create a foundation that won't crumble when you bite into it. If you’re looking for other seasonal treats, you might find my Peppermint Sugar Cookies recipe is a great way to use up any leftover peppermint extract you have in the pantry.
Crucial Specs for Your Bake
When we talk about traditional family baking, the small details are what keep the recipe consistent generation after generation. For this recipe, we are looking at a total time of 45 minutes, with about 20 minutes of that being active prep work.
You’ll yield 16 generous squares, which is just enough to share if you're feeling generous.
The temperature of your ingredients is the silent partner in your success. Using two large eggs at room temperature is non negotiable here. Cold eggs can seize up your melted 1/2 cup of butter, creating a lumpy batter that won't bake evenly.
I usually set my eggs in a bowl of warm water for five minutes if I’ve forgotten to take them out of the fridge. It’s a simple, budget friendly hack that saves the entire texture of the brownie.
Analyzing the Ingredient Deep Dive
Understanding why we use specific ingredients helps us become better instinctive cooks. We aren't just following a script; we're managing a series of small chemical reactions that lead to that classic comfort food result.
| Ingredient | Science Role | Pro Secret |
|---|---|---|
| Unsalted Butter | Fat & Emulsification | Browning the butter slightly adds a nutty depth to the cocoa. |
| Dutch Processed Cocoa | Flavor & Color | Sift it twice to avoid "cocoa bombs" of dry powder in the fudgy base. |
| Peppermint Extract | Volatile Aromatics | Add this to the frosting last to keep the scent from evaporating. |
| Heavy Cream | Moisture & Stability | Use cold cream to keep the frosting from becoming too runny. |
Every element has a job to do. For instance, the 1/3 cup of cocoa powder provides the structural backbone of the flavor. If you find yourself making a lot of chocolate based desserts, you might notice similar patterns in my Red Velvet Cupcakes recipe, where the balance of fat and cocoa is key to that signature crumb.
Selecting Your Pantry Essentials
For these mint brownies, we’re keeping things practical and budget conscious. You don't need the most expensive chocolate chips on the shelf; a standard 1 cup of semi sweet chocolate chips works perfectly because the peppermint extract is the real star here.
- 1/2 cup unsalted butter, melted: Why this? Melted butter creates a chewier, denser brownie than creamed butter. (Substitute: Salted butter; just omit the 1/4 tsp extra salt.)
- 1 cup granulated sugar: Why this? Provides sweetness and helps create that crackly top layer. (Substitute: Light brown sugar for a more molasses like depth.)
- 2 large eggs: Why this? Acts as the primary binder and provides the lift. (Substitute: Flax eggs, though the texture will be significantly more crumbly.)
- 1/3 cup cocoa powder: Why this? Dutch processed offers a darker color and smoother finish. (Substitute: Natural cocoa powder; the brownies will be slightly more acidic.)
- 1/2 cup all purpose flour: Why this? Just enough to hold everything together without being cakey. (Substitute: 1 to-1 gluten-free flour blend.)
- 1.5 tbsp heavy cream: Why this? Thins the frosting to a spreadable, velvety consistency. (Substitute: Whole milk; frosting will be slightly less stable.)
- 1 tsp peppermint extract: Why this? Provides that essential "cool" flavor profile. (Substitute: Spearmint extract for a "chewing gum" style flavor.)
| Original Ingredient | Substitute | Why It Works |
|---|---|---|
| Heavy Cream | Full fat Coconut Milk | Provides similar fat content. Note: Adds a subtle tropical undertone. |
| Dutch Cocoa | Black Cocoa | Intense dark color and Oreo like flavor. Note: Very strong, use sparingly. |
| Chocolate Chips | Chopped Chocolate Bar | Melts more fluidly for the ganache. Note: Can be more expensive than chips. |
Using what you have on hand is the smartest way to cook. If you've run out of heavy cream, don't rush to the store; that splash of milk or even a bit of extra softened butter in the frosting can bridge the gap. The goal is a velvety finish that sits proudly on top of the chocolate base.
Essential Tools for the Home Baker
You don't need a high end stand mixer for this, though a hand mixer makes the frosting step much easier. I usually just use a sturdy whisk and a silicone spatula. The spatula is great for folding the 1/2 cup of flour into the chocolate mixture without overworking the gluten.
An 8x8 inch square baking pan is the standard here. I highly recommend lining it with parchment paper, leaving an inch of overhang on the sides. This "sling" method allows you to lift the entire block of mint brownies out of the pan once they’ve set, which is the only way to get those clean, sharp edges you see in professional bakeries.
Without it, you're stuck digging them out with a knife, which usually ruins that first sacrificial corner piece.
Bringing the Layers Together

1. Whisking the Foundation
Melt your 1/2 cup of unsalted butter and whisk it vigorously with the 1 cup of sugar in a large bowl. You want the sugar to begin dissolving into the fat, which creates that desirable "shiny" top.
2. Sifting and Folding
Add your eggs and vanilla, then sift in the 1/3 cup of cocoa powder, 1/2 cup of flour, and 1/4 tsp salt. Fold gently with a spatula until no streaks of white flour remain. Note: Over mixing here will introduce too much air, making the brownies cakey.
3. Achieving the Bake
Pour the batter into your lined pan and bake at 350°F for 25 minutes until the edges are firm and the center barely jiggles. Let these cool completely in the pan; this is the most important step for a clean layer.
4. Aerating the Peppermint Cloud
In a clean bowl, beat the 1/2 cup of softened butter with 2 cups of powdered sugar. Slowly add the 1.5 tbsp heavy cream, 1 tsp peppermint extract, and food coloring until the frosting is pale green and fluffy.
5. Mastering the Thermal Set
Spread the mint frosting evenly over the cooled brownies. Place the pan in the fridge for 30 minutes. Note: If the brownies are even slightly warm, the frosting will slide right off.
6. Tempering the Final Snap
Melt the 1 cup of chocolate chips with the 6 tbsp of butter in 30 second bursts in the microwave. Stir until the glaze is glossy and completely smooth.
7. The Final Pour
Pour the chocolate ganache over the chilled mint layer. Tilt the pan to let the chocolate coat every corner smoothly.
8. The Hardest Step
Return the pan to the fridge for at least 1 hour. You want that top layer to be firm enough to shatter slightly when the knife pierces it.
Common Mistakes & Troubleshooting
The most frequent heartbreak in brownie baking is the "sliding layer" syndrome. This happens when the layers haven't bonded because of temperature differences. If your ganache is too hot when you pour it over the mint frosting, it will melt the butter in the frosting, creating a muddy mess.
Why Your Chocolate Is Seizing
If you’re melting the 1 cup of chocolate chips and it suddenly turns into a gritty, clumpy paste, a tiny drop of water likely got into the bowl. Chocolate is an emulsion of fat and cocoa solids; water breaks that emulsion instantly.
| Problem | Root Cause | Solution |
|---|---|---|
| Crumbly Base | Too much flour or over baking | Measure flour by weight or pull from oven 2 mins early next time. |
| Grainy Frosting | Powdered sugar wasn't sifted | Beat the frosting for an extra 3 mins to dissolve the sugar crystals. |
| Ganache Won't Set | Not enough chocolate or too much butter | Melt in a few extra chocolate chips to thicken the mixture. |
Common Mistakes Checklist
- ✓ Always line your pan with parchment paper for easy removal.
- ✓ Wait for the brownie base to be cold to the touch before frosting.
- ✓ Sift your cocoa powder to ensure a silky, lump free batter.
- ✓ Use a hot knife (dipped in warm water and wiped dry) to slice for perfect edges.
- ✓ Don't skip the salt; it balances the sweetness of the 2 cups of powdered sugar.
Flavor Variations to Try
The Box Mix Shortcut
If you’re in a rush, use a high-quality box brownie mix as your base. To make it taste "homemade," replace the water called for on the box with melted butter and add an extra egg yolk. This increases the fat content, giving you that rich mouthfeel that scratch made brownies provide.
Once baked and cooled, continue with the mint frosting and ganache steps as written.
The Grasshopper Adult Twist
For a more sophisticated version, replace the heavy cream in the frosting with 1.5 tbsp of Creme de Menthe liqueur. It adds a complex, botanical mint flavor that extract sometimes lacks. You can also swap the semi sweet chips in the topping for dark chocolate (70% cocoa) to cut through the sweetness of the sugar.
dairy-free Adaptation
You can make these budget friendly and dairy-free by using a plant based butter stick and full fat coconut milk in the frosting. For the topping, ensure your chocolate chips are dairy-free. The texture will be slightly softer, so keep them chilled until the very moment you serve them. If you enjoy making treats from scratch, you'll find that these techniques are very similar to those used in my French Toast Muffins recipe, which also relies on a careful balance of moisture and fat.
Scaling for Large Gatherings
Cutting the Recipe Down
If you only need a few treats, you can halve this recipe easily. Use a loaf pan instead of an 8x8 square. For the eggs, beat one egg in a small bowl and use half of it (about 2 tablespoons). Reduce the baking time by about 5 minutes, but start checking for doneness at the 18 minute mark.
Doubling for a Crowd
To double the recipe for a 9x13 inch pan, you can simply x2 all ingredients. However, be careful with the peppermint extract; flavors can intensify, so start with 1.5 tsp and taste before adding the full 2 tsp. Increase the bake time for the base to roughly 35-40 minutes.
Because the volume is higher, the center will take longer to set than the edges.
Myths Regarding Mint Chocolate
One common myth is that you must use expensive "baking chocolate" bars for the ganache. In reality, 1 cup of standard semi sweet chocolate chips contains stabilizers that actually help the ganache stay shiny and firm.
While professional bars have a higher cocoa butter content, chips are much more budget friendly and provide a more consistent result for home bakers.
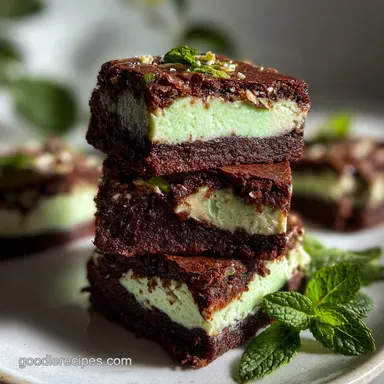
Another misconception is that the green food coloring changes the flavor. It is purely aesthetic! If you prefer a more "natural" look, feel free to skip the drops. The brownies will still have that refreshing mint hit, though they won't have that classic "grasshopper" look.
Some people even find that skipping the dye makes the chocolate look more sophisticated for formal events.
Storage and Zero Waste Tips
Storage Guidelines: These brownies are best kept in the refrigerator because of the butter based frosting. In an airtight container, they will stay fresh and fudgy for up to 5 days.
If you need to stack them, place a piece of parchment paper between the layers to prevent the ganache from sticking to the bottom of the brownie above it.
Freezing Instructions: Mint brownies freeze beautifully. Wrap individual squares tightly in plastic wrap and then place them in a freezer bag. They can be frozen for up to 3 months. To eat, simply let them thaw in the fridge for a few hours.
I actually quite like eating them straight from the freezer the texture becomes almost like a frozen fudge bar.
Zero Waste Idea: If you have "ugly" end pieces or crumbs left over, don't throw them away! Crumble them up and use them as a topping for vanilla bean ice cream. Or, better yet, fold the crumbs into a batch of vanilla frosting for a "mint chocolate chip" cupcake topping. If you're looking for a quick snack to use up other pantry staples, check out my quinoa salad with recipe for a healthy lunch to balance out all this chocolate.

Recipe FAQs
Is it true that room temperature eggs are crucial for a smooth batter?
Yes, room temperature eggs are non-negotiable. Cold eggs shock the melted butter, leading to a lumpy batter that bakes unevenly.
How do I ensure my mint brownie base is fudgy and not cakey?
Reduce the flour and fold gently until just combined. The high fat to flour ratio prevents gluten development, which keeps the texture dense and rich.
Can I substitute natural cocoa powder for the Dutch processed cocoa powder?
Yes, but the flavor and color will change. Natural cocoa powder is more acidic, resulting in a slightly lighter color and a tangier chocolate bite.
How to prevent the mint frosting from melting into the warm brownie base?
Cool the brownie base completely before applying any topping. Place the frosted layer into the refrigerator for at least 30 minutes before adding the final chocolate ganache.
Must I use parchment paper when baking these brownies?
No, but it is highly recommended for clean serving. Line the pan with an overhang sling so you can lift the entire cooled slab out before slicing.
Why did my chocolate ganache topping seize into a grainy paste?
A single drop of water broke the emulsion. Chocolate seizes when water interferes with the melted fat; ensure your tools are completely dry.
How long should I bake the brownies to achieve a chewy edge?
Bake for 25 minutes at 350°F, checking when the edges firm up. The center should still have a slight jiggle to ensure a chewy, fudgy texture upon cooling.
Easy Mint Brownies Recipe
Ingredients:
Instructions:
Nutrition Facts:
| Calories | 332 kcal |
|---|---|
| Protein | 2.1 g |
| Fat | 20.2 g |
| Carbs | 38.6 g |
| Fiber | 1.3 g |
| Sugar | 31.2 g |
| Sodium | 74 mg |
