Homemade Buttery Crescent Rolls

- Time: Active 30 minutes, Passive 2 hours 2 minutes, Total 2 hours 32 mins
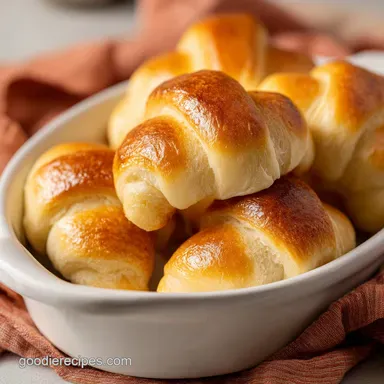
- Flavor/Texture Hook: Buttery, salt flecked, and pillowy soft
- Perfect for: Holiday dinners, family Sunday roasts, or beginner bread bakers
- Bake the Most Buttery Homemade Crescent Rolls
- Why You'll Love These Classic Rolls
- Everything to Know Before You Bake
- The Science Behind a Perfect Crumb
- Essential Ingredients for Better Bread
- Steps to Roll the Perfect Crescent
- Fixing Common Dough and Bake Issues
- Adjusting This Recipe for Larger Crowds
- Debunking Old School Bread Baking Tales
- Keep Your Rolls Fresh for Days
- Best Dishes to Pair With Rolls
- Recipe FAQs
- 📝 Recipe Card
Bake the Most Buttery Homemade Crescent Rolls
The first time I tried making these, the scent of the blooming yeast hit me like a warm hug from my grandmother. I remember standing in my tiny kitchen, watching the butter melt into the warm milk, feeling that quiet thrill of creating something from scratch.
There is nothing quite like the sound of a tray hitting the counter and that first roll being torn apart, releasing a puff of steam that carries the aroma of toasted flour and salt.
Honestly, I used to be terrified of yeast. I thought if I looked at it wrong, the whole batch would fail. But once you realize that yeast is just a living thing that needs a little warmth and sugar, the fear disappears.
These rolls have become a staple in our home because they bridge that gap between a quick fix and a labor of love. We've moved past the "can" and never looked back.
We are going to walk through this together so your kitchen smells just as incredible as mine did that first morning. You do not need fancy equipment or a professional bakery setup. Just some simple ingredients, a bit of patience for the rise, and a hungry family waiting at the table.
Trust me on this, once you see that golden brown crust shatter under your thumb, you will be hooked for life.
Why You'll Love These Classic Rolls
There is a reason why homemade crescent rolls are the crown jewel of any dinner spread. While we all have memories of the popping sound of a pressurized can, the scratch made version offers a depth of flavor that a factory simply cannot replicate.
Fat Induced Tenderness: The combination of whole milk and a half cup of melted butter interferes with gluten development just enough to ensure the rolls stay soft rather than chewy.
Controlled Fermentation: Using a full package of active dry yeast with a touch of sugar creates a robust rise that guarantees a light, airy interior even if your kitchen is a bit chilly.
Thermal Finish: Brushing the hot rolls with salted butter immediately after baking creates a savory glaze that softens the crust to a velvety finish.
The Science of the Spiral
The spiral shape isn't just for looks; it creates multiple layers of dough separated by thin films of fat. When the heat hits the oven, the moisture in the butter evaporates, forcing those layers apart and creating that signature flaky "shatter" when you bite in.
Fast vs Classic Comparison
| Feature | store-bought Tubed Dough | Homemade Crescent Rolls |
|---|---|---|
| Fat Source | Often palm oil or margarine | Pure unsalted butter |
| Texture | Uniformly soft, often greasy | Flaky exterior, pillowy interior |
| Flavor Profile | High sodium, chemical tang | Rich, yeasty, naturally sweet |
Building a meal around these rolls is easy because they pair so well with almost anything. If you are planning a big holiday spread, they sit perfectly next to a Broccoli Casserole recipe or even a festive Easter Bunny Cake recipe for dessert.
Everything to Know Before You Bake
Before we get our hands messy, let's talk about the logistics. This recipe is designed to be approachable, but bread baking thrives on precision. I have learned the hard way that "warm" water is a specific range, not just whatever comes out of the tap.
If it's too hot, you'll kill the yeast; too cold, and they'll never wake up.
- 1. Liquid Temperature
- Ensure your water and milk are between 40°C and 43°C (105°F to 110°F).
- 2. Dough Weight
- Each of the 16 rolls should weigh roughly 55 to 60 grams if you want them perfectly even.
- 3. Oven Heat
- 190°C (375°F) is the sweet spot for browning without drying out the center.
Budget Decisions for Best Results
| Ingredient | Budget Alternative | Flavor Impact | Savings |
|---|---|---|---|
| Unsalted Butter | Salted Butter | Slightly saltier (reduce added salt) | $0.50 |
| Whole Milk | 2% Milk + 1 tsp Oil | Slightly less rich mouthfeel | $0.20 |
| Active Dry Yeast | Instant Yeast | Faster rise, less "yeasty" aroma | Neutral |
The Science Behind a Perfect Crumb
Understanding what each ingredient does helps you troubleshoot on the fly. We aren't just mixing things together; we are building a structure that can hold air and fat in perfect harmony.
| Ingredient | Science Role | Pro Secret |
|---|---|---|
| Active Dry Yeast | Leavening agent | Feed it 1 tsp sugar to see it "bloom" faster. |
| All Purpose Flour | Protein structure | Sift it before measuring to avoid dense, heavy rolls. |
| Whole Milk | Hydration and fat | The lactose helps the crust turn a deep golden brown. |
| Large Egg | Emulsifier | Brings the fat and water together for a silky dough. |
I once made the mistake of using cold milk straight from the fridge. The dough took five hours to rise, and I ended up serving dinner at midnight. Lesson learned: temperature is your best friend when working with enriched doughs like these.
Essential Ingredients for Better Bread
You likely have most of this in your pantry right now. That is the beauty of this recipe it uses basic staples to create something that feels like a luxury.
- 1/4 cup warm water (105°F to 110°F): Why this? Essential for rehydrating and waking up the dry yeast granules.
- 2 1/4 tsp active dry yeast (1 package): The engine that drives the entire rise.
- 1/3 cup plus 1 tsp granulated sugar: Provides food for the yeast and a hint of sweetness.
- 3/4 cup warm whole milk: Adds fat for tenderness and sugars for browning.
- 1/2 cup unsalted butter, melted: Why this? Creates the "short" crumb that makes these melt in your mouth.
- 1 large egg, room temperature: Provides structure and a rich, golden color.
- 1 tsp salt: Tightens the gluten and balances the sweetness.
- 4.25 cups all purpose flour: The foundation; provides just enough protein for height.
- 2 tbsp salted butter, melted (for brushing): The final savory punch for the crust.
Substitution Guide
| Original Ingredient | Substitute | Why It Works |
|---|---|---|
| Whole Milk | Oat Milk (Full Fat) | Similar viscosity. Note: Adds a slight toasted grain flavor. |
| All Purpose Flour | Bread Flour | Higher protein. Note: Results in a chewier, more artisanal texture. |
| Unsalted Butter | Vegan Butter Sticks | High fat content. Note: Ensure it is a stick form, not a spread. |
Steps to Roll the Perfect Crescent

Right then, let's get to work. Clear off your counter and let's make some magic.
- Bloom the yeast. Combine 1/4 cup warm water, 1 tsp sugar, and 2 1/4 tsp yeast. Let it sit 5 minutes until it looks foamy and smells like a brewery.
- Combine wet ingredients. In your stand mixer, whisk 3/4 cup warm milk, 1/2 cup melted butter, 1/3 cup sugar, the egg, and 1 tsp salt. Note: Ensure the butter isn't hot enough to cook the egg.
- Add the flour. Pour in the 4.25 cups of flour gradually. Use the dough hook on low speed until the dough pulls away from the sides.
- Knead for silkiness. Keep the mixer running for 5-7 minutes. The dough should be tacky but not stick to your clean finger.
- Start the first proof. Place dough in a greased bowl, cover with a warm damp cloth, and let rise for 1 hours 30 mins until it has doubled in size.
- Punch and divide. Deflate the dough gently. Divide it into two equal balls. Roll each ball into a 12 inch circle on a lightly floured surface.
- Cut the triangles. Use a pizza cutter to slice each circle into 8 even wedges, like a pizza.
- The perfect crescent swirl. Starting at the wide end, roll the dough toward the point. Note: Tuck the point underneath so it doesn't pop up during baking.
- The second proof. Place on a parchment lined sheet. Cover and let rise for another 30 minutes until puffy and soft to the touch.
- Bake and glaze. Bake at 190°C (375°F) for 12 minutes until the tops are golden brown. Brush immediately with the 2 tbsp of melted salted butter.
Fixing Common Dough and Bake Issues
If things aren't looking quite right, don't panic. Bread dough is incredibly resilient, and most "mistakes" are still very edible.
Why My Rolls Are Dense
If your rolls feel more like hockey pucks than clouds, the culprit is usually the rise. Either the yeast was expired, the water was too hot, or you didn't let them proof long enough. In a cold kitchen, I like to put my rising dough inside the oven (turned off!) with a pan of boiling water on the rack below it.
The Triangles Won't Stay Rolled
This usually happens if you have too much flour on your work surface. The dough needs a little bit of "grip" to stay coiled. If they keep unraveling, dab a tiny drop of water on the tip of the triangle before pressing it into the roll.
| Problem | Root Cause | Solution |
|---|---|---|
| Bottoms burning | Dark baking sheet | Move rack up or use a silicone mat. |
| Dough is too sticky | High humidity | Add flour 1 tablespoon at a time. |
| Rolls look pale | Oven temp too low | Check oven with a separate thermometer. |
Common Mistakes Checklist
- ✓ Never skip the "bloom" step for active dry yeast; it confirms the yeast is alive.
- ✓ Avoid adding all the flour at once; different brands of flour absorb moisture differently.
- ✓ Don't rush the second rise; this is where the airy texture is actually created.
- ✓ Measure your flour by spooning it into the cup rather than scooping, which packs it down.
- ✓ Ensure the egg is at room temperature so it doesn't seize the melted butter.
Adjusting This Recipe for Larger Crowds
When the whole extended family shows up, 16 rolls won't last past the appetizers. You can easily scale this up, but keep a few things in mind.
Scaling Up (2x): If you double the recipe to make 32 rolls, you don't necessarily need to double the yeast perfectly. Two packets (4.5 tsp) are plenty. However, you will likely need to work in batches for the kneading process unless you have a professional grade mixer.
Reduce the total liquid by about 10% to prevent the dough from becoming too slack.
Scaling Down (1/2): Making 8 rolls is perfect for a small weeknight dinner. Use half an egg by beating it in a small bowl first, then measuring out 2 tablespoons. Use a smaller bowl for the rise so the dough doesn't dry out in a cavernous space.
Decision Shortcut: If you want extra flakiness, brush the triangles with butter before rolling them up. If you want a softer crust, cover the rolls with a clean towel immediately after they come out of the oven to trap the steam.
If you want a deeper flavor, let the dough rise in the fridge overnight for a slow, cold ferment.
Debunking Old School Bread Baking Tales
There is a lot of noise out there about what you "must" do with bread. Let's clear some of that up.
One common myth is that salt kills yeast instantly on contact. While a massive pile of salt directly on yeast isn't great, mixing them into the same bowl of flour is perfectly fine. The salt actually helps regulate the yeast so it doesn't grow too fast and collapse.
Another one I hear constantly is that you have to knead by hand to "feel" the dough. While that is a lovely sentiment, a stand mixer does a much more consistent job of developing the gluten structure without adding body heat to the dough. Don't feel guilty for using the tools you have!
Finally,, many people believe you can't use all purpose flour for "real" bread. In this recipe, the all purpose flour is actually superior to bread flour because we want a tender, delicate bite, not a chewy, crusty baguette texture.
Keep Your Rolls Fresh for Days
If you actually have leftovers (a rare occurrence at my house), you need to store them properly to maintain that velvety crumb.
Storage: Keep the rolls in an airtight container or a heavy duty zip top bag at room temperature for up to 3 days. Do not put them in the fridge; the cold temperature actually crystallizes the starches and makes bread go stale faster.
Freezing: These freeze beautifully! Once they are completely cool, wrap them individually in plastic wrap and then place them in a freezer bag. They will stay fresh for up to 2 months.
To reheat, just pop them in a 300°F (150°C) oven for 5-8 minutes until warm.
Zero Waste Tip: If you find yourself with a few rolls that have gone a bit hard, don't toss them! Cut them into cubes, toss them with a little olive oil and garlic salt, and bake them until crispy. They make the absolute best buttery croutons for a Caesar salad.
You can also pulse them in a food blender for fresh breadcrumbs that are far better than anything in a canister.
Best Dishes to Pair With Rolls
These crescent rolls are versatile enough to follow you from breakfast to dinner. I love serving them warm with a spread of honey butter or even a simple strawberry jam in the morning.
For dinner, they are the ultimate tool for swiping up gravy or sauce. They are the natural companion to a hearty beef stew or a roast chicken. If you are looking for a show stopping meal, try serving these alongside our Resurrection Rolls recipe during the holidays it is always a hit to have different textures on the table.
Because they are slightly sweet, they also balance out spicy dishes remarkably well. Try them with a kicky chili or a spiced lentil soup. The butteriness cuts through the heat and cleanses the palate between bites.
No matter how you serve them, the fact that they came from your oven and not a cardboard tube makes the whole meal feel special. Happy baking, my friend!

Recipe FAQs
Are croissants and crescent rolls the same thing?
No, they are distinctly different. Croissants require complex lamination folding butter repeatedly into the dough to create hundreds of ultra thin layers for maximum flakiness. Crescent rolls are simpler, enriched rolls relying on butter in the dough for tenderness, not extensive lamination.
How long to cook crescent rolls?
Bake for 12 minutes at 190°C (375°F). Ensure they are golden brown on top, as the baking time is short due to the relatively small size of the rolls.
Are crescent rolls just puff pastry?
No, they are fundamentally different structures. Puff pastry is a neutral dough layered purely with fat that puffs up dramatically when steam lifts the layers. Crescent rolls are a yeasted, enriched dough that rises before baking, resulting in a softer, bread like texture with some layered flakiness.
Who invented the crescent roll?
The true historical origin is debated, possibly Austrian or Hungarian. The modern crescent shape is widely credited to the Austrian Kipferl, which predates the French croissant, though the French popularized the laminated version.
What is the proper water temperature for activating yeast in this recipe?
Use liquid between 40°C and 43°C (105°F to 110°F). This warmth wakes up the yeast without killing it, ensuring a robust rise for an airy interior.
Can I substitute whole milk with a lower fat option?
Yes, you can substitute 2% milk, but add one teaspoon of oil. Whole milk fat contributes significantly to the final velvety mouthfeel; reducing the fat without replacement will result in a slightly less rich and tender roll.
How should I store leftovers to keep them soft?
Store in an airtight container at room temperature for up to three days. Avoid refrigeration, as the cold temperatures accelerate starch retrogradation, causing the rolls to go stale quickly.
Homemade Buttery Crescent Rolls
Ingredients:
Instructions:
Nutrition Facts:
| Calories | 212 kcal |
|---|---|
| Protein | 4.3 g |
| Fat | 8.3 g |
| Carbs | 30.5 g |
| Fiber | 0.9 g |
| Sugar | 4.4 g |
| Sodium | 158 mg |
