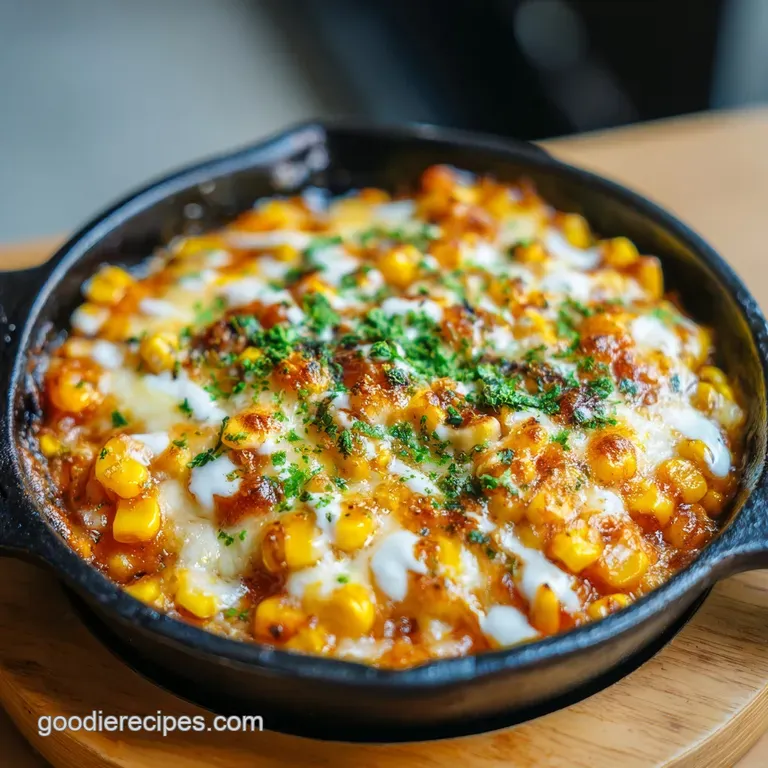
Korean Corn Cheese with Mozzarella: Caramelized and Creamy
- Time: Active 5 minutes, Passive 10 minutes, Total 15 minutes
- Flavor/Texture Hook: Charred sweetness meets a velvety, stretchy mozzarella pull
- Perfect for: Game nights, BBQ side dishes, or a quick midnight snack
- Perfecting the Korean Corn Cheese with Mozzarella
- Why This Cheesy Corn Recipe Actually Works
- Analyzing the Components for Maximum Flavor
- The Right Tools for the Job
- Building the Ultimate Korean Corn Cheese with Mozzarella
- Navigating Potential Kitchen Mishaps
- Adjusting the Recipe for Different Crowds
- Debunking Common Corn Cheese Misconceptions
- Storage Guidelines and Sustainable Kitchen Habits
- Creative Flavor Adaptations
- Serving Suggestions for the Best Experience
- Recipe FAQs
- 📝 Recipe Card
Perfecting the Korean Corn Cheese with Mozzarella
You know that specific disappointment when you order a side of corn cheese at a BBQ joint and it arrives as a lukewarm, soupy puddle of yellow kernels swimming in oil? It’s heartbreaking. I used to think the secret was just adding more cheese, but I realized the real culprit is moisture.
Canned corn is packed in brine, and if you don't fight that liquid from the start, your mozzarella never stands a chance of clinging to the kernels. It just slides off in a sad, greasy heap.
Get ready to fall in love with Korean Corn Cheese with Mozzarella, the dish you didn't know you needed in your life. I remember the first time I actually got this right in my own kitchen.
The aroma of the butter hitting the hot cast iron, mingling with the scent of garlic and the nutty smell of toasting corn, filled the entire house. It’s a sensory experience that starts long before the first cheese pull.
When you see those little mahogany colored charred bits on the corn, you know you've unlocked a level of flavor that most people skip.
This isn't just about melting stuff together; it’s about creating a cohesive, velvety bite that stays together on the chip or spoon. We are going to treat the corn like a steak, searing it to get that deep sweetness out.
If you've ever struggled with a sauce that breaks or corn that tastes "tinny" straight from the can, this is the targeted fix you’ve been looking for. We're going to use specific techniques to ensure the corn is snappy, the sauce is emulsified, and the cheese is charred to bubbly perfection.
Why This Cheesy Corn Recipe Actually Works
Moisture Evaporation: By dry toasting the corn kernels in a hot skillet before adding fat, we drive off the internal water that usually turns the dish into a soggy mess.
Emulsion Stability: The combination of sugar and high fat Kewpie mayonnaise creates a thick, clingy binder that resists breaking under the high heat of the broiler.
Aromatic Layering: Sautéing the garlic and onions in butter after the corn is dry ensures the flavors penetrate the kernels rather than just sitting on the surface.
Temperature Gradient: Using a lid to melt the cheese initially ensures the core stays hot and creamy while a final blast under the broiler creates those essential smoky charred spots.
| Method | Time | Texture | Best For |
|---|---|---|---|
| Stovetop + Broil | 15 minutes | Deeply charred spots and snappy corn | Maximum flavor and visual "wow" factor |
| Oven Bake Only | 22 minutes | Uniformly melted but less corn browning | Large batches for parties |
| Air Fryer | 12 minutes | Extremely crispy edges, slightly drier | Quick single serving snacks |
The difference between a good corn cheese and a legendary one usually comes down to how you handle the sugars in the corn. When you sear the kernels until they develop a light mahogany colored edge, you are concentrating the natural sweetness. This provides a necessary contrast to the salty, fatty mozzarella.
Without that sear, the dish can feel one dimensional and overly heavy. By following the 2 minute dry toast rule, you ensure every bite has a structural integrity that stands up to being scooped.
Analyzing the Components for Maximum Flavor
| Ingredient | Science Role | Pro Secret |
|---|---|---|
| Kewpie Mayonnaise | Provides a stable emulsion that doesn't "break" into oil at high temps | Use the Japanese version with egg yolks for a richer, custard like finish |
| Mozzarella | Offers a high moisture to protein ratio for that iconic "long stretch" | Buy a block and shred it yourself to avoid the powdery anti clumping agents |
| White Onion | Adds sulfurous depth and a subtle crunch to break up the creamy texture | Dice it smaller than the corn kernels so it blends into the sauce |
The choice of corn is also a major factor. While I always recommend a high-quality 15 oz can of whole kernel sweet corn, you can use frozen corn in a pinch. However, frozen corn contains even more internal water.
If you go that route, you’ll need to increase the dry toasting time by at least 3 minutes to ensure the pan doesn't become a steam bath. The goal is to hear that "pop" and "sizzle" which tells you the exterior of the kernel is caramelizing.
The Right Tools for the Job
To get that restaurant quality finish, you really need a vessel that holds heat. An 8 inch cast iron skillet is the gold standard here. Because it retains heat so efficiently, it keeps the cheese in a molten state for much longer once it hits the table.
If you use a thin stainless steel or non stick pan, the cheese tends to seize up and become rubbery within minutes of leaving the stove. Trust me, the cast iron makes a world of difference in the "stretch" factor.
If you’re planning to serve this as part of a larger spread, perhaps alongside some Mexican Street Corn Pasta Salad, having a heat resistant silicone spatula is also helpful. You’ll want something that can scrape the bottom of the pan to incorporate those brown bits (the fond) back into the mayo mixture. A fine mesh strainer is also non negotiable; you need to get every drop of that canning liquid off the corn before it touches the heat.
Building the Ultimate Korean Corn Cheese with Mozzarella
- Drain the corn. Pour the 15 oz can of sweet corn into a fine mesh strainer and let it sit for a minute. Press down with paper towels to remove every bit of surface moisture. Note: This prevents the corn from steaming instead of searing.
- Dry sear the kernels. Heat your 8 inch cast iron skillet over medium high heat. Toss in the dry corn no oil yet! and toast for 2 minutes. Cook until the steam stops rising and the corn looks matte.
- Sauté aromatics. Drop in the 1.5 tbsp unsalted butter, 2 tbsp diced white onion, and 1 clove of minced garlic. Sauté for 3-4 minutes until you smell the garlic and the onions turn translucent.
- Develop the color. Continue cooking the corn and aromatics until the kernels show light mahogany colored edges and a nutty aroma.
- Prepare the binder. While the corn is browning, whisk 3 tbsp Kewpie mayo, 1 tbsp sugar, 0.25 tsp salt, and 0.125 tsp black pepper in a small bowl.
- Create the emulsion. Drop the heat to medium low. Fold in the mayo mixture, stirring for 60 seconds. Wait until the sauce looks thick and glossy, coating every kernel.
- Layer the cheese. Flatten the corn into an even layer with your spatula. Sprinkle the 1.5 cups of mozzarella over the top, reaching all the way to the edges of the pan.
- Melt and bubble. Cover the pan with a lid for 2 minutes to trap the heat. The cheese should be completely melted and starting to wiggle.
- The final char. If you want those professional brown spots, pop the skillet under a broiler for 1-2 minutes. Watch closely until the cheese is bubbling and develops dark, charred spots.
- The finish. Remove from heat and immediately sprinkle with 1 tbsp chopped scallions and the optional 0.5 tsp gochugaru. Serve immediately while the aroma is at its peak.
Navigating Potential Kitchen Mishaps

Why Your Cheese is Rubbery and Tough
If you find that your cheese has the texture of an old tire rather than a silky cloud, it’s usually a temperature issue. Overheating mozzarella for too long causes the proteins to tighten up and squeeze out the fat. This is why we use the "melt then broil" two step method.
The lid melts it gently, and the broiler just kisses the top for color. If you leave it on the stove too long on high heat, you'll lose that velvety texture.
Why Your Sauce Looks Oily and Separated
This usually happens if the heat is too high when you add the mayonnaise. Mayonnaise is an emulsion of oil and egg; if it gets too hot, it "breaks," leaving you with a puddle of yellow oil at the bottom of the pan. Always drop your heat to medium low before stirring in the mayo mixture.
This ensures the sugar dissolves into the fats without the emulsion collapsing.
| Problem | Root Cause | Solution |
|---|---|---|
| Watery base | Corn wasn't dry enough | Pat dry and ensure a full 2 minute dry sear |
| Bland flavor | Not enough caramelization | Sauté corn until visible brown spots appear |
| Burnt garlic | Added too early | Ensure corn is toasted before adding butter/garlic |
Common Mistakes Checklist
- ✓ Never skip the paper towel pat down; moisture is the enemy of the sear.
- ✓ Don't use "light" or fat free mayonnaise; it won't emulsify and will turn into a watery mess.
- ✓ Use a lid to melt the cheese; this keeps the moisture in the corn so it stays juicy.
- ✓ Avoid pre shredded cheese if possible; the potato starch coating prevents a smooth melt.
- ✓ Serve in the same pan you cooked in to retain the essential heat for the cheese pull.
Adjusting the Recipe for Different Crowds
When you're scaling this recipe, keep in mind that the pan surface area is more important than the volume. If you want to double the recipe to 8 servings, don't just use a deeper pot. You need a larger 12 inch skillet to ensure the corn can still be seared in a relatively thin layer.
If the corn is too deep, the bottom will burn before the top moisture evaporates.
For a smaller portion (halving the recipe), use a 6 inch skillet or a small oven safe ramekin. Be careful with the cooking times; a smaller volume of corn will brown much faster usually 20% quicker than the standard recipe. If you're looking for a different cheesy main to pair this with, my Baked Cream Cheese Chicken is a fantastic companion that shares that similar rich, creamy profile.
Debunking Common Corn Cheese Misconceptions
One myth I hear constantly is that you must use fresh corn off the cob for the best results. While fresh corn is great, canned sweet corn actually has a higher sugar content and a consistent texture that works better for this specific "anju" (Korean drinking snack) style.
The canning process slightly softens the hulls, which allows the mayo and cheese to integrate more deeply into the kernel.
Another misconception is that the sugar is optional. I’ve tried making it without the granulated sugar, and it just doesn't taste like the authentic street food version. The sugar isn't just for sweetness; it aids in the caramelization process during that short broil and balances the saltiness of the mozzarella.
Don't skip it it’s the secret to that "addictive" quality people rave about.
Storage Guidelines and Sustainable Kitchen Habits
Storage
- Fridge: Store leftovers in an airtight container for up to 3 days.
- Freezer: I don't recommend freezing this dish. The mayonnaise and mozzarella will separate upon thawing, resulting in a grainy, oily texture that is nearly impossible to fix.
- Reheating: The best way to revive this is in a skillet over low heat with a splash of milk to loosen the sauce. Avoid the microwave if you can, as it tends to make the cheese rubbery.
Zero Waste Tips
Don't throw away the liquid from the canned corn! It’s actually full of flavor. You can save it in a jar in the freezer and add it to your next vegetable soup or use it as a base for a corn chowder. Also, if you have leftover scallion whites, don't toss them dice them up and sauté them along with the onions for extra depth. If you find yourself with extra mozzarella, it works perfectly on a Chicken Alfredo Pizza, which also happens to be ready in about 30 minutes.
Creative Flavor Adaptations
For a Spicy Street Food Kick
If you want to move away from the purely sweet and salty profile, try adding 1 teaspoon of Gochujang (Korean chili paste) to the mayo mixture. This will turn the sauce a beautiful orange hue and add a fermented, spicy depth that cuts through the richness of the mozzarella.
This version is particularly good when served alongside grilled meats or cold beer.
For an Easy Korean Corn Cheese Air Fryer Version
You can actually make this in an air fryer if you're in a hurry. Mix the drained corn, butter (melted), aromatics, and mayo mixture in a small oven safe dish. Air fry at 375°F (190°C) for 8 minutes, then top with cheese and fry for another 3-4 minutes until golden.
It won't have the same deep sear as the cast iron, but it's a brilliant shortcut for a quick afternoon snack.
Serving Suggestions for the Best Experience
The most important rule of serving this dish is timing. You have about a 5 to-7 minute window of "peak stretch" before the cheese begins to firm up. I always bring the skillet directly to the table on a thick wooden trivet. It keeps the party vibe alive and ensures the cast iron stays hot.
Pair this with something crunchy. While a spoon works, sturdy tortilla chips, toasted baguette slices, or even saltine crackers are the way to go. The contrast between the crunch of a chip and the velvety, stretchy cheese is exactly what makes this dish so satisfying.
If you're serving this as a side dish, it goes beautifully with spicy fried chicken or a zesty salad to balance out the decadence. No matter how you serve it, just make sure you’re ready for the inevitable request for a second batch it disappears faster than you'd think!

Recipe FAQs
Is it true I must use fresh corn instead of canned for the best texture?
No, this is a common misconception. Canned corn works perfectly as long as you drain it through a fine mesh strainer and pat it thoroughly dry with paper towels to prevent steaming.
Can I use light or low-fat mayonnaise?
No, stick with full fat Kewpie mayonnaise. low-fat versions lack the necessary fat content to form a stable emulsion, which will cause your corn mixture to become a watery mess instead of creamy.
How to achieve the signature charred, mahogany colored edges on the corn?
Toast the corn in a preheated cast iron skillet over medium high heat for 10 minutes before adding other ingredients. This high heat technique removes surface moisture, allowing the kernels to brown and develop flavor rather than boiling in their own juices.
Is it necessary to shred my own mozzarella block?
Yes, I highly recommend shredding your own cheese. Pre-shredded varieties are coated in potato starch to prevent clumping, which interferes with the smooth, stretchy melt required for this dish.
How to prevent the cheese from burning before the corn is heated through?
Cover the skillet with a lid for 2 minutes after adding the cheese. This traps the heat and steam, melting the mozzarella gently and evenly without the direct, aggressive heat of the broiler.
Can I prepare this ahead of time for a party?
No, this dish should be served immediately. The magic of the recipe is the hot, stretchy cheese pull, which is best experienced right out of the skillet while the temperature is optimal.
How to apply the emulsification technique used here to other creamy dishes?
Whisk your fats and seasonings over low heat until the mixture thickens into a uniform sauce. If you enjoyed mastering this creamy base, apply the same sauce binding technique to achieve a cohesive, rich finish in our pasta bakes.
Korean Corn Cheese

Ingredients:
Instructions:
Nutrition Facts:
| Calories | 292 kcal |
|---|---|
| Protein | 11.4 g |
| Fat | 21.1 g |
| Carbs | 14.1 g |
| Fiber | 1.4 g |
| Sugar | 6.2 g |
| Sodium | 385 mg |
