Lucky Charms Treat with Marshmallows Recipe
- Time: Active 10 minutes, Passive 5 minutes, Total 15 minutes
- Flavor/Texture Hook: Velvety marshmallow pull with a salty, vanilla bean finish
- Perfect for: School bake sales, nostalgic weekend cravings, or beginner friendly gifting
- Achieving the Softest Lucky Charms Treat with Marshmallows Ever
- Understanding the Core Recipe Specs for Ultimate Snack Success
- A Deep Dive into High Quality Ingredients and Smart Substitutes
- Essential Kitchen Equipment for Creating No Bake Cereal Bars
- From Prep to Plate with Step by Step Culinary Precision
- Pro Level Tips and Common Pitfalls to Avoid Every Time
- Creative Flavor Twists and Swaps for Your Cereal Treats
- Safe Storage and Reheating Methods for Longevity and Freshness
- Flavorful Pairing Ideas to Complete Your Sweet Dessert Spread
- Recipe FAQs
- 📝 Recipe Card
Achieving the Softest Lucky Charms Treat with Marshmallows Ever
The second that butter hits the pan and starts to sizzle, your kitchen transforms. I remember the first time I tried making these, thinking I could just eyeball the ratios like my mom did. Total disaster. I ended up with a brick so hard it could have been used as a doorstop.
But then, I caught that aroma the nutty, toasted scent of grass fed butter mingling with high end vanilla. It changed everything. We aren't just melting sugar here; we're creating a suspension of joy.
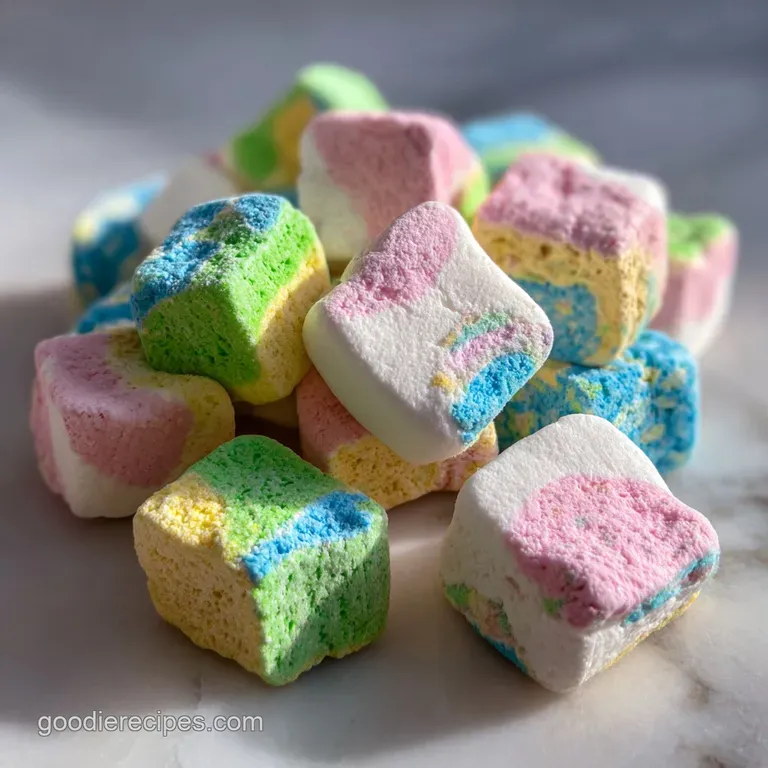
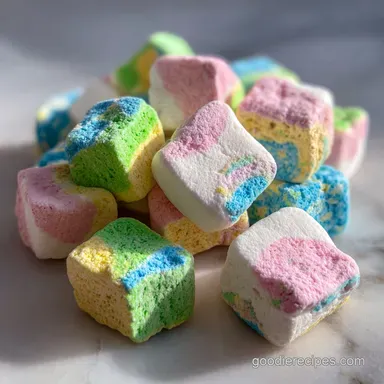
Trust me, there is a specific kind of magic when you fold that iconic cereal into a pool of melted white clouds. You've seen the store-bought ones, right? They're fine in a pinch, but they lack that "shatter" when you bite in, followed immediately by a chewy, velvety center.
This recipe is my love letter to that contrast. It’s about the pops of color from the "marbits" and the way a tiny pinch of flaky salt cuts right through the sweetness.
I’ve spent countless Saturday mornings tinkering with this Lucky Charms Treat with Marshmallows recipe to get the "marshmallow math" just right. We’re going to use two different types of marshmallows and a specific temperature technique that I swear by.
It’s the difference between a snack that’s "okay" and one that has your friends texting you for the recipe before they've even finished their first square. Let's get into the nitty gritty of why this works.
Understanding the Core Recipe Specs for Ultimate Snack Success
The Gelatin Lattice: Marshmallows are essentially a stabilized foam that, when melted slowly, creates a flexible sugar lattice that coats the cereal without making it soggy.
The Emulsion Bridge: Butter acts as a lubricant and flavor carrier, preventing the sugar from crystalizing into a hard, brittle mess as it cools.
Thermal Residual Setting: Using residual heat to melt the final third of marshmallows ensures they don't over cook, which is the secret to that legendary cheese pull stretch.
Moisture Retention: The vanilla bean paste isn't just for flavor; the tiny amount of alcohol and moisture helps keep the sugar matrix from drying out too quickly.
| Method | Time | Texture | Best For |
|---|---|---|---|
| Stovetop | 15 minutes | Maximum stretch and velvety pull | The gold standard for quality |
| Microwave | 8 minutes | Denser, slightly more firm | Quick cravings with zero cleanup |
| Brown Butter | 20 minutes | Nutty, deep, and sophisticated | Adult palates and dinner parties |
When you're deciding which path to take, remember that heat is the enemy of a soft treat. If you choose the stovetop method, you have total control over the "melt point." Much like the technique used in our Churro Rice Krispie recipe, the goal is to stop the heat just before every single lump disappears. This ensures the sugars stay pliable rather than turning into a hard candy shell.
A Deep Dive into high-quality Ingredients and Smart Substitutes
| Ingredient | Science Role | Pro Secret |
|---|---|---|
| Grass Fed Butter | Provides the fat to sugar ratio needed for a soft bite. | Use European style butter for higher fat content and less water. |
| Vanilla Bean Paste | Adds aromatic depth and tiny black specks for a gourmet look. | Paste is thicker than extract, adding flavor without thinning the "glue." |
| Flaky Sea Salt | Acts as a flavor enhancer that balances the high glycemic load. | Don't mix it in; sprinkle it on top so the tongue hits it first. |
The Cereal Base
6 cups (200g) Lucky Charms Cereal. Why this? The toasted oat pieces provide a sturdy structural contrast to the soft marshmallows.Substitute: Any toasted oat cereal, though you'll miss the iconic shapes.
The Velvety Binder
10 oz (283g) Fresh Mini Marshmallows, divided. Why this? Dividing them allows for both a smooth binder and whole gooey pockets.Substitute: 7 oz of marshmallow fluff, though it will be significantly stickier and harder to press.
The Finishing Touches
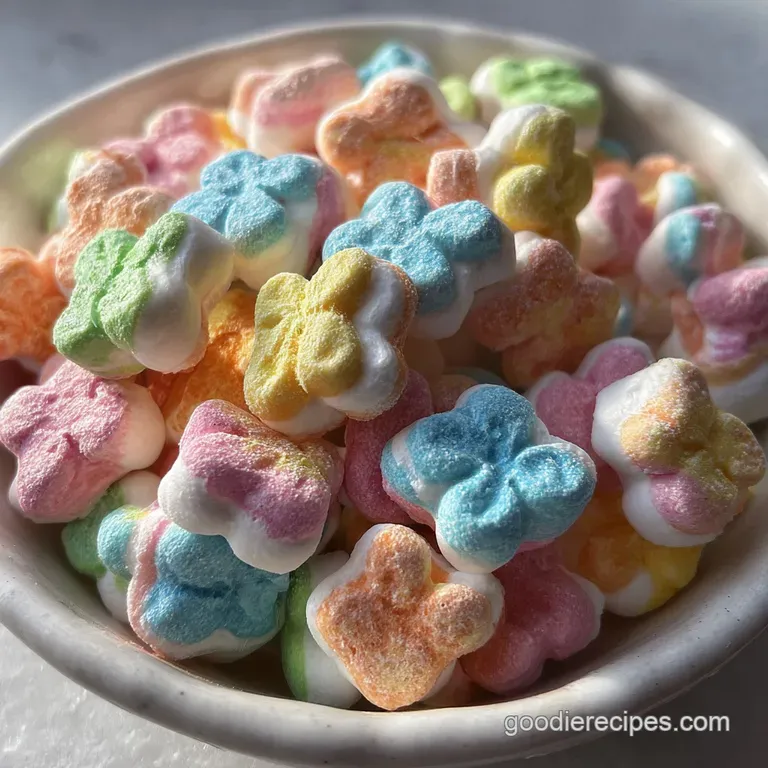
1 cup (50g) Mini Lucky Charms Marshmallows (dehydrated bits). Why this? These add a specific crunch that the fresh marshmallows lack.Substitute: Extra fresh mini marshmallows if you can't find the separated dehydrated ones.
Essential Kitchen Equipment for Creating No Bake Cereal Bars
You don't need a professional kitchen to pull this off, but a few specific tools make the process less of a sticky nightmare. First, a large, heavy bottomed pot is non negotiable. I use a 6 quart Dutch oven because the thick walls distribute heat evenly, preventing the butter from scorching while the marshmallows take their sweet time to melt.
A 9x9 inch square baking pan is the target size for this specific quantity. If you go larger, your bars will be thin and lose that satisfying height. I always line my pan with parchment paper, leaving a slight overhang on the sides.
This "sling" method lets you lift the entire block out once it's set, making it infinitely easier to get clean, professional cuts.
Finally,, get yourself a silicone spatula. Wooden spoons are classic, but marshmallows love to cling to wood fibers. A over high heat silicone spatula will allow you to scrape every last bit of gooey goodness from the pot into the pan.
If you find the mixture is still sticking to the spatula while you're pressing it down, a quick mist of non stick spray on the tool is a total lifesaver.
From Prep to Plate with step-by-step Culinary Precision
Phase 1: The Golden Foundation
Melt 1/2 cup (113g) Unsalted Grass Fed Butter in your large pot over low heat. Note: Keep the heat low to prevent the butter from separating or browning too quickly.
Phase 2: The Marshmallow Melt
Add 7 oz of the Fresh Mini Marshmallows to the melted butter. Stir continuously until the mixture is smooth and resembles liquid silk.
Phase 3: The Flavor Infusion
Stir in 1 tsp Pure Vanilla Bean Paste and 1/4 tsp of the Flaky Sea Salt. Note: Adding the salt now ensures even distribution of the base flavor.
Phase 4: The Gentle Fold
Remove the pot from the heat and immediately dump in the 6 cups (200g) Lucky Charms Cereal. Fold gently until every oat piece is glistening and coated.
Phase 5: The Secondary Textures
Fold in the remaining 3 oz of Fresh Mini Marshmallows and 1/2 cup of the dehydrated Lucky Charms Marshmallows. Note: We do this off heat so these pieces stay mostly intact for texture.
Phase 6: The Soft Touch Set
Transfer the mixture to your prepared 9x9 inch pan. Press down with very light pressure until the surface is level but still airy.
Phase 7: The Final Garnish
Press the remaining 1/2 cup of dehydrated marshmallows into the top. Sprinkle with the remaining 1/4 tsp Flaky Sea Salt until the colors pop against the white marshmallow.
Phase 8: The Cooling Wait
Let the treats sit at room temperature for at least 30 minutes. until the internal structure feels firm yet springy to the touch.
Pro Level Tips and Common Pitfalls to Avoid Every Time
Chef's Tip: Freeze your dehydrated marshmallow bits for 10 minutes before folding them in. This prevents them from softening too much when they hit the warm cereal mixture, keeping that signature "crunch" intact.
One unconventional trick I learned after a decade of making these: use buttered hands. When it's time to press the mixture into the pan, don't use a tool. Rub a little bit of butter on your palms and fingers. You can feel the density of the bars as you press, ensuring you don't pack them too tightly.
If you over compress, the treats lose their air pockets and become difficult to chew.
Another secret is the "residual heat" rule. I always turn the stove off when there are still a few small lumps of marshmallow visible. The heat from the pot and the butter will finish the job. This keeps the sugar temperature lower, which is the primary factor in maintaining a soft, pull apart texture.
If you keep the heat on until it's a boiling liquid, you've essentially made a hard caramel, which will result in a brittle bar once cooled.
Why Your Treat with Marshmallows Turned Hard
This is almost always a result of high heat or over mixing. When sugar is heated too much, it reaches the "hard ball" stage. Plus,, if you pack the mixture into the pan like you're tamping down wet concrete, it will eat like concrete.
| Problem | Root Cause | Solution |
|---|---|---|
| Hard/Brittle Bars | Sugar was overheated or bars were packed too tight. | Use the lowest heat possible and a gentle "light touch" when pressing. |
| Soggy Cereal | The marshmallow mixture had too much water/moisture. | Ensure you are using fresh, high-quality marshmallows and not old, humid ones. |
| No Marshmallow Pull | Ratio of cereal to marshmallow was too high. | Verify measurements; 10 oz of marshmallows is the minimum for 6 cups of cereal. |
Common Mistakes Checklist
- ✓ Never use old, stale marshmallows; they won't melt into a smooth emulsion.
- ✓ Use a large enough pot to allow for vigorous folding without crushing the cereal.
- ✓ Stop pressing the mixture the moment the surface looks even.
- ✓ Wait for the treats to cool completely before slicing to ensure clean edges.
- ✓ Use vanilla bean paste instead of extract for a more concentrated, less watery flavor.
Creative Flavor Twists and Swaps for Your Cereal Treats
If you want to take this to the next level, consider browning the butter first. This adds a toasted, nutty aroma that pairs beautifully with the oat cereal. Just cook the butter for an extra 3-5 minutes until you see little brown specks at the bottom and it smells like hazelnuts. This technique is similar to how we develop flavor in our Coconut Cookies in recipe, where the fat provides more than just moisture.
For those looking for a budget friendly option, you can absolutely use store brand cereal and generic mini marshmallows. However, if you choose the budget route, don't skip the vanilla and sea salt.
Those two "premium" additions act as the mask for the simpler base ingredients, providing the high end finish that makes these feel like they came from a boutique bakery.
- If you want a "Birthday Cake" vibe, add 1 tablespoon of rainbow sprinkles during the final fold.
- If you want a richer finish, melt 1/2 cup of white chocolate chips and drizzle it over the top before the salt.
- If you want more crunch, add 1/2 cup of toasted slivered almonds to the cereal mix.
| Premium | Budget | Flavor Impact | Savings |
|---|---|---|---|
| Vanilla Bean Paste | Vanilla Extract | Paste has more intense "pods" flavor | Save $4-6 |
| Grass Fed Butter | Standard Salted Butter | Grass fed is creamier and more yellow | Save $2-3 |
| Name Brand Cereal | Generic Toasted Oats | Name brand has specific "marbit" shapes | Save $1-2 |
Safe Storage and Reheating Methods for Longevity and Freshness
These treats are best within the first 24 hours, but they’ll stay surprisingly soft for up to 3 days if stored correctly. The key is an airtight container. If air gets to them, the marshmallows will begin to dehydrate and the cereal will lose its crunch.
I like to place a small piece of wax paper between layers so they don't fuse into one giant block.
If you find that your treats have firmed up more than you’d like, don't toss them! A quick 5-8 second blast in the microwave on a paper towel will revive that marshmallow pull perfectly. Just don't go any longer, or the sugar will melt and turn into a sticky mess that’s impossible to handle.
For zero waste tips, take any leftover cereal dust at the bottom of the bag and save it in a jar. It makes a fantastic topping for vanilla ice cream or a "crust" for French toast. If you have small scraps from trimming the edges of your treats, chop them up and fold them into a batch of brownie batter for a "trash can brownie" experience that kids absolutely love.
Flavorful Pairing Ideas to Complete Your Sweet Dessert Spread
Since these Lucky Charms bars are unapologetically sweet, I like to pair them with something that offers a sharp contrast. A cold glass of whole milk is the classic choice, but if you're serving these at a brunch or a party, a strong, bitter espresso or a dark roast coffee works wonders to balance the sugar.
The tannins in the coffee cut right through the buttery marshmallow coating.
If you're building a dessert board, these look stunning next to fresh berries like raspberries or tart green apple slices. The acidity of the fruit cleanses the palate between bites of the rich, chewy treat.
I’ve also seen people serve these alongside a savory snack like salty pretzels or roasted nuts to hit that "sweet and salty" craving that everyone seems to have.
Finally, for the ultimate "cereal lover" experience, try serving a square of this treat at the bottom of a bowl, then pouring a little bit of cold milk over it. It sounds strange, but the treat stays crunchy while the milk picks up all that vanilla and marshmallow flavor.
It's like a deconstructed bowl of cereal that feels way more indulgent.
- Myth
- You must use high heat to melt marshmallows faster. Truth: High heat causes the sugar to crystallize and the treats to become rock hard once they cool down to room temperature.
- Myth
- Marshmallow fluff is a 1:1 replacement for mini marshmallows. Truth: Fluff lacks the gelatin stability of whole marshmallows, resulting in a treat that often collapses or becomes overly gooey and messy.
- Myth
- You can't freeze cereal treats. Truth: You can freeze them for up to 2 months if wrapped tightly in plastic wrap and stored in a freezer bag; just thaw at room temp for 15 minutes before eating.

Recipe FAQs
Do they make Lucky Charms with just the marshmallows?
Yes, General Mills sells them separately. They are marketed as "Lucky Charms Frosted Toasted Oat Cereal Marshmallows Only" or often called "Marbits" by fans.
Are Lucky Charms basically cheerios with marshmallows?
No, they are distinct cereals despite sharing an oat base. Lucky Charms use a toasted oat cereal base, while Cheerios are plain, puffed oat rings; the sugar coating and marbits differentiate them significantly.
How do you make Lucky Charms marshmallow squares?
Melt butter and marshmallows gently over low heat until smooth, then remove from heat and immediately fold in the cereal until coated.
Press the mixture lightly into a prepared pan, garnish quickly, and allow it to cool completely at room temperature before slicing into squares.
Was Lucky Charms the first cereal with marshmallows?
No, it was not the first cereal to feature marshmallows. That distinction generally goes to Sugar Smacks or a similar early, heavily sweetened oat product, although Lucky Charms popularized the concept.
What is the key to making sure my cereal treats stay soft and chewy?
Avoid overheating the marshmallow mixture. You must cook the butter and marshmallows only until they form a smooth emulsion, stopping the heat before the sugar begins to boil or caramelize.
Also, avoid pressing the mixture too firmly into the pan, as compaction removes the air pockets that keep the bars tender.
Can I substitute regular marshmallows for mini marshmallows in the binder?
Yes, but you must adjust the melting time. Use the same weight of standard marshmallows, but expect them to take 1-2 minutes longer to fully incorporate into the melted butter base.
Should I add salt to my Lucky Charms treats?
Yes, adding a pinch of flaky sea salt is highly recommended. It doesn't make the bar salty; rather, the salt cuts through the intense sweetness, enhancing the vanilla and toffee notes in the toasted oats.
Lucky Charms Marshmallow Treats
Ingredients:
Instructions:
Nutrition Facts:
| Calories | 179 kcal |
|---|---|
| Protein | 1.2 g |
| Fat | 6.6 g |
| Carbs | 29.7 g |
| Fiber | 1.0 g |
| Sugar | 18.7 g |
| Sodium | 87 mg |
