Purple Velvet Cake: Moist and Silky
- Time: Active 25 minutes, Passive 30 minutes, Total 55 minutes
- Flavor/Texture Hook: Silky, tight crumb with a tangy, cocoa kissed finish and velvety frosting.
- Perfect for: Birthday celebrations, budget conscious parties, or weekend baking projects.
- Achieving the Most Vibrant Purple Velvet Cake Results
- The Logic Behind the Texture and Hue
- Understanding Your Primary Components
- Technical Specifications for the Perfect Bake
- Elements Required for Success
- Necessary Kitchen Tools
- Detailed Preparation Guidelines
- Correcting Common Baking Obstacles
- Creative Adjustments and Flavor Swaps
- Scaling for Large or Small Crowds
- Debunking Common Velvet Baking Beliefs
- Proper Storage and Zero Waste Tips
- Perfect Pairings for Your Dessert
- Recipe FAQs
- 📝 Recipe Card
Achieving the Most Vibrant Purple Velvet Cake Results
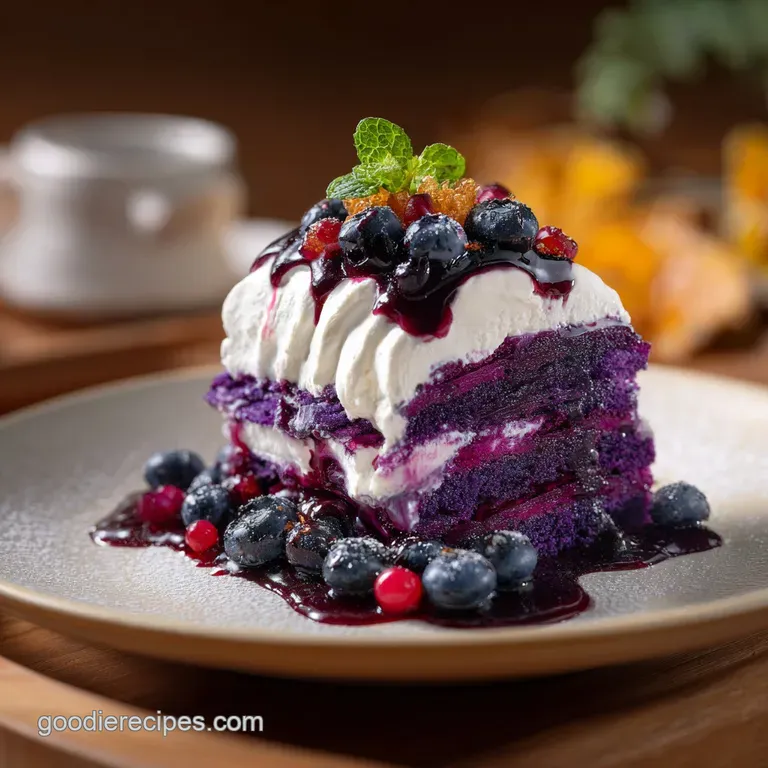
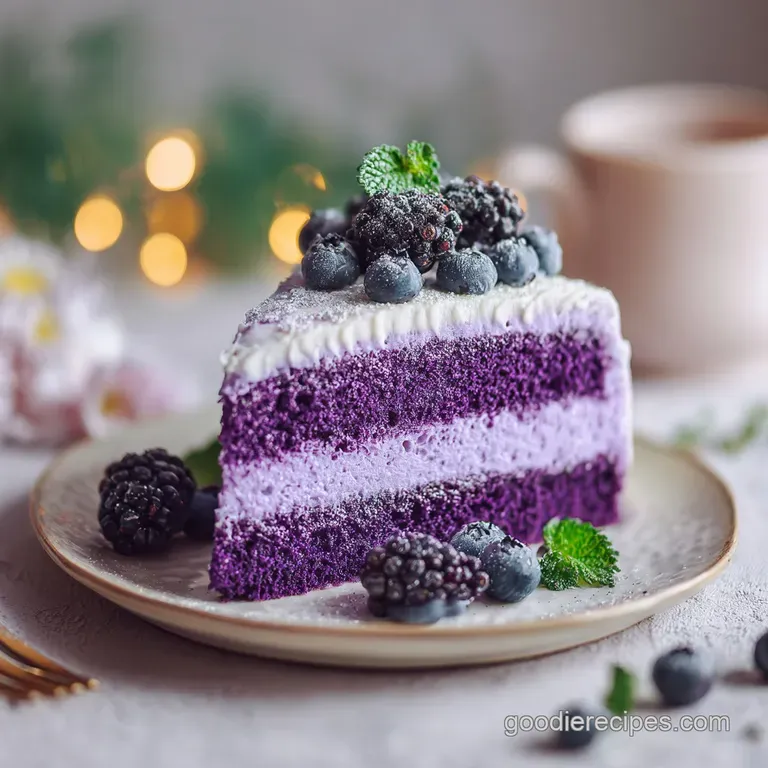
The moment you pull this Purple Velvet Cake from the oven, your kitchen fills with the scent of warm vanilla and just a whisper of cocoa. I remember the first time I tried a version of this at a local bake sale; it stood out like a royal gem among rows of beige pound cakes.
The color was striking, but the texture is what actually caught me off guard. It wasn't just a dyed sponge cake. It had that specific, tight knit crumb that actually feels like velvet on the tongue.
What makes this specific version work so well, especially when you're watching your grocery budget, is the clever use of unsweetened applesauce. I started using it as a swap years ago when I ran out of oil, and I realized it actually creates a more delicate structure than oil alone.
It keeps the cake incredibly moist without that oily film that can sometimes coat the roof of your mouth. It's a smart little secret that saves a few cents and improves the final bite.
We aren't just making a "purple cake" here. We are leaning into the classic "velvet" tradition, where the interaction of ingredients creates a specific mouthfeel. Most people think the cocoa is just for flavor, but it's actually there to provide a tiny bit of acidity and structure.
When that hits the buttermilk and the vinegar, magic happens. You get a cake that is sturdy enough to stack but soft enough to melt away the second you take a bite.
The Logic Behind the Texture and Hue
Understanding how these ingredients interact helps you avoid a heavy or dull result. Here is how we get that plush finish without spending a fortune on specialty flours.
- Acidic Tenderizing: The combination of buttermilk and distilled white vinegar breaks down the gluten strands in the all purpose flour. This creates a crumb that is soft and fine rather than chewy like a bread roll.
- Starch Suspension: By using applesauce, we introduce pectin and moisture that holds the starch molecules in place. This prevents the cake from drying out, even if you leave it on the counter for a few hours.
- Pigment Stabilization: The cocoa powder adds a dark base that helps the purple gel food coloring look rich and royal. Without that tiny bit of cocoa, the purple can often look neon or artificial.
- Carbon Dioxide Burst: The baking soda reacts instantly with the vinegar and buttermilk, creating tiny air pockets. This gives the cake its lift and prevents it from becoming a dense, purple brick.
| Servings | Ingredient Adjustment | Pan Size | Cook Time |
|---|---|---|---|
| 6 people | Use 0.5x all ingredients | One 8 inch round | 25-28 minutes |
| 12 people | Follow official quantities | Two 8 inch rounds | 30 minutes |
| 24 people | Use 2x all ingredients | Four 8 inch rounds | 32-35 minutes |
Choosing the right pan size is the first step toward success. If you try to bake the full 12 serving batch in one deep pan, the outside will dry out before the center sets. Stick to the two pan method for that even, velvety bake every single time.
Understanding Your Primary Components
Before we reach for the mixing bowl, let's look at why these specific items are on your counter. Each one has a job to do that goes beyond just filling the pan.
| Ingredient | Science Role | Pro Secret |
|---|---|---|
| Buttermilk | Tenderizer | Always use room temperature to ensure the fats don't seize up during mixing. |
| Applesauce | Moisture Lock | Use unsweetened to keep the sugar levels balanced and the crumb exceptionally soft. |
| Gel Food Coloring | Pigment Density | Gel is more concentrated than liquid, so it won't thin out your batter or ruin the rise. |
| Distilled Vinegar | Leavening Agent | This provides the final "kick" to the baking soda for a perfectly leveled cake top. |
A small tip from my kitchen to yours: if you only have liquid food coloring, you'll likely need the whole bottle, and even then, the color might fade. Gel is the way to go for that deep, regal purple.
Technical Specifications for the Perfect Bake
When I talk about "velvet" cake, I'm talking about a very specific set of numbers. Consistency is what separates a good cake from one that people will still be talking about next month.
We are aiming for a cake that is exactly 175°C (350°F) in the oven to ensure the edges don't crisp up too much before the middle is done.
The total time of 55 minutes is split between 25 minutes of prep and 30 minutes in the oven. Do not rush the cooling phase. If you try to frost a cake that is even slightly warm, that cream cheese frosting will turn into a puddle, and your beautiful purple layers will slide right off the plate.
I've made that mistake more than once in a hurry, and trust me, it's heartbreaking.
Elements Required for Success
Gather everything on your counter before you start. There is nothing worse than realizing you're out of vinegar when the batter is already half mixed.
- 315g all purpose flour: This provides the structure. Sift it to avoid lumps.
- 250g granulated cane sugar: For sweetness and moisture retention.
- 1 tbsp unsweetened cocoa powder: This is the "secret" to the velvet flavor profile.
- 1 tsp baking soda: Our primary lifting agent.
- 0.5 tsp salt: To balance the sweetness of the frosting.
- 240ml buttermilk: Room temperature is essential here.
- 180ml vegetable oil: Provides a reliable, soft fat source.
- 60g unsweetened applesauce: Our budget smart moisture booster.
- 2 large eggs: Room temperature helps them emulsify better.
- 1 tsp distilled white vinegar: Reacts with the soda for lift.
- 2 tsp vanilla bean paste: For those beautiful little black specks and deep flavor.
- 1.5 tsp purple gel food coloring: Adjust slightly if you want a lighter lavender.
- 450g reduced fat cream cheese: Softened for a smooth, spreadable frosting.
- 115g unsalted butter: Softened to mix perfectly with the cheese.
- 240g powdered sugar: Sifted to ensure zero grittiness.
- 1 tsp vanilla extract: For the frosting flavor.
- 1 pinch sea salt: To cut through the sugar in the frosting.
If you find yourself missing buttermilk, don't panic. You can make a quick version by adding a tablespoon of lemon juice to 240ml of regular milk and letting it sit for 10 minutes. It won't be quite as thick, but it gets the job done for this Purple Velvet Cake without a trip to the store.
Necessary Kitchen Tools
You don't need a professional kitchen to pull this off, but a few specific tools will make your life much easier.
- Two 8 inch round cake pans: These are the standard for a classic double layer look.
- Parchment paper: This is non negotiable. It ensures the cakes release perfectly every time.
- Large mixing bowl: For your dry ingredients.
- Medium mixing bowl: For your wet ingredients.
- Fine mesh sieve: For sifting the flour, cocoa, and powdered sugar.
- Silicone spatula: Perfect for folding the batter gently.
- Hand mixer or stand mixer: Essential for getting the frosting light and fluffy.
- Wire cooling rack: Helps air circulate around the cakes so they cool evenly.
Using a kitchen scale to measure your flour and sugar in grams will always give you a better result than using cups. A cup of flour can vary by as much as 20g depending on how you pack it, which can be the difference between a velvety cake and a dry one.
Detailed Preparation Guidelines
Follow these steps closely to ensure your Purple Velvet Cake has the perfect texture and color.
- Preheat your oven to 175°C (350°F). Grease two 8 inch round cake pans and line the bottoms with parchment paper. Note: Parchment is the only way to guarantee the cake won't stick.
- In a large bowl, sift together the 315g all purpose flour, 250g sugar, 1 tbsp cocoa powder, 1 tsp baking soda, and 0.5 tsp salt. Whisk to ensure even distribution.
- In a separate medium bowl, whisk together the 240ml buttermilk, 180ml oil, 60g applesauce, 2 eggs, 1 tsp vinegar, 2 tsp vanilla bean paste, and 1.5 tsp purple gel food coloring until the color is uniform.
- Gradually add the wet ingredients to the dry ingredients. Use a silicone spatula to fold the mixture together until just combined. Note: Do not overmix or you will lose the delicate velvet texture.
- Divide the batter equally between the two prepared cake pans. Tap the pans on the counter twice until you see small air bubbles pop on the surface.
- Bake for 30 minutes until a toothpick inserted into the center comes out clean. Cool in the pans for 10 minutes before transferring to a wire rack to cool completely.
- Prepare the frosting by beating the 450g softened cream cheese and 115g butter together until silky and pale. Gradually add 240g sifted powdered sugar, 1 tsp vanilla extract, and a pinch of sea salt, beating until light and fluffy.
- Once cakes are entirely cool, frost the top of one layer, stack the second layer on top, and cover the exterior with the remaining cream cheese frosting.
Chef's Tip: If your kitchen is warm, pop the frosting in the fridge for 15 minutes before you start decorating. This helps it hold its shape and prevents "crumb tearing" while you spread.
Correcting Common Baking Obstacles
Even the best of us have days where the oven behaves badly or a measurement goes slightly wonky. Most of the time, these issues are easy to spot before they ruin your dessert.
My Cake Texture is Heavy or Dense
If your cake feels more like a muffin than velvet, you likely over stirred the batter. Once the flour hits the wet ingredients, the clock starts on gluten development. You want to stop mixing the second the last streak of flour disappears.
Another culprit could be cold ingredients; if the eggs or buttermilk were straight from the fridge, they won't emulsify properly with the oil, leading to a "clumpy" batter that doesn't rise well.
| Problem | Root Cause | Solution |
|---|---|---|
| Cake sinks in middle | Oven door opened too early | Wait at least 25 minutes before checking. |
| Frosting is runny | Butter was too soft/melted | Chill frosting for 20 minutes before using. |
| Color is muddy brown | Too much cocoa powder | Stick to exactly 1 tbsp for a bright purple. |
Common Mistakes Checklist
- ✓ Always sift your cocoa powder; it's notorious for having tiny lumps that won't dissolve in the batter.
- ✓ Ensure your baking soda is fresh by dropping a pinch into vinegar; it should fizz aggressively.
- ✓ Don't skip the parchment paper, even if you "grease the pan well."
- ✓ Let the cakes cool 100% before frosting; even a hint of warmth will melt the cream cheese.
- ✓ Use gel coloring, not liquid, to maintain the correct batter consistency.
Creative Adjustments and Flavor Swaps
This recipe is quite forgiving if you want to play around with the flavor profile or dietary needs. For example, if you love this texture but want a different vibe, you might also like my Red Velvet Cake.
- Lavender Infusion: Swap the vanilla extract for a half teaspoon of culinary lavender oil for a floral, sophisticated twist.
- Chocolate Chip Surprise: Fold in 100g of white chocolate chips to the batter for little pockets of sweetness.
- gluten-free Option: You can use a 1:1 gluten-free flour blend. Just ensure it contains xanthan gum to help hold the structure of the velvet crumb.
- dairy-free Swap: Use a vegan buttermilk (soy milk + vinegar) and a plant based butter/cream cheese for the frosting. It works surprisingly well because the oil and applesauce do the heavy lifting for moisture.
If you find yourself craving something even more chocolatey, you should try the Hot Fudge Pudding Cake which uses a completely different dual layer technique.
Scaling for Large or Small Crowds
Adjusting this recipe is straightforward as long as you keep the ratios in check. When cutting the recipe in half for a single 8 inch layer, you'll need to beat one egg and use exactly half by weight or volume, as half an egg is tricky to eyeball.
For doubling the recipe, I recommend making the batter in two separate batches rather than one giant one. Most home mixers can't handle that much volume effectively, and you risk overmixing the bottom of the bowl while trying to incorporate the top.
If you do double it, reduce the total liquid by about 10% to prevent the middle from becoming too heavy to rise.
| Change | Flour Adjustment | Baking Time Shift |
|---|---|---|
| Half Batch | 158g | Reduce by 5-8 minutes |
| Double Batch | 630g | Increase by 5 minutes (in batches) |
| Cupcakes | 315g | Bake for 18-22 minutes |
Debunking Common Velvet Baking Beliefs
There are a few "rules" people swear by that don't actually hold up when you look at the science of a Purple Velvet Cake.
One common thought is that you need beet juice for a "natural" color. While you can use beets, the flavor is very earthy and can clash with the cocoa. Gel coloring provides a much more predictable and vibrant result without altering the taste.
Another misconception is that velvet cake is just chocolate cake with food coloring. A true velvet cake has a much lower cocoa content and a much higher acidity level. If you used a standard chocolate cake recipe and just added purple dye, you'd end up with a dark, muddy looking cake that tastes like cocoa, not the tangy, light flavor we are going for here.
Proper Storage and Zero Waste Tips
This cake stays fresh longer than most because of the oil and applesauce, but you still want to protect that delicate crumb.
- Fridge: Store the frosted cake in an airtight container for up to 4 days. The cream cheese frosting is dairy based, so it must stay chilled.
- Freezer: You can freeze the unfrosted layers wrapped tightly in plastic wrap for up to 3 months. Thaw them in the fridge overnight before frosting.
- Zero Waste: If you have leftover cake scraps from leveling the tops, don't throw them away! Crumble them up and mix with a spoonful of leftover frosting to make cake pops, or use them as a garnish on top of the finished cake.
- Frosting Scraps: Leftover frosting is amazing on morning toast or as a dip for graham crackers.
Perfect Pairings for Your Dessert
Since this cake is quite rich and tangy, it pairs beautifully with drinks that have a bit of a bite or a clean finish. A cold glass of milk is the classic choice, but a sharp Earl Grey tea with its citrusy bergamot notes is actually my favorite way to enjoy a slice.
If you are serving this at a party, consider a side of fresh blackberries or blueberries. The tartness of the fruit cuts through the sweetness of the cream cheese frosting perfectly. It also looks beautiful to have a few purple berries scattered around the base of the cake stand. For another great party option with a light crumb, take a look at the Heavenly White Snack Cake.

Recipe FAQs
What is a purple velvet cake?
It is a cocoa based sponge characterized by its vibrant purple hue and velvety crumb. The recipe uses distilled white vinegar and buttermilk to create a tender, tight crumb texture that is distinct from standard yellow or white cakes.
What is the difference between red velvet and purple velvet cake?
The primary difference is the colorant used. Both rely on the chemical reaction between cocoa powder, vinegar, and baking soda for their signature texture, but purple velvet uses high-quality gel dye instead of red to achieve its royal tone.
Is it true red velvet is just regular cake with food coloring?
No, this is a common misconception. A true velvet cake requires the specific reaction between acidic ingredients like buttermilk and vinegar with cocoa powder to develop its characteristic fine, soft crumb that standard cakes lack.
How to ensure the cake stays moist?
Fold the wet and dry ingredients just until combined. Overmixing develops the gluten and ruins the delicate structure; if you enjoyed perfecting this tender crumb, you can apply the same mixing technique for light results in our other velvet style recipes.
How to prevent the cream cheese frosting from melting?
Wait until the cakes are completely cool to the touch before frosting. Even a slight hint of residual heat will soften the butter and cream cheese, causing the icing to slide off the layers.
Can I use liquid food coloring instead of gel?
No, avoid liquid food coloring. Liquid dyes are too thin and would require you to add excessive amounts to reach the desired shade, which alters the delicate balance of your wet ingredients and ruins the cake's chemistry.
How to get the cocoa powder fully incorporated?
Sift the cocoa powder into the dry ingredients before mixing. Cocoa powder is notorious for forming tiny, stubborn lumps that will not dissolve once the liquid is added, so sifting is the only way to ensure a uniform color and flavor.
Moist Purple Velvet Cake
Ingredients:
Instructions:
Nutrition Facts:
| Calories | 544 kcal |
|---|---|
| Protein | 7.5 g |
| Fat | 28.5 g |
| Carbs | 65.8 g |
| Fiber | 1.2 g |
| Sugar | 42.5 g |
| Sodium | 355 mg |
