Nestle Toll House Chocolate Chip Cookies
- Time: Active 15 minutes, Passive 10 minutes, Total 25 minutes
- Flavor/Texture Hook: Buttery, caramelized, and loaded with melted semi sweet morsels
- Perfect for: Family gatherings, school bake sales, or rainy afternoon snacks
- Nestle Toll House Recipe Chocolate Chip Cookie with Semi Sweet Morsels
- The Science Behind the Bake
- Official Recipe Times and Yields
- Detailed Breakdown of Essential Ingredients
- Minimal Tools for Maximum Success
- Detailed Step-by-Step Baking Instructions
- Troubleshooting Your Cookie Baking Issues
- Simple Ways to Adapt Ingredients
- Long-Term Storage and Waste Reduction
- Creative Serving and Pairing Suggestions
- Recipe FAQs
- 📝 Recipe Card
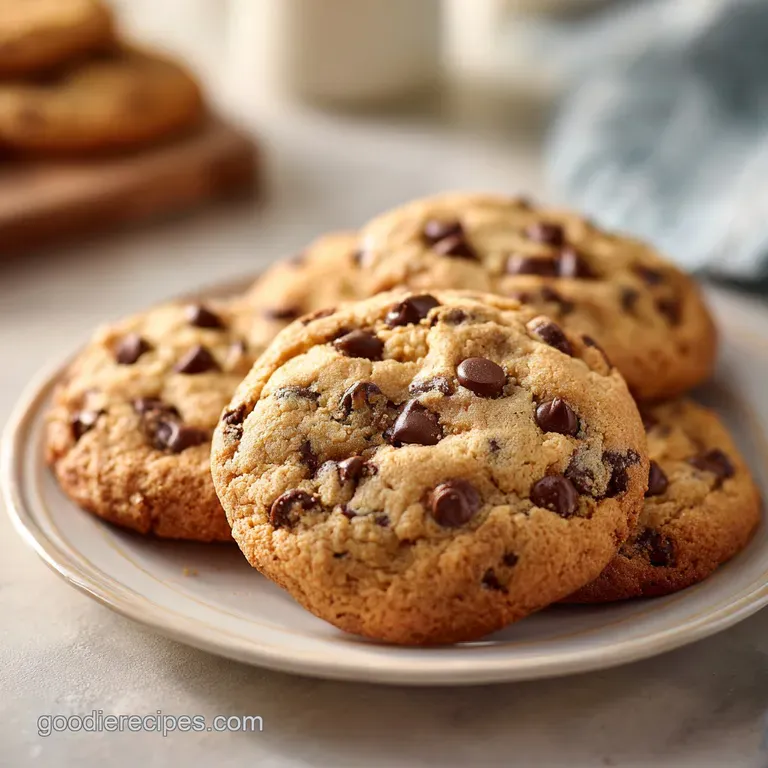
Nestle Toll House Recipe Chocolate Chip Cookie with Semi Sweet Morsels
The very first thing you notice isn't the sight of the cookies, but that heavy, sweet aroma of browning butter and warm vanilla that fills every corner of the house. It's a scent that pulls you right into the kitchen before the timer even goes off.
I remember standing by the oven as a kid, watching through the glass as the little mounds of dough slowly flattened out, their edges turning that specific shade of golden brown that promises a perfect crunch. Discover the ultimate Nestle Toll House Chocolate Chip Cookie recipe featuring semi sweet morsels.
There is something incredibly nostalgic about the crinkle of the yellow chocolate chip bag. We’ve all seen it in the cupboard, and honestly, we’ve probably all snitched a handful of those semi sweet morsels while the butter was softening on the counter.
It's the kind of recipe that doesn't need to be flashy because the combination of salty, sweet, and chocolatey just works every single time.
I’ve made these cookies more times than I can count, and I’ve learned that the little things really do matter. Whether it's how you measure your flour or the temperature of your eggs, these small details are the difference between a cookie that is just okay and one that disappears from the cooling rack in minutes.
We are going to walk through exactly how to get that classic result using the most reliable methods I’ve found over the years.
The Science Behind the Bake
When we talk about what makes this specific cookie so iconic, it really comes down to the interaction between the sugars and the fats. It isn't just about mixing things together, it is about creating a structure that can support all those heavy chocolate chips without falling apart or becoming too greasy.
- Aeration Through Creaming: Beating the butter and sugars for a full 3 minutes creates millions of tiny air pockets that expand in the heat of the oven, giving the cookie its lift.
- The Acid Base Reaction: The baking soda reacts with the acidic molasses in the brown sugar, which produces carbon dioxide and helps the cookies rise rather than just spreading into a puddle.
- Starch Gelatinization: As the oven temperature hits 190°C, the flour starches absorb moisture and set the structure, turning the dough into a solid, chewy crumb.
- Maillard Browning: This is where the flavor comes from - the proteins and sugars react under the high heat of 375°F to create that toasted, caramel like taste on the edges.
| Method | Texture Result | Best Use Case |
|---|---|---|
| Fast (No Chill) | Thinner, crispier edges, more spread | Immediate cravings |
| Classic (Chilled) | Thicker, chewier, deeper flavor | Best for gifting/parties |
| Extra Aerated | Cake like, soft, very pale | When you want a soft bite |
While the fast method is what we usually do when the kids are hovering in the kitchen, taking the time to properly cream the butter makes a world of difference. If you skip the creaming and just stir it all together, you end up with a much denser, flatter cookie that lacks those beautiful little nooks and crannies that hold the chocolate.
Official Recipe Times and Yields
Knowing exactly how much dough you have and how long it needs to stay in the heat is the best way to avoid the dreaded "hard as a rock" cookie. Since this recipe yields a massive 60 cookies, having a plan for your baking sheets is vital.
| Servings | Ingredient Adjustments | Pan Size | Cook Time |
|---|---|---|---|
| 15 Cookies | 1/4 of all ingredients (use 1/2 egg) | 1 large sheet | 9-11 minutes |
| 30 Cookies | Half all ingredients (use 1 egg) | 2 large sheets | 9-11 minutes |
| 60 Cookies | Use full recipe as written below | 4 large sheets | 9-11 minutes per batch |
A quick tip on that half egg for the small batch: just crack the egg into a small bowl, whisk it until the yolk and white are totally combined, and then use two tablespoons of the mixture. It’s way more accurate than trying to eye ball half an egg.
Detailed Breakdown of Essential Ingredients
Each component in this bowl has a very specific job to do. When you understand why we use a full cup of butter or two types of sugar, you can start to troubleshoot your own bakes like a pro.
| Ingredient | Science Role | Pro Secret |
|---|---|---|
| Unsalted Butter | Provides fat for tenderness and flavor | Use "cool room temp" (it should dent, not melt) |
| Brown Sugar | Adds moisture and caramel notes | Pack it tight to ensure the correct volume |
| Baking Soda | Provides lift and aids in browning | Ensure it is fresh by testing a pinch in vinegar |
| All Purpose Flour | Provides the gluten structure | Weigh it (280g) instead of scooping for consistency |
We use two types of sugar because they bring different strengths to the party. The granulated sugar is what gives you those crispy, lattice like edges that shatter when you bite into them. The brown sugar, thanks to the molasses, keeps the center soft and chewy even after the cookies have cooled down.
For the chocolate, sticking with the Nestle Toll House Semi Sweet Chocolate Morsels is traditional for a reason. They are designed to hold their shape even when they are melty and hot, giving you those distinct "pockets" of chocolate. If you find yourself wanting to try something different, you could check out my Muffins with Velvety Crumb recipe which uses a similar chocolate profile but in a much softer, fluffier base.
Minimal Tools for Maximum Success

You don't need a kitchen full of high tech gadgets to make these perfectly. In fact, some of the best batches I've ever made were in a single bowl with a sturdy wooden spoon. However, if you have a hand mixer or a stand mixer, it will save your arm some serious work during the creaming stage.
- Large Mixing Bowl: You need plenty of room to fold in those two cups of chips and the walnuts without spilling flour everywhere.
- Sturdy Spatula: Essential for scraping the bottom of the bowl to make sure no pockets of dry flour are hiding.
- #40 Cookie Scoop: This is a secret for uniform baking. When every cookie is the exact same size, they all finish at the exact same time.
- Baking Sheets: Heavy duty rimmed sheets are best. They distribute heat more evenly than the thin, cheap ones.
- Wire Cooling Rack: Getting the cookies off the hot pan after 2 minutes is crucial to stop the cooking process.
If you don't have a cookie scoop, a rounded tablespoon works just fine, just try to be as consistent as possible. I usually use two spoons - one to scoop and one to push the dough onto the sheet.
Detailed step-by-step Baking Instructions
- Preheat the oven to 375°F (190°C). Note: A hot oven is necessary for that immediate "puff" and edge crisping.
- Cream the fats and sugars. Combine the 226g of softened butter, 150g granulated sugar, 150g brown sugar, and 5ml vanilla extract in your bowl. Beat until the mixture is pale and fluffy, which usually takes about 3 minutes of active mixing.
- Incorporate the eggs. Add the 2 large eggs one at a time. Beat well after each one until the dough looks smooth and emulsified.
- Mix the dry base. In a separate bowl, whisk the 280g flour, 6g baking soda, and 6g salt. Note: This ensures the leavening is evenly distributed so you don't get a soapy taste in one spot.
- Combine the mixtures. Gradually add the dry ingredients to the butter mixture. Beat on low until the last streak of white flour disappears. Do not overmix here!
- Fold in the inclusions. Use your spatula to stir in the 340g of semi sweet chocolate morsels and 120g of chopped walnuts by hand.
- Portion the dough. Drop rounded tablespoonfuls onto your baking sheets, leaving about 2 inches of space between them.
- Bake for precision. Slide the sheets into the oven for 9 to 11 minutes until the edges are golden brown and the centers look slightly set.
- Rest on the sheet. Let the cookies sit on the hot pan for 2 minutes. Note: This allows the structure to firm up so they don't break when you move them.
- Cool completely. Move them to a wire rack. They will continue to firm up as they cool, reaching that perfect chewy texture.
Troubleshooting Your Cookie Baking Issues
Even with a classic recipe, things can go sideways. Usually, it's a matter of temperature - either the oven's or the butter's. If your cookies aren't looking quite right, don't panic. Most issues are very easy to fix for the next batch.
Why Your Cookies Are Too Flat
If your cookies spread into one giant "mega cookie" on the pan, your butter was likely too warm. When the butter starts out almost melted, it doesn't have the strength to hold the air pockets you created during creaming.
Another culprit could be greasing your pans too heavily, which gives the dough nothing to "grab" onto as it rises.
Why Your Cookies Are Tough
Toughness usually comes from overworking the dough once the flour is added. When you mix flour with liquid (like the moisture in butter and eggs), gluten starts to develop. A little gluten is good for structure, but too much makes a cookie taste like bread.
Always stop mixing the second you don't see any more dry flour.
| Problem | Root Cause | Solution |
|---|---|---|
| Greasy Bottoms | Butter was too soft/melting | Chill the dough for 30 minutes before baking |
| Burnt Bottoms | Dark baking sheets or low oven rack | Move rack to middle and use parchment paper |
| Dry/Crumbly | Too much flour measured | Use a scale or the "spoon and level" method |
Common Mistakes Checklist
- ✓ Check that your baking soda isn't expired (it's the only lift you have!).
- ✓ Use room temperature eggs so they emulsify properly with the fat.
- ✓ Don't skip the salt; it balances the sugar and makes the chocolate taste "more" like chocolate.
- ✓ Give the oven a full 20 minutes to preheat, even if the light says it's ready sooner.
- ✓ Avoid using "spreads" or tub butter; you need the high fat content of real butter sticks.
For those times when the kitchen feels a bit chaotic and things aren't going perfectly, remember that even a "failed" cookie usually still tastes pretty good with a glass of milk. If you're looking for something a bit more foolproof and sturdy, my Sweet Corn Bread Recipe is a great way to practice your mixing techniques with a very forgiving batter.
Simple Ways to Adapt Ingredients
While the original recipe is a masterpiece, sometimes you need to change things up based on what's in your pantry or who is coming over for dinner. You can swap out the nuts or even the type of chocolate without ruining the base structure of the cookie.
| Original Ingredient | Substitute | Why It Works |
|---|---|---|
| Chopped Walnuts | Pecans or Macadamias | Similar fat content. Note: Pecans are sweeter; macadamias are creamier |
| Semi Sweet Morsels | Dark Chocolate Chunks | Same cocoa butter ratio but less sugar for a richer bite |
| Unsalted Butter | Salted Butter | Swap 1:1. Note: Reduce the added sea salt in the recipe to 1/2 tsp |
If you want to scale the recipe down because you don't need five dozen cookies, it's very straightforward. Just remember that when you halve a recipe, the baking time usually stays the same because the individual cookies are still the same size. You are just putting fewer of them in the oven at once.
For a double batch, I recommend working in stages and keeping the second half of the dough in the fridge while the first batches bake. This keeps the butter at the right temperature and prevents the last few dozen from spreading too much.
Long Term Storage and Waste Reduction
The beauty of this dough is that it actually gets better with age. The flour has more time to hydrate, which leads to a more uniform bake and a deeper, more complex flavor profile.
Storing Baked Cookies: Once they are completely cool, put them in an airtight container. They will stay fresh at room temperature for about 3 to 5 days. A little trick I learned from my grandmother: put a single slice of white bread in the container.
The cookies will absorb the moisture from the bread and stay soft for much longer.
Freezing the Dough: This is the ultimate "busy person" hack. Scoop the dough into balls and place them on a tray in the freezer for an hour. Once they are frozen solid, toss them into a freezer bag.
You can bake them straight from the freezer - just add 1 or 2 minutes to the total baking time. They will stay good for up to 2 months.
Zero Waste Tip: If you have a few cookies that got a little too crispy or went stale, don't throw them out! Crush them up and use them as a topping for vanilla ice cream, or fold them into a cheesecake crust. Even the "crumbs" at the bottom of the bag are gold.
If you have leftover walnuts that are nearing their end, toast them lightly in a pan before adding them to the dough to refresh their oils and boost the flavor.
Creative Serving and Pairing Suggestions
While a cold glass of milk is the gold standard, there are so many ways to turn these cookies into a real event. Since this recipe makes so many, you can afford to get a little bit creative with how you present them.
- The Ice Cream Sandwich: Take two completely cooled cookies and sandwich a big scoop of high-quality vanilla bean ice cream between them. Roll the edges in extra mini morsels for a bakery style look.
- Warm Cookie Skillet: Instead of making individual cookies, press some of the dough into a small cast iron skillet and bake it at 350°F (180°C) for about 20 minutes. It’s gooey, messy, and perfect for sharing.
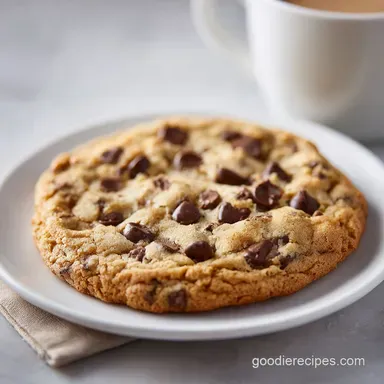
- Coffee Pairing: The bitterness of a dark roast coffee or a sharp espresso cuts right through the richness of the butter and the semi sweet chocolate. It's my favorite way to enjoy a cookie in the afternoon.
One of the best things about the Nestle Toll House Recipe Chocolate Chip Cookie with Semi Sweet Morsels is how it brings people together. There is a reason this recipe has been on the back of the bag for decades. It's reliable, it's comforting, and it tastes like home.
No matter how many fancy, gourmet cookies I try at expensive bakeries, I always find myself coming back to this one. It's the balance of that salty hit against the melted chocolate that just hits the spot every time. So, preheat that oven, get your butter softening, and let the house start smelling like heaven.
Happy baking!

Recipe FAQs
Is it true I should use melted butter for a chewier cookie?
No, this is a common misconception. You must use softened butter to properly cream it with the sugars; melting the butter ruins the structure and causes the cookies to spread into thin, greasy puddles.
How to achieve the perfect golden brown edges?
Bake at 375°F for exactly 9 to 11 minutes. Removing them when the edges are set but the centers still look slightly soft ensures the residual heat on the baking sheet finishes the process without drying them out.
How to prevent cookies from spreading too thin?
Measure your flour carefully using the spoon and-level method. Excess sugar or soft butter often causes over spreading, but keeping your dough cool before it hits the oven creates a more stable structure, similar to how we manage density in our fluffy biscuit recipe.
Can I make the dough ahead of time?
Yes, chilling the dough improves the flavor and texture. You can refrigerate the prepared dough for up to 24 hours before scooping and baking, which allows the flour to hydrate fully for a better crumb.
How to fix cookies that came out too cakey?
Decrease your mixing time after adding the flour. Once the last streak of flour disappears, stop immediately, as over mixing develops too much gluten and leads to a bready rather than chewy texture.
Is it necessary to use a stand mixer?
No, a sturdy hand held mixer or even a wooden spoon works fine. The goal is simply to cream the butter and sugars until pale and fluffy, which takes about 3 minutes of vigorous effort.
How to store leftovers to keep them fresh?
Keep them in an airtight container at room temperature. Placing a small slice of bread in the container can help maintain the moisture level of the cookies for a few extra days.
Nestle Toll House Cookies
Ingredients:
Instructions:
Nutrition Facts:
| Calories | 108 kcal |
|---|---|
| Protein | 1.3 g |
| Fat | 6.3 g |
| Carbs | 12.6 g |
| Fiber | 0.6 g |
| Sugar | 8.4 g |
| Sodium | 66 mg |
