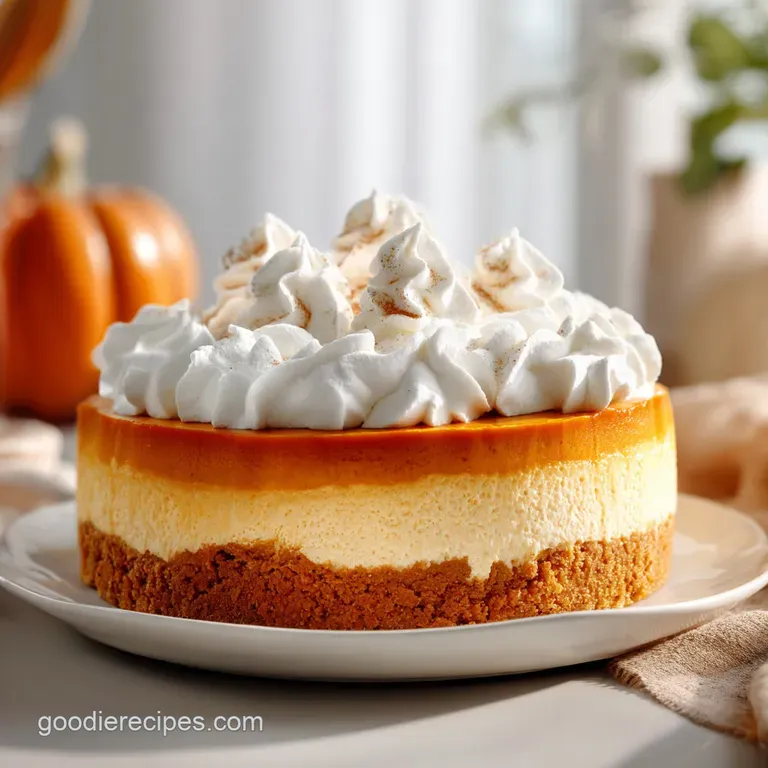
Pumpkin Cake Cheesecake: Moist and Creamy
- Time: Active 30 minutes, Passive 60 minutes, Total 90 minutes
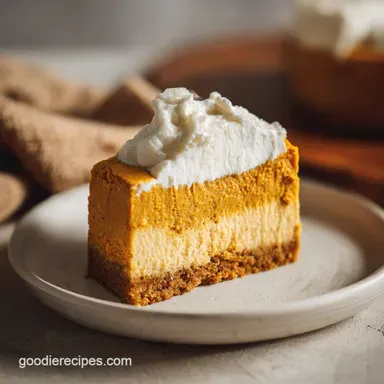
- Flavor/Texture Hook: Spiced, moist crumb topped with a silky smooth cream cheese finish and crunchy pecans
- Perfect for: Thanksgiving gatherings, cozy autumn potlucks, or anyone who can't choose between cake and cheesecake
- Mastering the Texture of Your Pumpkin Cake Cheesecake
- Essential Numbers for Your Perfect Holiday Bake
- Choosing Your Elements for the Ultimate Flavor
- Gathering the Right Tools for Success
- Walking Through the Layering and Baking Process
- Solving Common Issues with Your Layered Bake
- Twists and Turns for Your Seasonal Treat
- Storing Your Slices and Reducing Kitchen Scrap
- Creating a Complete Spread for Your Guests
- Comparison of Cooking Approaches
- Quick Solution Guide
- Decision Shortcut
- Recipe FAQs
- 📝 Recipe Card
Mastering the Texture of Your Pumpkin Cake Cheesecake
Forget everything you have ever heard about needing a complex, sloshing water bath to get a decent cheesecake layer. Honestly, that's a myth that has kept too many good home cooks from trying layered desserts.
I used to think that without a steam filled oven, the cheesecake top would just turn into a cracked, dry canyon of disappointment. But here is the secret: the pumpkin cake layer underneath acts as a built in insulator.
It provides a moist foundation that releases steam slowly as it bakes, protecting the delicate proteins in the cream cheese from the harsh, direct heat of the oven.
The first time I pulled a Pumpkin Cake Cheesecake out of the oven, I was bracing for a disaster. I expected the layers to mud together or the top to be rubbery. Instead, the house smelled like a cozy hug of cinnamon and nutmeg, and the cake had this gorgeous, distinct separation.
It was a classic family moment, everyone hovering around the kitchen island waiting for it to cool. We’ve all been there, right? That agonizing wait where you just want to grab a spoon and dive in. But trust me, the patience pays off when you see those clean, sharp layers on the plate.
This recipe works because we are playing with density and temperature. By keeping our ingredients at room temperature, we ensure they emulsify perfectly, creating a batter that is light enough to rise but sturdy enough to hold up that creamy crown.
We are looking for a specific texture here not a light, airy sponge, but a dense, pudding like crumb that feels substantial and comforting. It is a traditional method that relies on simple pantry staples to create something that looks like it came from a high end bakery.
1. Specific Gravity and Layer Density
The magic of the "self layering" effect comes down to the weight of the batters. The pumpkin cake base is intentionally thicker and heavier due to the pumpkin puree and flour. When we pour the cheesecake batter on top, it sits there like a cloud on a mountain.
If the pumpkin base were too thin, the cheesecake would sink to the bottom, leaving you with a messy swirl rather than distinct tiers.
2. The Role of Pumpkin Fiber
Pumpkin puree isn't just there for the orange color and the "vibe." It is packed with plant fibers that hold onto moisture. This is why pumpkin cakes stay moist for days while a standard vanilla cake might dry out.
In this Pumpkin Cake Cheesecake, the puree acts as a humectant, keeping the bottom layer soft even after an hour in the oven. It creates a velvety mouthfeel that contrasts beautifully with the cheesecake.
3. Residual Heat Coagulation
One of the biggest mistakes people make is overbaking the cheesecake layer. You want to pull it out when the center still has a slight, slow motion jiggle. It shouldn't be liquid, but it shouldn't be firm like a brick either.
The residual heat trapped in the cake base continues to "cook" the cheesecake as it cools on your counter. This gentle finish is what prevents those ugly cracks and keeps the top looking like smooth silk.
Essential Numbers for Your Perfect Holiday Bake
When you are planning your day, it helps to know exactly what the timeline looks like. This isn't a "flash in the pan" dessert; it needs a bit of rhythm. If you start at 2:00 PM, you’ll have a cooled cake ready for the fridge by 4:30 PM, which is just in time for it to set overnight for a spectacular next day reveal.
| Feature | Specification | Why It Matters |
|---|---|---|
| Oven Temp | 350°F (180°C) | Balances the cake rise with the cheesecake set. |
| Pan Type | 9 inch Springform | Allows for easy removal without breaking the layers. |
| Cooling Time | 6 hours (minimum) | Essential for the cheesecake proteins to fully set. |
| Shelf Life | 5 days | Flavors deepen and the cake becomes more moist over time. |
Giving yourself enough time is the biggest "chef secret" there is. I once tried to rush this for a last minute dinner party, and the center was still a bit too soft. It tasted great, but it didn't have that "wow" factor when I sliced it. Now, I always bake it the night before.
It takes the stress out of the hosting duties and ensures every slice is firm and clean.
| Method | Total Time | Texture | Best For |
|---|---|---|---|
| Classic (This Recipe) | 90 minutes | Layered, moist, and creamy | Presentation and traditional flavor. |
| Fast (store-bought Mix) | 60 minutes | Sweeter, lighter, less dense | Quick weeknight cravings. |
| No Bake Version | 4 hours (chill) | Mousse like, lacks cake base | High summer when it's too hot to bake. |
Choosing Your Elements for the Ultimate Flavor
Using the right ingredients is like setting the foundation for a house. You don't want to cut corners on the things that provide the structure and the soul of the dish. For this Pumpkin Cake Cheesecake, we are leaning on high fat dairy and warm spices to do the heavy lifting.
1. For the Spiced Pumpkin Cake Layer
- 1.5 cups (190g) all purpose flour: The skeleton of the cake.
- 1 cup (200g) granulated sugar: For sweetness and a tender crumb.
- 1 tsp baking powder & 0.5 tsp baking soda: Our lift agents.
- 2 tsp pumpkin pie spice: The soul of the dish. Why this? A pre mixed blend ensures consistent flavor without measuring six different jars.
- 0.5 tsp salt: Essential to balance the sugar.
- 1 cup (245g) pumpkin puree: Use 100% pure pumpkin, not pie filling.
- 0.5 cup (120ml) vegetable oil: Keeps the cake moist even when cold.
- 2 large eggs (room temperature): For structure.
- 1 tsp vanilla extract: To round out the spice notes.
2. For the Cheesecake Layer
- 16 oz (450g) full fat cream cheese, softened: The creamy heart. Why this? low-fat versions often "weep" and won't set as firmly.
- 0.5 cup (100g) granulated sugar: Just enough to sweeten the tang.
- 2 large eggs (room temperature): Binds the fats together.
- 0.25 cup (60g) sour cream: Adds a subtle tang and keeps the texture velvety.
- 1 tsp vanilla extract: A classic aromatic bridge.
3. For the Optional Topping
- 0.25 cup (60ml) salted caramel sauce: For that sticky, sweet finish.
- 0.5 cup pecan halves: Adds a much needed crunch to the soft layers.
| Component | Role | Pro Secret |
|---|---|---|
| Pumpkin Puree | Moisture/Fiber | Blot it with a paper towel if it looks very watery. |
| Cream Cheese | Fat/Structure | Never use the "tub" kind; only use the bricks for baking. |
| Vegetable Oil | Tenderness | Swap for melted butter for a richer, more "boxed cake" flavor. |
When it comes to the cream cheese, I cannot stress this enough: it must be soft. If you try to beat cold cream cheese, you will end up with little white lumps that never go away. I like to leave mine on the counter for at least 3 hours before I start. If you're in a rush, you can microwave it in 10 second bursts, but be careful not to melt it! For more tips on achieving that silky texture, you might find my guide on moist red velvet cupcakes helpful, as it tackles similar cream cheese challenges.
Gathering the Right Tools for Success
You don't need a professional kitchen to pull this off, but a few specific items make the job much easier. I’ve tried making this in a regular cake pan, and honestly, it’s a nightmare to get out. You end up with a "trifle" instead of a cake. Stick to the springform!
2 Must Have Tools
- 9 inch Springform Pan: This is non negotiable for a layered cake like this. The removable sides allow you to reveal the beautiful layers without flipping the cake upside down (which would ruin the cheesecake top).
- Electric Hand Mixer or Stand Mixer: You need this to get the cheesecake layer truly smooth. While you can whisk the pumpkin base by hand, the cream cheese needs that mechanical power to aerate and emulsify properly.
Chef Tip: Line the bottom of your springform pan with parchment paper. Even with a "non stick" pan, the pumpkin cake is quite moist and can stick to the metal. A circle of parchment ensures a clean release every single time.
Walking Through the Layering and Baking Process
This is where the magic happens. The key to a great Pumpkin Cake Cheesecake is a gentle touch and following the order of operations. Think of it as a three phase project: the base, the crown, and the bake.
Phase 1: The Foundation Prep
- Preheat the oven to 350°F (180°C). Make sure your rack is in the center position. If it’s too high, the cheesecake will brown too fast; too low, and the cake bottom might scorch.
- Prep the pan. Grease the sides of your 9 inch springform pan with butter or non stick spray, and line the bottom with a parchment paper circle.
Phase 2: Mixing the Pumpkin Base
- Whisk the dry ingredients. In a large bowl, combine the flour, 1 cup sugar, baking powder, baking soda, pumpkin pie spice, and salt. Use a whisk to break up any flour clumps.
- Emulsify the wet ingredients. In a separate bowl, whisk the vegetable oil, 2 eggs, pumpkin puree, and 1 tsp vanilla until the mixture is uniform and bright orange.
- Combine the two. Fold the wet mixture into the dry ingredients. Stop as soon as you see no more white streaks of flour. Over mixing will make the cake tough and bready.
- Transfer to the pan. Pour the batter into your prepared pan and use a spatula to level it out. It should be a thick, sturdy layer.
Phase 3: The Cheesecake Crown
- Beat the cream cheese. In a clean bowl, beat the softened cream cheese and 0.5 cup sugar on medium high speed until it’s silky and fluffy. This usually takes about 2 to 3 minutes.
- Add the liquids. Lower the mixer speed and add the remaining 2 eggs, sour cream, and vanilla. Mix just until combined. Note: Mixing on low speed prevents too many air bubbles from forming, which helps prevent cracking.
- Layer it up. Carefully pour the cheesecake batter over the pumpkin base. I like to pour it over the back of a large spoon to avoid making a "crater" in the pumpkin layer. Smooth the top gently.
Phase 4: The Assembly and Bake
- Bake for 60 minutes. Set your timer and resist the urge to open the oven door for the first 45 minutes. Sudden temp changes are the enemy of cheesecake.
- Check for doneness. The edges should be slightly puffed and set, but the center 2 inches should still have a slight jiggle. This is the Precision Checkpoint: 60 minutes at 350°F should result in an internal temp of about 150°F for the cheesecake layer if you use a probe thermometer.
Phase 5: The Critical Cooling Period
- Cool at room temperature. Let the cake sit on the counter for about an hour. This slow cooling prevents the cheesecake from shrinking too fast and pulling away from the sides.
- Chill for 6 hours. Cover with plastic wrap (ensure it doesn't touch the top!) and refrigerate. This is when the magic happens the cake becomes ultra moist and the cheesecake gets that signature velvety bite.
- Final flourish. Drizzle with salted caramel and top with pecans before serving. Use a hot, clean knife for the most beautiful slices.
Solving Common Issues with Your Layered Bake

Even the best bakers run into trouble sometimes. The beauty of a Pumpkin Cake Cheesecake is that even if it doesn't look like a magazine cover, it usually still tastes phenomenal. But if you’re a perfectionist like me, here is how to avoid the most common pitfalls.
1. The "Sinking Center"
If your cake comes out with a deep valley in the middle, it usually means one of two things: either the oven door was opened too early, or the cake was pulled out before the center could set. Cheesecake needs that gentle, consistent heat to build its structure. If you see the center sinking as it cools, don't panic!
That’s exactly what the salted caramel and pecans are for they are nature’s best way to hide a "rustic" top.
2. Weeping or Moisture on Top
Sometimes you’ll see little beads of moisture on top of the cheesecake after it has been in the fridge. This is usually just condensation. To prevent this, make sure the cake is completely cool before you cover it with plastic wrap.
If it’s still warm, the steam gets trapped and rains back down on your beautiful dessert. Just dab it gently with a paper towel if it happens.
| Problem | Root Cause | Solution |
|---|---|---|
| Cracked Top | Overbaked or cooled too fast | Pull out while still jiggly; cool at room temp 1 hour. |
| Lumpy Cheesecake | Cold cream cheese | Ensure all dairy is room temp before mixing. |
| Soggy Cake Base | Underbaked or too much puree | Check doneness with a skewer in the cake layer. |
If you find that your cakes often come out a bit denser than you'd like, you might want to compare the technique here with something like my moist southern coconut cake, which uses a different hydration method to achieve a light crumb.
Common Mistakes Checklist
- ✓ Skip the "Tub" Cream Cheese: Always use the brick format. The tub version contains more water and air, which will ruin the density of the bake.
- ✓ Don't Over mix the Eggs: Once the eggs go into the cheesecake batter, mix only until just incorporated. Too much air will cause the cake to rise like a soufflé and then collapse.
- ✓ Grease the Sides Well: If the cheesecake sticks to the side of the pan as it cools, it will pull and crack in the middle.
- ✓ Patience is Key: Do not slice this cake while it’s warm. The cheesecake needs the cold to "bond" with the cake layer, or they will just slide apart.
Twists and Turns for Your Seasonal Treat
Once you’ve mastered the basic Pumpkin Cake Cheesecake, you can start playing with the flavors. It’s a very forgiving recipe that can handle a bit of experimentation.
3 Numbered Flavor Twists
- The Chocolate Swirl: Add 0.5 cup of mini chocolate chips to the pumpkin batter. The combination of pumpkin and dark chocolate is sophisticated and unexpected.
- The Gingersnap Crust: If you want even more texture, press 1 cup of crushed gingersnap cookies mixed with 2 tbsp of melted butter into the bottom of the pan before adding the pumpkin batter. It adds a spicy, crunchy base.
- The Bourbon Kick: Add 1 tablespoon of good quality bourbon to the cheesecake batter. It amplifies the vanilla and spice notes, making it a very "adult" holiday dessert.
2 Smart Substitutions
- Greek Yogurt for Sour Cream: If you’re out of sour cream, full fat Greek yogurt works perfectly. It provides the same acidity and fat content to keep the cheesecake silky.
- Homemade Spice Blend: If you don't have "pumpkin pie spice," mix 1.5 tsp cinnamon, 0.25 tsp ginger, 0.125 tsp cloves, and 0.125 tsp nutmeg. It's usually fresher and more vibrant than the store-bought stuff anyway.
| Original Ingredient | Substitute | Why It Works |
|---|---|---|
| Vegetable Oil (0.5 cup) | Melted Butter (0.5 cup) | Adds a richer, dairy forward flavor but cake might be firmer when cold. |
| Granulated Sugar (for cake) | Brown Sugar (packed) | Adds a molasses depth and extra moisture. Note: Cake will be darker. |
Storing Your Slices and Reducing Kitchen Scrap
Because this cake is so moisture rich, it keeps incredibly well. In fact, most people find it tastes even better on day two or three when the spices have had time to "marry" with the creaminess of the cheese.
Storage Guidelines:Fridge: Store in an airtight container for up to 5 days. If you've already added the caramel and pecans, keep in mind the pecans might lose a bit of their crunch over time. Freezer: This cake freezes beautifully!
Wrap individual slices in plastic wrap and then foil. They will stay fresh for up to 3 months. Thaw in the fridge overnight before serving.
Zero Waste Tips: Don't throw away that leftover pumpkin puree if you didn't use the whole can! You can stir it into oatmeal, mix it into pancake batter, or even freeze it in an ice cube tray for future smoothies.
If you have leftover pecan pieces, toast them in a dry pan and toss them over a salad for an instant upgrade. Even the crumbs from the bottom of the pan are gold sprinkle them over vanilla ice cream for a "deconstructed" pumpkin treat.
Creating a Complete Spread for Your Guests
When you are serving something as rich and decadent as Pumpkin Cake Cheesecake, you want to think about balance. This is a heavy hitter in the dessert world, so your pairings should either cut through the richness or lean into the cozy theme.
- Hot Coffee
- A dark, slightly bitter roast is the perfect foil for the sweet caramel and creamy cheese.
- Apple Cider
- Whether cold or mulled, the acidity of the apples brightens the earthy pumpkin flavors.
- Dessert Wine
- A late harvest Riesling or a glass of Tawny Port adds a luxurious touch to a holiday meal.
Serving Suggestions: I love to serve this on a big wooden board rather than a traditional cake stand. It feels more "family style" and rustic. Add a few extra pecan halves and maybe some cinnamon sticks around the base for a festive look.
If you really want to go over the top, a dollop of unsweetened whipped cream on the side helps lighten the palate between those rich, spiced bites.
Remember, the best part of baking isn't the "perfect" result it's the smell of the kitchen while it's in the oven and the look on your friends' faces when you set it down on the table.
This cake has become a staple in my house because it’s reliable, comforting, and just a little bit fancy without the stress. Enjoy the process, don't fear the jiggle, and happy baking!
Comparison of Cooking Approaches
| Method | Time | Texture | Best For |
|---|---|---|---|
| Slow Cool (Oven Cracked) | 2 hours extra | Most velvety, zero cracks | Perfectionists with time to spare. |
| Room Temp Cool | 1 hour | Great structure, minor risk of small cracks | Most home cooks. |
| Fast Chill (Freezer) | 30 mins | Can become grainy or "sweat" | Emergency "I forgot dessert" situations. |
Quick Solution Guide
| Problem | Cause | Fix |
|---|---|---|
| Top is brown but center is raw | Oven too hot | Tent with foil and lower temp by 25°F. |
| Layers are mixing together | Batter too thin | Chill pumpkin base for 10 mins before adding cheesecake. |
| Cheesecake is grainy | Over mixed eggs | Only mix eggs until just yellow disappears. |
Decision Shortcut
- If you want a lighter cake: Replace the vegetable oil with an equal amount of unsweetened applesauce. It reduces the fat and adds a subtle fruitiness.
- If you want a more intense spice: Increase the pumpkin pie spice to 1 tablespoon and add 0.5 tsp of freshly cracked black pepper to the cake batter.
- If you want a "Showstopper" look: Use a piping bag to drizzle the caramel in a perfect zig zag pattern and place the pecans in a circular crown around the edge.

Recipe FAQs
Is pumpkin cheesecake a thing?
Yes, it is a classic seasonal dessert. By layering a spiced pumpkin cake base with a rich, smooth cream cheese filling, you get the best of both worlds in every bite.
Can diabetics eat cheesecake?
No, this recipe is not designed for a diabetic diet. It contains significant amounts of sugar and flour, so it is best to consult with a medical professional regarding your specific dietary needs.
Is the Costco pumpkin cheesecake good?
Yes, it is a popular store-bought option. However, baking this recipe at home allows you to control ingredient quality, such as ensuring you use high-quality brick style cream cheese for a superior, dense texture.
Does Trader Joe's have a pumpkin cheesecake?
Yes, they typically stock a seasonal frozen version. While convenient, homemade versions provide a much fresher flavor profile, especially when you master the emulsification technique used to incorporate the pumpkin puree and eggs.
How to prevent the cheesecake from cracking?
Grease the sides of the springform pan thoroughly before adding your batter. If the cake sticks to the sides while cooling, the tension will pull the center apart and cause cracks.
How to tell when the cake is finished baking?
Check that the edges are set while the center retains a slight, slow motion jiggle. It is crucial to stop baking at this stage, as the cake finishes its coagulation process while resting in the refrigerator for at least 6 hours.
How to store leftovers for the best texture?
Place slices in an airtight container in the refrigerator for up to 5 days. The flavors actually improve over the first few days as the pumpkin spices marry with the creaminess of the cheese.
Pumpkin Cake Cheesecake Recipe
Ingredients:
Instructions:
Nutrition Facts:
| Calories | 449 kcal |
|---|---|
| Protein | 7g |
| Fat | 28g |
| Carbs | 44g |
| Fiber | 1g |
| Sugar | 29g |
| Sodium | 271mg |
