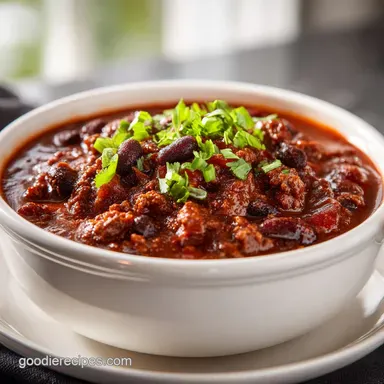
The Best Chili Recipe: Slow Simmered

- Why You Will Love My Version of the Best Chili Recipe
- The Physics of the Low and Slow Simmer
- Important Stats for Planning Your Chili Night
- Choosing the Right Components for Deep Flavor
- The Best Tools for a Great Batch of Chili
- How to Build Your Chili from Scratch
- How to Fix Common Issues with Homemade Chili
- Ways to Change This Recipe for Different Diets
- Storing and Reheating Your Chili for Best Results
- Fun Ways to Top and Serve Your Chili
- High in Sodium
- Recipe FAQs
- 📝 Recipe Card
Why You Will Love My Version of the Best Chili Recipe
I remember the first time I won our neighborhood cook off. It wasn't because I used some exotic pepper from a remote island or a secret family heirloom. It was because I stopped treating chili like a quick soup and started treating it like a slow simmered labor of love.
The secret was that smell the kind that hits you when you walk through the door on a rainy Sunday and immediately makes you feel at home. That rich, smoky aroma is exactly what you'll get with this batch.
This isn't your average "dump a can of beans and some powder" situation. We're talking about a velvety, deep, and slightly earthy bowl of comfort that actually tastes better the next day.
I've made all the mistakes so you don't have to like the time I added too much cumin and it tasted like a spice cabinet exploded in my kitchen, or when I didn't brown the meat enough and it ended up grey and bland. Trust me, the extra ten minutes of searing makes all the difference in the world.
You're going to get a mix of textures here, from the melt in-your mouth beef chuck to the classic ground beef. It’s thick enough to stand a spoon up in, which is exactly how a real chili should be.
Whether you're feeding a rowdy crowd during the big game or just looking for a cozy family dinner, this is the one people will ask for again and again. Right then, let's crack on and get this bubbling on your stove.
The Physics of the Low and Slow Simmer
Lipid Solubility: Many aromatic compounds in chili powder and cumin are fat soluble, meaning they only release their full flavor potential when toasted in oil rather than boiled in water.
Maillard Mastery: Searing the cubed beef chuck at high heat creates hundreds of new flavor compounds through a chemical reaction between amino acids and reducing sugars, providing a savory depth that raw meat lacks.
| Method | Time | Texture | Best For |
|---|---|---|---|
| Stovetop | 1 hour 15 mins | Thick and concentrated | Classic family dinner |
| Slow Cooker | 6 hours (Low) | Extremely tender meat | Set it and forget it days |
| Dutch Oven | 1 hour 30 mins | Best crust development | Achieving maximum flavor |
Chili is one of those dishes where the method matters just as much as the ingredients. If you're looking for another crowd pleaser that uses similar flavors but in a different format, you should check out my Mexican Casserole Recipe. It’s a great way to use up some of the same pantry staples you’ll be pulling out for this chili batch.
Important Stats for Planning Your Chili Night
We need to talk about timing because good chili can't be rushed. You’ll need about 20 minutes for prep mostly chopping onions and dicing that beef chuck.
The actual cook time is 1 hour 15 mins, but honestly, if you have the time to let it sit for an extra 30 minutes on low, the flavors will thank you. This recipe yields 8 generous servings, making it perfect for meal prep or a large family gathering.
1. The Triple Threat Umami Base
Most people just use ground beef, but we’re using a mix. The 1 lb of 80/20 ground beef gives us that classic texture and fat content, while the 1 lb of beef chuck roast, cut into tiny 1/4 inch cubes, provides a steak like bite that feels much more substantial.
It’s the difference between a basic stew and a competition worthy bowl.
2. Texture Mastery
The beans are a point of contention for some, but for this version, we’re using 30 oz (850g) of dark kidney beans. They hold their shape during the long simmer and provide a creamy contrast to the chewy beef.
We also use a mix of crushed tomatoes and tomato paste to ensure the sauce is thick and rich, not watery or thin.
3. Better Than Dining Out
The addition of 0.5 cup (120ml) of strong black coffee and 1 tbsp of unsweetened cocoa powder might sound weird, but it’s the pro move. The coffee adds acidity and a dark, roasted note, while the cocoa powder enhances the earthiness of the chili powder without making it taste like dessert.
It’s the "secret ingredient" that will have your friends guessing all night.
Choosing the Right Components for Deep Flavor
| Ingredient | Science Role | Pro Secret |
|---|---|---|
| Beef Bone Broth | Rich Protein Base | Use chilled broth to easily skim fat |
| Cocoa Powder | Flavor Depth | Intensifies the earthy notes of peppers |
| Strong Coffee | Acidic Catalyst | Brightens heavy beef and fat flavors |
| Tomato Paste | Natural Thickener | Brown it in the pan to remove raw taste |
When you're gathering your supplies, don't skimp on the spices. Freshness matters here. If that jar of cumin has been sitting in the back of your pantry since the last presidency, it’s time for a new one. The 1 tbsp of smoked paprika is non negotiable for that "cooked over a campfire" vibe.
For a perfect starter while your chili simmers, I always recommend whipping up a batch of my Chilis Salsa Recipe. It’s ready in about 30 minutes and hits that perfect restaurant style craving while the main event finishes up on the stove.
- 1 lb ground beef (80/20): Provides the essential fat and classic chili texture.
- 1 lb beef chuck roast: Cut into 1/4 inch cubes for a premium, meaty bite.
- 2 large yellow onions (300g): Finely diced to melt into the sauce.
- 1 large bell pepper (150g): Adds a subtle sweetness to balance the heat.
- 6 cloves garlic: Minced fresh don't use the jarred stuff here.
- 2 jalapeños: Seeded and minced. Leave the seeds in if you want a real kick.
- 2 cups (480ml) beef bone broth: Much deeper flavor than standard stock.
- 0.5 cup (120ml) strong black coffee: Adds a roasted, complex background note.
- 28 oz (794g) crushed tomatoes: The base for our thick sauce.
- 3 tbsp tomato paste: For body and concentrated tomato flavor.
- 30 oz (850g) dark kidney beans: Rinsed and drained for the best texture.
- 0.25 cup chili powder: Use a high-quality blend for the best results.
- 1 tbsp smoked paprika: Adds that essential smoky depth.
- 2 tsp ground cumin: Earthy and aromatic.
- 1 tbsp unsweetened cocoa powder: Our secret weapon for richness.
- 1 tsp dried oregano: A classic herbaceous touch.
- 1 tsp kosher salt: Adjust to taste at the very end.
- 0.5 tsp black pepper: Freshly ground is always better.
| Original Ingredient | Substitute | Why It Works |
|---|---|---|
| Beef Bone Broth | Chicken Stock | Lighter flavor but provides the necessary liquid |
| Kidney Beans | Black Beans | Softer texture but works well with the spices |
| Beef Chuck Roast | Extra Ground Beef | Changes the texture but keeps the flavor profile |
The Best Tools for a Great Batch of Chili
You don't need a kitchen full of gadgets, but a couple of things will make your life much easier. First, a heavy bottomed pot is essential. A cast iron Dutch oven (like a Lodge) is my go to because it holds heat so evenly. This prevents the bottom from scorching while you’re letting it simmer for over an hour.
1. Heavy Bottomed Dutch Oven
This is the workhorse of the recipe. It allows you to sear the beef at high heat without the pan cooling down too much, which is vital for getting that dark, flavorful crust on the meat cubes.
2. Sharp Chef's Knife
Since you'll be dicing 1 lb of chuck roast into tiny cubes and finely dicing 300g of onions, a sharp knife isn't just a luxury it's a safety requirement. It makes the prep work fly by and ensures your veggie pieces are uniform, so they cook at the same rate.
Chef Tip: Freeze your beef chuck roast for about 15-20 minutes before dicing. It firms up the fat and muscle, making it infinitely easier to cut those perfect 1/4 inch cubes without the meat sliding around.
How to Build Your Chili from Scratch

Phase 1: The Sear and Fond
Start by heating your pot over medium high heat. Add the 1 lb of beef chuck cubes in batches. Don't crowd the pan! We want a hard sear until they are dark brown and crusty. Remove the cubes and then add the 1 lb of ground beef, breaking it up as it cooks.
Look for the "fond" (the brown bits) on the bottom of the pot; that is pure flavor gold.
Phase 2: The Aromatic Sweat
Lower the heat to medium and add your 300g of diced onions and 150g of bell pepper. Use the moisture from the veggies to scrape up those brown bits from the bottom of the pan. Sauté for 5-7 minutes until the onions are translucent and soft.
Add the minced garlic and jalapeños, cooking for just another minute until the smell fills your kitchen.
Phase 3: Blooming the Spices
Add the 3 tbsp of tomato paste to the center of the pot. Cook it for 2 minutes, stirring constantly, until it turns a shade darker. Now, toss in the 0.25 cup chili powder, smoked paprika, cumin, cocoa powder, and oregano.
Toast these spices for 60 seconds until they become intensely fragrant. This "blooming" process is what separates the best chili recipe from a mediocre one.
Phase 4: The Integration
Deglaze the pot with the 0.5 cup of black coffee, then pour in the 2 cups of beef bone broth and the 28 oz of crushed tomatoes. Add the seared beef chuck back in, along with the 30 oz of rinsed kidney beans. Stir everything together, making sure no spices are stuck to the sides.
Bring it to a gentle boil, then immediately drop the heat to low.
Phase 5: The Finishing Touch
Cover the pot partially and let it simmer for 1 hour 15 mins. You want a lazy bubble, not a violent boil. Every 20 minutes, give it a stir to make sure nothing is sticking to the bottom. After the time is up, taste it.
This is when you add your 1 tsp of salt and 0.5 tsp of black pepper. The chili is ready when the sauce is thick and the chuck cubes are tender.
Chef Tip: Add a teaspoon of balsamic vinegar or a squeeze of lime juice right before serving. The sudden hit of bright acidity makes all the heavy, smoky flavors pop.
How to Fix Common Issues with Homemade Chili
Sometimes things don't go exactly to plan, but don't panic. Most chili "disasters" are actually very easy to fix. If your chili tastes a bit flat, it’s usually an salt or acid issue. If it’s too spicy, we can fix that too.
1. Chili is Too Thin
If your chili looks more like soup than a thick stew, don't worry. You can simmer it uncovered for an extra 20 minutes to reduce the liquid. Alternatively, take a potato masher and crush a few of the beans right in the pot.
The starch from the beans will act as a natural thickener and give the sauce a heartier body.
2. Flavor Feels "Flat"
This usually happens if the spices weren't bloomed or if the meat wasn't browned properly. The quickest fix is to add a little bit more salt, but if that doesn't work, try a tiny pinch of brown sugar. It sounds counterintuitive, but a tiny bit of sweet can balance out the bitter notes of the coffee and cocoa.
3. Too Much Heat
If those jalapeños were a bit angrier than you expected, you can mellow the dish out. Adding more dairy when serving like a big dollop of sour cream or a handful of shredded cheddar helps coat the tongue and neutralize the capsaicin.
You can also add more crushed tomatoes to dilute the spice levels.
| Problem | Root Cause | Solution |
|---|---|---|
| Greasy surface | High fat beef content | Skim with a cold metal spoon or bread slice |
| Tough meat | Not enough simmer time | Simmer longer; collagen needs time to melt |
| Bitter taste | Spices or coffee burnt | Add a tiny pinch of brown sugar or honey |
Common Mistakes Checklist: - ✓ Skipping the sear on the beef chuck (you lose 50% of the flavor). - ✓ Not rinsing the canned beans (the canning liquid is metallic and salty). - ✓ Using pre ground pepper instead of fresh (fresh adds a necessary bite).
- ✓ Boiling too hard (this makes the meat tough instead of tender). - ✓ Forgetting to taste for salt at the very end.
Ways to Change This Recipe for Different Diets
You can easily tweak this recipe to fit your lifestyle without losing that core comfort flavor. If you're looking for a lighter version, swap the beef for ground turkey and use chicken bone broth. The cocoa powder and coffee still work wonders here to give the lighter meat a richer "darker" profile.
1. The Turkey Twist
Use 2 lbs of ground turkey instead of the beef mix. Since turkey is much leaner, you'll want to add 1 tbsp of Worcestershire sauce to bring back some of that savory depth. It's a fantastic way to keep the spirit of the best chili recipe while cutting down on saturated fats.
2. The Plant Based Pivot
For a vegetarian version, replace the beef with 2 additional cans of beans (pinto or black beans work great) and a bag of frozen meatless crumbles. Use vegetable broth instead of bone broth. The cocoa and coffee are even more important here to provide the "meatiness" that the veggies might lack.
Storing and Reheating Your Chili for Best Results
Chili is famous for being better on day two. As it sits in the fridge, the spices continue to meld and the starches from the beans further thicken the sauce. It’s the ultimate make-ahead meal.
- Fridge Storage: Keep it in an airtight container for up to 4 days.
- Freezer Storage: This recipe freezes beautifully. Let it cool completely, then store in freezer bags for up to 3 months. Lay them flat to save space!
- Zero Waste Tip: If you have just a little bit of chili left, use it as a topper for baked potatoes or toss it with some pasta for a "Cincinnati style" lunch. Never throw out the "chili dregs" they are packed with flavor.
When reheating, do it slowly on the stovetop over medium low heat. You might need to add a splash of water or broth, as it will have thickened significantly in the fridge. Avoid the microwave if you can, as it tends to heat the beans unevenly and can make the meat rubbery.
Fun Ways to Top and Serve Your Chili
The chili itself is the star, but the toppings are the supporting cast that makes the show complete. I like to set up a "chili bar" when I have friends over. Everyone has their own preference for how much "zip" or "cream" they want in their bowl.
1. The Competition Garnish
If you want that "award winning" look, go with a dollop of cold sour cream, a sprinkle of sharp cheddar cheese, and some finely sliced green onions. The contrast between the hot, spicy chili and the cold cream is heaven. A few pickled jalapeños on top can add a nice vinegar punch.
2. The Texture Companion
Don't forget the crunch! Traditionalists love saltine crackers, but I’m a huge fan of thick, salty tortilla chips or even Fritos. If you want to get fancy, serve this alongside some warm, honey glazed cornbread. The sweetness of the bread against the smoky heat of the chili is a pairing that never fails.
| Metric | Checkpoint | Visual/Sensory Cue |
|---|---|---|
| Temperature | 180°C (350°F) | For oven finishing or cornbread side |
| Weight | 300g Onions | Roughly 2 large yellow onions diced |
| Time | 75 minutes | Simmer until meat is fork tender |
If you're planning a full spread, don't forget the sides. While this chili is a meal on its own, a simple green salad or a bowl of my classic Caldo de Pollo can be a great way to offer variety for a larger gathering.
If you want X, do Y
- If you want it thicker, crush a half cup of beans against the side of the pot.
- If you want it spicier, leave the jalapeño seeds in and add a teaspoon of chipotle in adobo.
- If you want it smokier, double the smoked paprika or add a drop of liquid smoke.
Myths about Chili: "Searing meat seals in juices." This isn't true; moisture loss happens regardless. However, the crust adds massive flavor through the Maillard reaction, which is why we do it.
"Chili needs to cook all day." While longer is often better, 75 minutes is the sweet spot where the meat is tender but the beans haven't turned to mush. "Beans don't belong in chili." This is a regional debate (looking at you, Texas!), but in this kitchen, we love the fiber and texture they bring to the table.

High in Sodium
895 mg of sodium per serving (39% of daily value)
The American Heart Association recommends limiting sodium intake to about 2,300mg per day for most adults. Individuals with high blood pressure may need to aim for lower limits.
Tips to Reduce Sodium in Your Chili
-
Low-Sodium Broth-30%
Substitute the regular beef bone broth with low-sodium or no-salt added beef broth. This can significantly cut down on the sodium content without sacrificing flavor.
-
Reduce Added Salt-25%
Omit the 1 tsp of kosher salt entirely or reduce it to 1/2 tsp. Taste and adjust after cooking; other spices enhance flavor without adding sodium. You can always add more, but you can't take it away!
-
No-Salt Added Tomatoes-20%
Use no-salt added crushed tomatoes instead of regular. This simple swap can make a noticeable difference in the overall sodium level.
-
Fresh or Dried Beans-20%
Replace canned kidney beans with freshly cooked or dried beans prepared at home without salt. If using canned, rinse them thoroughly to remove excess sodium.
-
Leaner Ground Beef-10%
Opt for leaner ground beef (e.g., 90/10) to reduce the overall sodium and fat content of the chili.
-
Spice It Up!
Enhance the flavor with sodium free herbs and spices like garlic powder, onion powder, smoked paprika (increase amount), or a pinch of cayenne pepper. These will help compensate for the reduced salt.
Recipe FAQs
What is the secret to really good chili?
Searing the meat properly and blooming the spices. The deep brown crust (fond) on the beef creates hundreds of complex flavor compounds via the Maillard reaction. Blooming the spices in fat before adding liquid unlocks their fat-soluble aromatics.
What is the secret ingredient for chilli?
Unsweetened cocoa powder and strong black coffee. These don't make the chili taste like coffee or chocolate, but they add incredible dark depth, earthiness, and acidity that balances the richness of the beef fat.
What are the common mistakes when cooking chili?
Boiling aggressively and not browning the meat enough. Boiling causes the meat to tighten and become tough, while skipping the sear removes the foundation of savory flavor. Simmer gently for 75 minutes minimum.
What's the best ingredient to add to chili?
A splash of acid right at the end, like balsamic vinegar or lime juice. This brightens all the heavy, smoky flavors in the bowl, making the entire profile pop. If you enjoyed mastering this flavor balancing technique, see how we use a similar acid principle in the Chicken Stroganoff Recipe for perfect savory finish.
How do I make my chili thicker if it’s too watery?
Mash a portion of the beans against the side of the pot. The starch released from the mashed beans acts as a natural emulsifier, binding the liquid to the solids quickly. This is a simple texture fix that avoids over reducing the sauce.
Is it true I must use only one type of beef in my chili?
No, using a blend yields superior texture and flavor. Combine fatty ground beef for traditional texture with cubed beef chuck roast for hearty, steak like bites. If you prefer making large, uniform batches, consider applying similar blending principles to a casserole for a great result in our Broccoli Cheese Casserole recipe.
How long should chili simmer for the best results?
Simmer for a minimum of 75 minutes, partially covered, on low heat. While this timeline tenderizes the chuck roast effectively, chili quality improves significantly when allowed to rest overnight. The slow integration of spices is key to deep flavor development.
The Best Chili Recipe
Ingredients:
Instructions:
Nutrition Facts:
| Calories | 408 kcal |
|---|---|
| Protein | 29.7 g |
| Fat | 18.5 g |
| Carbs | 32.4 g |
| Fiber | 9.8 g |
| Sugar | 6.1 g |
| Sodium | 895 mg |
