Ultra Fudgy Brown Butter Brownies

- Time:20 minutes active + 25 minutes baking + 1 hour chilling = 105 minutes total
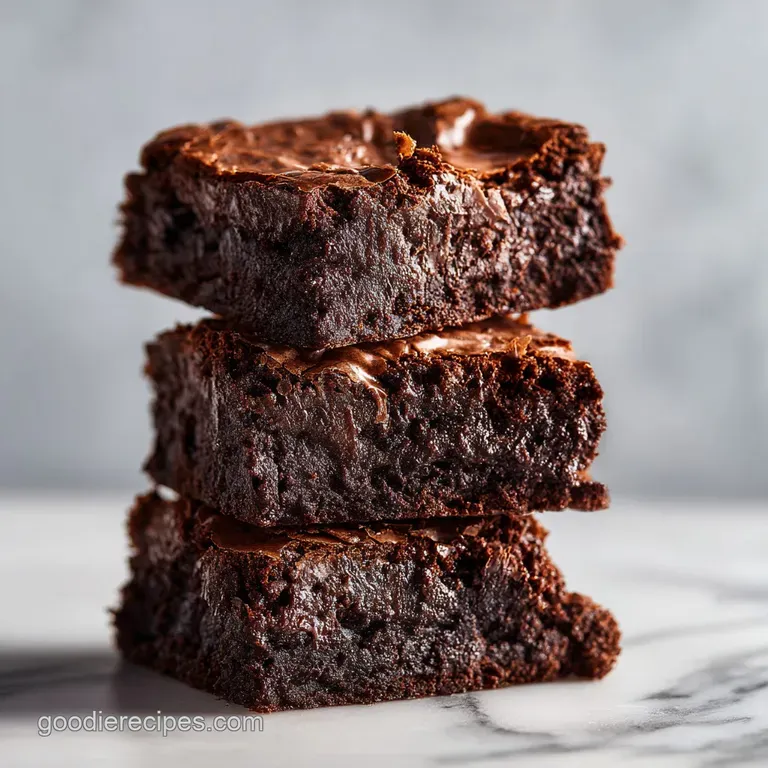
- Flavor/Texture Hook: Toasty, nutty base with a shatter thin top crust and velvety center
- Perfect for: Rainy Sunday afternoons or impressing people who think they "don't like" chocolate
- A Deep Dive into Brown Butter Brownies
- The Essential Recipe Specifications and Times
- Selecting the Best Ingredients for Fudgy Results
- Choosing the Right Equipment for Even Baking
- The Cooking Process for Maximum Chocolate Flavor
- Professional Tips to Avoid Common Brownie Pitfalls
- Creative Variations and Ingredient Substitution Ideas
- Preservation Secrets for Maintaining That Fudgy Texture
- How to Serve and Enjoy Your Masterpiece
- Recipe FAQs
- 📝 Recipe Card
A Deep Dive into Brown Butter Brownies
It is a rainy Tuesday afternoon, and the kitchen is quiet except for the rhythmic whisking of eggs. Suddenly, the air shifts. It’s no longer just the smell of melting fat; it’s a heavy, intoxicating aroma of toasted hazelnuts and dark caramel. That is the moment the butter transforms.
If you’ve ever stood over a skillet watching yellow liquid turn into liquid gold, you know the exact sensory "click" I’m talking about. It’s the backbone of this entire recipe, and honestly, once you go brown butter, you never really go back to the plain stuff.
We’ve all had those brownies that are basically just chocolate cake in a square pan. That’s fine for a bake sale, but that’s not what we’re doing here. This recipe is about that specific, almost illegal level of fudginess that sticks to the roof of your mouth while the top remains as thin and brittle as a frozen puddle.
We’re leaning into the intensity of Dutch process cocoa and the bitterness of espresso to make sure the sweetness doesn't just bowl you over.
The first time I made these for a family dinner, the room went silent. No one was talking; they were just navigating that transition from the crispy edge to the molten center. It’s a dish that demands your full attention.
We’re going to talk about why we whisk the eggs until they’re pale, why the pan color matters, and how to tell when they’re done without over baking them into a brick. Trust me, it’s easier than it looks, but the small details make all the difference.
The Essential Recipe Specifications and Times
Before we get our hands messy, we need to look at the numbers. Precision is the best friend of any baker, especially when we’re dealing with the delicate balance of fat and sugar. If you skip the resting time, you’ll end up with a pile of delicious crumbs rather than clean, professional looking squares.
- 1. Butter Temp
- Brown the butter until the milk solids are a deep amber, roughly 10 minutes.
- 2. Egg Aeration
- Whisk the egg and sugar mixture for a full 5 minutes until it falls in thick ribbons.
- 3. The Pull
- Take them out at exactly 25 minutes; the carryover heat finishes the job.
Why This Works
- Maillard Browning: Toasting the butter milk solids creates complex, nutty flavor compounds that regular melted butter lacks.
- Sugar Dissolution: Whisking the granulated sugar into the eggs creates a stable foam that rises slightly, then collapses into that classic crackly top.
- Fat to Flour Ratio: Using minimal flour (95g) ensures the structure remains dense and moist rather than bread like.
- Espresso Synergy: Small amounts of coffee don't make the brownies taste like a latte; they simply amplify the dark notes of the cocoa.
| Thickness | Internal Temp | Rest Time | Visual Cue |
|---|---|---|---|
| 1 inch | 185°F (85°C) | 1 hour | Edges pull away from the pan slightly |
| 1.5 inches | 190°F (88°C) | 1.5 hours | Center doesn't jiggle when shaken |
| 0.75 inch | 180°F (82°C) | 45 minutes | Surface looks like cracked parchment |
This table helps you decide when to pull the pan based on how thick your batter sits. If you use a slightly larger pan and the batter is thinner, aim for the lower end of the time scale to avoid a dry result.
Selecting the Best Ingredients for Fudgy Results
The magic starts with the butter. Use the best quality unsalted butter you can find, because when we cook off the water, the flavor of the fat becomes incredibly concentrated. For the chocolate, I always reach for semi sweet bars (60% cacao) rather than chips for the base, because bars melt more smoothly into the butter.
| Component | Science Role | Pro Secret |
|---|---|---|
| Unsalted Butter | Flavor Carrier | Use a light colored pan to see the solids brown |
| Dutch Process Cocoa | pH Balance | Sift it twice to remove every single lump |
| Large Eggs | Structural Binder | Use room temperature eggs for better volume |
| Granulated Sugar | The "Shatter" Top | Whisk until the mixture is pale and thick |
For the dry ingredients, the all purpose flour provides just enough gluten to hold things together. We aren't looking for a lot of "lift" here no baking powder or soda allowed. We want density.
- 225g unsalted butter: Provides the fat and the nutty flavor base. Why this? Higher fat content means a silkier mouthfeel after browning.
- 115g semi sweet chocolate: Melted into the butter for a ganache like base. Why this? Chopped bars melt better than stabilized chocolate chips.
- 200g granulated sugar: For the structure and that crispy top.
- 110g light brown sugar: Adds moisture and a hint of molasses.
- 3 large eggs: The primary leavening agent via aeration.
- 1 tbsp vanilla extract: Rounds out the sharp cocoa notes.
- 1 tsp espresso powder: Intensifies the chocolate without adding coffee flavor.
- 45g Dutch process cocoa powder: Provides a deep, dark color and smooth flavor.
- 95g all purpose flour: The minimal structure needed to keep it together.
- 0.75 tsp sea salt: Essential for cutting through the richness.
- 100g chocolate chunks: Folded in at the end for pockets of melted joy.
Choosing the Right Equipment for Even Baking
You don't need a professional kitchen, but a few specific tools will save you from a lot of frustration. First and foremost, grab a light colored skillet (like stainless steel or white enamel) for the butter.
If you use a dark non stick pan, you won't be able to see the milk solids turning brown, and you’ll likely burn them.
A sturdy whisk is your best friend here. We are going to be whisking those eggs manually (unless you want to use a hand mixer), and you need something that can really move the air into that sugar egg mixture. For the pan, an 8x8-inch square metal pan is the gold standard.
Glass pans hold heat differently and often lead to overcooked edges and a raw middle.
Finally, parchment paper is non negotiable. Don't just grease the pan. Create a "sling" by letting the parchment hang over two sides. This allows you to lift the entire block of brownies out once they’re cooled, making those clean, sharp cuts a million times easier.
The Cooking Process for Maximum Chocolate Flavor
This is where we bring the heat and the technique. The process is a sequence of temperature management getting the butter hot enough to brown, then cool enough to not scramble the eggs. If you've ever made my Brown Butter Caramel Sauce, you'll recognize the nutty aroma we're chasing here.
- Melt the 225g unsalted butter in a light skillet over medium heat. Note: It will sizzle and pop as the water evaporates.
- Watch for the foam to subside and amber flecks to appear at the bottom. Immediately remove from heat once it smells like toasted nuts.
- Stir the 115g of chopped chocolate into the hot butter. Note: The residual heat is enough to melt it without scorching.
- Whisk 200g granulated sugar, 110g brown sugar, and 3 eggs in a separate bowl. Whisk 5 minutes until pale and thick.
- Mix in the 1 tbsp vanilla and 1 tsp espresso powder until fully incorporated.
- Fold the butter chocolate mixture into the eggs gently with a spatula. Continue until no oily streaks remain.
- Sift in 45g cocoa powder, 95g flour, and 0.75 tsp sea salt. Note: Sifting prevents "cocoa bombs" of dry powder.
- Fold in the 100g chocolate chunks with a few quick turns.
- Pour into the parchment lined 8x8-inch pan and smooth the top.
- Bake at 350°F (175°C) for 25 minutes until the surface is dull and crackled.
| Method | Time | Texture | Best For |
|---|---|---|---|
| Fast Method | 35 mins | Cakey/Soft | Last minute guests |
| Classic (This Recipe) | 105 mins | Ultra Fudgy | True brownie lovers |
| Aged Method | 24 hours | Truffle like | Maximum flavor depth |
The "Classic" method we are using relies on that 1 hour rest time. Without it, the fats don't solidify, and the chocolate doesn't "set," leaving you with a messy texture.
Professional Tips to Avoid Common Brownie Pitfalls
The biggest mistake people make with Brown Butter Brownies is over browning the butter until the milk solids turn black. Black is bitter; amber is better. If it starts to smell like it’s burning, you’ve gone too far. Pour it out immediately to stop the cooking.
Another sneaky pitfall is the whisking stage. If you don't whisk the eggs and sugar long enough, you won't get that "shatter" top. You are looking for the "ribbon stage," where the batter falling from the whisk holds its shape on the surface for a few seconds before disappearing.
Why Your Brownies Are Greasy
If you see oil pooling on top of your batter, it usually means the butter was too hot when you added it to the eggs, or you didn't emulsify it well enough. The folding process should be gentle but thorough.
Why Your Brownies Are Cakey
This usually happens from over measuring the flour. If you don't have a scale, fluff your flour with a spoon before scooping it into a measuring cup and leveling it off. Never pack the flour down.
| Problem | Root Cause | Solution |
|---|---|---|
| Dull, matte top | Under whisked eggs | Whisk eggs and sugar for at least 5 mins |
| Dry, crumbly edges | Over baked | Reduce oven time by 3 mins next time |
| Raw, oily center | Butter too hot | Let butter/chocolate cool for 5 mins before mixing |
Common Mistakes Checklist:
- ✓ Using a dark colored skillet for browning (you can't see the color change).
- ✓ Skipping the sifting of cocoa powder (leads to bitter lumps).
- ✓ Cutting the brownies while they are still warm (they will fall apart).
- ✓ Over mixing the flour (develops too much gluten, making them tough).
- ✓ Using cold eggs (they won't aerate properly with the sugars).
Creative Variations and Ingredient Substitution Ideas
While the classic fudgy browned butter brownies are hard to beat, sometimes you want to pivot. If you’re looking for something with a different profile, you might enjoy my homemade fudgy brownies which focus more on traditional creamed butter.
| Original Ingredient | Substitute | Why It Works |
|---|---|---|
| Dutch process Cocoa | Natural Cocoa Powder | More acidic; brownies will be lighter and slightly tangier |
| Light Brown Sugar | Dark Brown Sugar | Adds more moisture and a deeper molasses flavor |
| Semi sweet Chocolate | Bittersweet (70%+) | Significantly less sweet; Note: May require 20g extra sugar |
For a saltier twist, sprinkle a generous pinch of Maldon sea salt flakes over the top immediately after taking them out of the oven. The crunch of the salt against the velvety chocolate is pure heaven. You can also swap the vanilla for almond extract if you want a cherry chocolate vibe, but go easy it's strong!
- For extra chewy edges
- Use a metal pan and don't use parchment on the sides.
- For a "truffle" texture
- Under bake by 2 minutes and chill in the fridge overnight.
- For a nuttier crunch
- Add 75g of toasted chopped walnuts along with the chocolate chunks.
Preservation Secrets for Maintaining That Fudgy Texture
Brownies are surprisingly hardy. Because of the high fat and sugar content, they don't stale as quickly as a loaf of bread. You can keep these in an airtight container at room temperature for up to 4 days.
In fact, many people (myself included) think they taste even better on day two once the flavors have had a chance to marry.
For long term storage, these freeze beautifully. Wrap individual squares tightly in plastic wrap, then place them in a freezer safe bag. They’ll stay fresh for up to 3 months.
When the craving hits, just let one sit on the counter for 20 minutes, or give it a 10 second zap in the microwave if you want that "just out of the oven" gooeyness.
Zero Waste Tip: If you somehow end up with edges that are too dry or crumbs from cutting, don't toss them! Pulse them in a food blender and use them as a "dirt" topping for vanilla ice cream, or fold them into a batch of chocolate chip cookie dough.
Nothing goes to waste in a chocolate obsessed kitchen.
How to Serve and Enjoy Your Masterpiece
The "Purist" way to eat these is standing in the kitchen, still in your apron, with a cold glass of whole milk. But if you’re serving guests, there are ways to make this feel like a five star dessert.
A small dollop of unsweetened whipped cream or a scoop of high-quality vanilla bean ice cream provides a cold, creamy contrast to the dense chocolate.
The Classic A La Mode
Warm a brownie for 15 seconds, top with a massive scoop of vanilla ice cream, and drizzle with a little extra melted chocolate. The way the ice cream melts into the crevices of the brownie is a sight to behold.
The Coffee House Pairing
Because of the espresso powder in the batter, these brownies pair perfectly with a sharp, dark roast coffee or a double shot of espresso. The bitterness of the drink cuts right through the richness of the brown butter, cleansing your palate for the next bite.
Achieving the "Shatter" Crust
That signature papery top isn't just luck. It comes from the sugar dissolving into the egg proteins. As the brownies bake, this mixture rises to the surface and dehydrates, creating a thin, meringue like layer.
If you find your crust isn't crackling, try using slightly finer granulated sugar or whisking for an extra minute. It’s the visual hallmark of a perfect batch, and it’s what makes people ask, "How did you do that?" Now you know the secret it’s all in the whisk.

Recipe FAQs
Is browned butter better for brownies?
Yes, it provides a superior depth of flavor. Browning the butter toasts the milk solids, creating a nutty, caramel like complexity that standard melted butter cannot replicate.
Can a diabetic eat a brownie?
Consult a healthcare professional regarding specific dietary restrictions. Because this recipe contains significant amounts of sugar and flour, it is best to discuss consumption with your doctor to see how it fits within your individual nutritional plan.
What is the trick to brown butter?
Use a light colored skillet to monitor color changes easily. Swirl the butter constantly over medium heat until it foams and the milk solids turn a deep amber brown with a nutty aroma, then remove it from the heat immediately to prevent burning.
Does brown butter make a difference in baking?
Yes, it fundamentally alters the flavor profile and moisture content. If you enjoyed mastering the sensory cues of browning butter here, you can apply that same precision and flavor development to elevate other butter based desserts.
Is it true I must bake these at 400°F for a crust?
No, this is a common misconception. Baking at 350°F for 25 minutes is essential to ensure the center remains soft and fudgy without drying out the edges.
How to achieve the perfect fudgy texture?
Whisk the sugar and eggs until they reach the "ribbon stage." This process, which takes 3-5 minutes, creates a thick, aerated base that ensures the brownie settles into a dense, velvety consistency rather than becoming cake like.
How to slice brownies cleanly?
Rest the brownies in the pan for at least 1 hour after baking. This cooling period is non-negotiable, as it allows the internal structure to set completely, ensuring you get clean, professional slices every time.
Ultra Fudgy Brown Butter Brownies

Ingredients:
Instructions:
Nutrition Facts:
| Calories | 283 kcal |
|---|---|
| Protein | 3.1 g |
| Fat | 16.7 g |
| Carbs | 33.4 g |
| Fiber | 1.6 g |
| Sugar | 26.1 g |
| Sodium | 112 mg |
