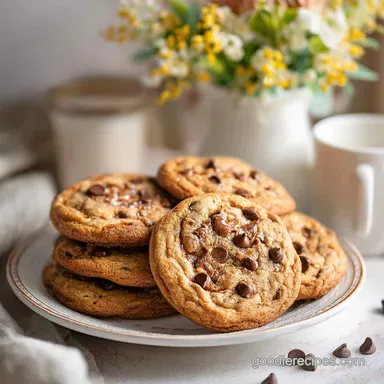
Toffee Chocolate Chip Cookies with Brown Butter

- Time: 20 min active + 24 min baking + 80 min cooling and chilling
- Flavor & Texture: Nutty, salty, and chewy with crisp edges
- Perfect for: Family gatherings or a cozy weekend treat
The smell of butter browning in a pan is a telltale sign that something good is happening. It starts with a loud foam and ends with a toasted hazelnut aroma that fills the entire kitchen. These cookies aren't just about chocolate, they're about that deep, caramelized base.
They're the kind of treat you make for a rainy Sunday or a family get together when you want something that feels a bit more special than a basic batch. The toffee bits melt into the dough, creating little pockets of crunch.
You can expect a cookie that's golden on the outside and soft in the middle. Since we're using brown butter and a bit of extra yolk, the texture stays rich and dense.
The Trick Behind the Texture
- Toasted Butter: Browning the butter removes water and toasts the milk solids, which adds a nutty flavor and helps the cookie hold its shape.
- Dark Brown Sugar: This sugar has more molasses than the light version, which keeps the centers chewy and adds a hint of caramel.
- Dough Chilling: Resting the dough for an hour allows the flour to fully hydrate, which prevents the cookies from spreading into flat puddles.
| Dough Prep | Bake Time | Texture | Best For |
|---|---|---|---|
| No Chill | 10-12 min | Thin and crispy | Quick cravings |
| 1 Hour Chill | 11-13 min | Thick and chewy | Classic bakery style |
Essential Tools
You'll need a light colored skillet to brown the butter. Using a dark pan makes it hard to see the color change, and you might burn the butter before you realize it. A digital scale is also helpful for getting the weights exact, especially with the flour.
Ingredients and Swaps
The unsalted butter is the star here, as we need to control the salt levels. Dark brown sugar provides the moisture and depth, while the extra egg yolk adds fat for a fudgier bite. All-purpose flour gives the right structure, and the mix of toffee and semisweet chocolate creates a balanced sweetness.
For those needing a gluten-free version, a 1:1 gluten-free flour blend usually works, but it can make the cookies slightly more fragile.
Ingredients and Substitutes
- 227 g unsalted butter, cut into cubes Why this? For browning and rich flavor
- 213 g packed dark brown sugar Why this? Adds moisture and caramel notes
- 100 g granulated sugar Why this? Creates crisp edges
- 50 g large egg, room temperature Why this? Binding and lift
- 18 g large egg yolk, room temperature Why this? Richer, chewier texture
- 15 g whole milk (1 tablespoon) Why this? Adjusts dough consistency
- 9 g pure vanilla extract (2 teaspoons) Why this? Enhances the brown butter
- 281 g all-purpose flour (2¼ cups) Why this? Standard structure
- 4 g baking soda (1 teaspoon) Why this? Helps them rise and brown
- 6 g fine salt (1 teaspoon) Why this? Balances the sugar
- 170 g toffee bits (1 cup) Why this? Adds crunch and sweetness
- 255 g semisweet chocolate chips (1½ cups) Why this? Classic chocolate contrast
| Original Ingredient | Substitute | Why It Works |
|---|---|---|
| Dark Brown Sugar | Light Brown Sugar | Similar function. Note: Less molasses flavor, slightly lighter color |
| Semisweet Chips | Dark Chocolate Chunks | Higher cocoa content. Note: Less sweet, more intense chocolate |
| Whole Milk | Heavy Cream | Similar liquid role. Note: Slightly richer result |
Key Steps

Phase 1: Brown the Butter
In a light-colored skillet over medium heat, melt the cubed butter, swirling the pan frequently. Wait for it to foam vigorously and then subside. Keep cooking until the milk solids at the bottom turn a golden-amber hue and smell like toasted hazelnuts. Ensure they do not burn or smell acrid.
Pour the browned butter and the toasted bits into a large mixing bowl and let it cool for about 20 minutes, until warm but no longer hot.
Phase 2: Build the Base
Stir the dark brown and granulated sugars into the cooled butter. Whisk for approximately 1 minute until the mixture is glossy and smooth. Mix in the whole egg, egg yolk, milk, and vanilla. Whisk for 1 to 2 minutes until the batter becomes thicker and noticeably lighter in color.
Phase 3: Add the Flour and Mix-Ins
Whisk together the flour, baking soda, and salt in a medium bowl. Gradually add the dry ingredients to the wet mixture in two batches on low speed, mixing only until no dry streaks are visible. Using a spatula, fold in the chocolate chips and toffee bits. The dough should be thick and easy to scoop.
Phase 4: Chill and Portion
Cover the bowl and refrigerate the dough for 1 hour. Scoop 3-tablespoon portions (about 55 g each) onto parchment-lined baking sheets, spacing them roughly 2 inches apart. If the dough gets too soft while portioning, return it to the refrigerator for 10 minutes.
Phase 5: Bake
Preheat your oven to 180°C (350°F) with the rack positioned in the center. Bake one sheet at a time for 11 to 13 minutes, rotating the pan halfway through, until the edges are deep golden and the centers look soft and slightly underdone.
Repeat for the remaining dough, with a total baking time of about 24 minutes.
Phase 6: Cool
Allow the cookies to rest on the hot baking sheet for 5 minutes, then move them to a cooling rack until they have cooled.
What Can Go Wrong
Cookies Spread Too Thin
This usually happens if the butter was too hot when you added the sugar or if you skipped the chilling hour. If the dough feels greasy or soft, pop it back in the fridge for 10 minutes. Always use parchment paper to prevent sticking and excessive sliding.
Butter Burned Quickly
If the butter smells sharp or the bits look black, it's overdone. This happens if the heat is too high or the pan isn't swirled. Start over with a lower heat setting and keep the butter moving constantly.
Dry or Cakey Texture
Too much flour is the culprit here. If you scoop flour directly with the measuring cup, you're likely packing it down and adding too much. Spoon the flour into the cup instead, or better , use the 281 g weight.
Freezing and Reheating Guide
These cookies stay fresh in an airtight container at room temperature for 3 days. For longer storage, the dough freezes beautifully. Scoop them into 55 g balls and freeze on a tray before transferring to a bag. They'll keep for 3 months.
To bake from frozen, just add 2 minutes to the baking time. If you've already baked them and want that fresh-out-of the-oven feel, microwave a cookie for 10 seconds. This softens the chocolate and makes the toffee a bit gooey again.
Easy Swaps and Add-Ins
- Espresso Toffee: Add 1 teaspoon of instant espresso powder to the dry ingredients. The bitterness cuts through the sugar and makes the toffee pop.
- Maple Pecan: Swap half the toffee bits for toasted pecans and add a tablespoon of maple syrup to the wet ingredients.
- Extra Richness: For a truly indulgent finish, drizzle these with a brown butter caramel sauce after they cool.
What to Serve This With
While chilled milk is a traditional pairing, a hot cup of black coffee provides a nice contrast to the richness of the brown butter. When serving these at a party, accompany them with tart berries like raspberries to add a burst of acidity. For a dessert platter, serve them with a few slices of crisp apple.
Recipe FAQs
What makes these cookies taste different from standard versions?
The browning of the butter creates a deep, toasted hazelnut flavor. Combined with dark brown sugar and toffee bits, this results in a rich, caramelized taste.
How to brown the butter for this recipe?
Melt the cubed butter in a light-colored skillet over medium heat until the milk solids turn golden brown. Swirl the pan often and watch for a toasted hazelnut aroma.
Why should the dough be chilled?
Chilling the dough for one hour allows the flour to fully hydrate. This prevents the cookies from spreading into flat puddles during baking.
Can I skip the refrigeration step?
Yes, you can bake them immediately for a thinner and crispier result. However, the one-hour chill is required for the thick, chewy bakery style.
Where should the finished cookies be stored?
Keep them in a sealed container at room temperature. Refer to the storage section for the exact duration.
Does the browned butter need to cool?
Yes, let it cool for about 20 minutes until it is warm to the touch. This ensures the sugars and eggs incorporate properly without melting.
Which skillet is best for browning butter?
Use a light-colored skillet so you can clearly see the milk solids changing color. A dark pan makes it hard to tell when the butter has reached the golden amber stage.
Toffee Chocolate Chip Cookies for 24