Easy Peel Hard Boiled Eggs: Simple Technique
- Time: Active 8 minutes, Passive 12 minutes, Total 20 minutes
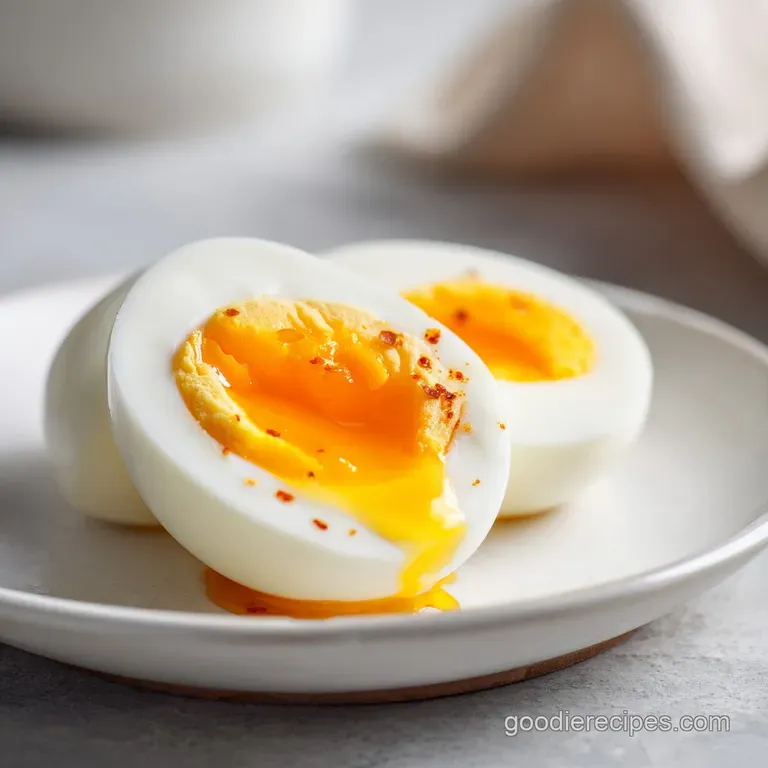
- Flavor/Texture Hook: Silky, tender whites with a creamy, custard like yolk center.
- Perfect for: High volume meal prep, holiday appetizers, or a reliable protein snack.
- Mastering Easy Peel Hard Boiled Eggs Every Time
- The Chemistry of the Shell Bond
- Ingredient Analysis for Consistent Results
- Components and Smart Substitutions
- Required Kitchen Tools and Equipment
- Step-by-Step Cooking and Peeling Process
- Fixing Common Egg Peeling Problems
- Scaling the Batch Size
- Debunking Kitchen Egg Myths
- Keeping and Using Your Eggs
- Creative Ways to Serve Eggs
- Recipe FAQs
- 📝 Recipe Card
Mastering Easy Peel Hard Boiled Eggs Every Time
I still remember the absolute frustration of standing over my kitchen sink, picking away at a dozen eggs like a frantic bird. I was trying to prep for a family picnic, and every single shell took half the egg white with it.
By the time I was finished, I didn't have smooth, beautiful eggs, I had cratered, sad looking lumps of protein that looked like they’d been through a rock tumbler. It was embarrassing, honestly.
I almost gave up on making deviled eggs entirely until I realized that peeling a hard boiled egg isn't about luck, it's about the physics of the membrane.
Since that kitchen disaster, I’ve tested every "hack" on the internet, from poking holes in the shell to shaking them in jars. What I found is that the most reliable way to get that clean, satisfying "shatter" and a smooth peel involves a few specific pantry staples and a very intentional temperature shift.
We aren't just boiling water here, we're manipulating the proteins so they don't glue themselves to the shell. You'll never have to hide "ugly" eggs under a pile of mayo again.
Right then, let's get into the nitty gritty of why this works. You don't need a biology degree, but understanding a tiny bit of egg anatomy helps you troubleshoot on the fly. We're looking for that moment where the shell literally falls away, leaving you with a velvety, unblemished surface.
Trust me on this one, once you see the shell slip off in two large pieces, you'll never go back to the old "start in cold water" method.
The Chemistry of the Shell Bond
- Alkaline Manipulation: Adding 1 tsp baking soda to the 2 quarts water increases the alkalinity of the water, which seeps through the porous shell to help weaken the bond between the membrane and the white.
- Protein Denaturation: Dropping cold eggs into boiling water causes the proteins in the whites to seize up quickly and pull away from the shell membrane immediately.
- Thermal Contraction: The 2 cups ice cubes in the 4 cups cold water create a "shock" that causes the egg inside to shrink slightly while the shell remains the same size, creating a microscopic gap.
- Membrane Lubrication: Adding 1 tbsp white vinegar helps slightly soften the calcium carbonate in the shell, making it just brittle enough to crack cleanly without splintering into a thousand tiny shards.
| Method | Time | Texture | Best For |
|---|---|---|---|
| Hot Start (This Recipe) | 12 minutes | Tender whites, consistent yolk | Speed and easy peeling |
| Cold Start | 15-18 minutes | Often rubbery whites | Beginners who fear cracking |
| Steaming | 13 minutes | Extremely delicate | Very fresh farm eggs |
Freshness actually plays a huge role in how your eggs behave in the pot. Older eggs are naturally more alkaline, which is why they usually peel better than those expensive ones you just got from the farmers' market.
If you are using farm fresh eggs, the baking soda in this recipe is your best friend because it mimics that natural aging process instantly.
Ingredient Analysis for Consistent Results
| Ingredient | Science Role | Pro Secret |
|---|---|---|
| Large Eggs | Protein structure | Use eggs that have been in the fridge for at least a week for the easiest peel. |
| Baking Soda | pH Leveler | Just a teaspoon changes the environment enough to prevent the "glue" effect on the membrane. |
| White Vinegar | Shell Softener | It doesn't affect flavor but makes the shell crack in larger, easier to grab chunks. |
| Ice Bath | Stop Clock | This is non negotiable to prevent that unsightly green sulfur ring around the yolk. |
Using the right water to egg ratio is also vital. You want enough water (2 quarts water) so that when you drop the 12 large eggs in, the temperature doesn't plummet too far. If the water stops boiling for too long, you lose that "thermal shock" advantage we discussed earlier.
Components and Smart Substitutions
- 12 large eggs: These are the standard. Why this? They provide a consistent cook time of 12 minutes for a creamy yolk.
- 2 quarts water: Provides enough thermal mass. Why this? Prevents the temperature from dropping too low when eggs are added.
- 1 tsp baking soda: Increases alkalinity. Why this? Helps separate the membrane from the egg white protein.
- 1 tbsp white vinegar: Brittle shell creator. Why this? Breaks down the calcium just enough to ensure a clean shatter.
- 2 cups ice cubes: Essential for the shock. Why this? Provides the immediate cooling necessary to stop the cooking process.
- 4 cups cold water: The base for the bath. Why this? Ensures the eggs are fully submerged and chilled quickly.
| Original Ingredient | Substitute | Why It Works |
|---|---|---|
| White Vinegar | Apple Cider Vinegar | Same acidity level. Note: May slightly tint the shell but won't affect the inside. |
| Baking Soda | Extra Salt (2 tbsp) | Increases water density. Note: Not as effective for pH shift but helps with buoyancy. |
| Large Eggs | Medium Eggs | Same protein structure. Note: Reduce cook time by 1-2 minutes to avoid overcooking. |
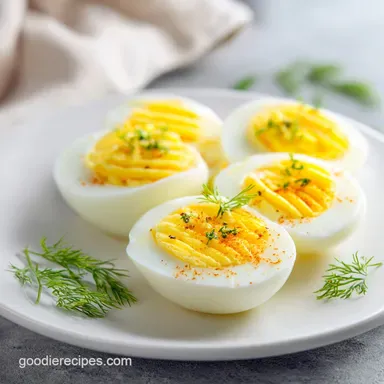
If you're planning a party, these are the base for a Deviled Eggs Recipe that actually looks professional. I love tossing leftovers into a simple sheet pan recipe for a protein boost.
Required Kitchen Tools and Equipment
You don't need fancy gadgets like an electric egg cooker to get these right. A simple, heavy bottomed 4 quart saucepan is your best bet because it holds heat better than thin aluminum pots. You'll also need a slotted spoon to gently lower the eggs into the boiling water.
I’ve made the mistake of just dropping them in, and trust me, they will crack on the bottom of the pot and leak white "ribbons" everywhere.
A large glass or stainless steel bowl is best for the ice bath. Avoid plastic if you can, as it doesn't stay as cold as metal or glass. Having a timer that counts seconds is also a must have.
When you're dealing with 12 minutes of cook time, being off by even sixty seconds can be the difference between a creamy yolk and one that’s starting to get chalky.
step-by-step Cooking and Peeling Process

- Boil the water. Fill your saucepan with 2 quarts water and bring to a rolling boil over high heat. Note: This ensures the thermal shock happens the second the eggs hit the water.
- Add pH boosters. Stir in 1 tsp baking soda and 1 tbsp white vinegar once the water is bubbling.
- Lower the heat. Turn the burner to medium low so the water is just simmering. Note: This prevents the eggs from bouncing and cracking when you add them.
- Introduce the eggs. Use a slotted spoon to gently lower the 12 large eggs into the water.
- Simmer steadily. Turn the heat back up to medium high and start your timer for 12 minutes until the water returns to a gentle, steady boil.
- Prep the bath. While the eggs cook, combine 2 cups ice cubes and 4 cups cold water in your large bowl.
- Transfer to chill. Immediately move the eggs to the ice bath when the timer beeps until the shells feel cold to the touch.
- Let them rest. Leave the eggs in the ice water for at least 10 minutes. Note: This allows the internal pressure to equalize and the egg to shrink from the shell.
- Crack and roll. Gently tap the egg on a hard surface to shatter the shell all over, then roll it between your palms.
- Peel under water. Dip the egg into the water as you peel until the shell slips off in large, clean pieces.
Fixing Common Egg Peeling Problems
The Stubborn Sticking Membrane
Sometimes, even with the best intentions, you get an egg that just won't let go. This usually happens if the eggs were incredibly fresh (less than 3 days old). When the membrane sticks, the worst thing you can do is keep picking with your fingernails.
Instead, try peeling the egg while it's completely submerged in the ice bath water. The water gets between the white and the membrane, acting as a natural lubricant.
The Dreaded Green Yolk Ring
If you cut open your egg and see a grayish green ring around the yolk, you've overcooked it. This is caused by a reaction between the sulfur in the whites and the iron in the yolks. It happens when the egg gets too hot for too long.
To fix this next time, make sure your ice bath is truly "icy" and that you don't leave the eggs in the boiling water for a second past 12 minutes.
| Problem | Root Cause | Solution |
|---|---|---|
| Pitted egg whites | Peeling too fast/dry | Peel under running water or submerged in a bowl. |
| Off center yolks | Eggs sat too long in fridge | Gently swirl the water during the first 2 minutes of boiling. |
| Hard to crack shells | Not enough vinegar | Increase white vinegar to 2 tbsp to further weaken the shell. |
Common Mistakes Checklist
- ✓ Never start with cold eggs in cold water if you want an easy peel.
- ✓ Don't skip the ice bath; the "carryover cooking" will make them rubbery.
- ✓ Avoid using farm fresh eggs the day you get them; let them sit for a week.
- ✓ Don't overcrowd the pot - the eggs should be in a single layer.
- ✓ Always peel starting from the wider end where the air pocket is located.
| Problem | Cause | Fix |
|---|---|---|
| Shell splinters | Not enough thermal shock | Ensure water is at a full rolling boil before adding eggs. |
| Rubbery whites | Cooked at too high a heat | Maintain a gentle simmer rather than a violent boil. |
| Liquid yolks | Under timed | Check your timer; ensure it's exactly 12 minutes for large eggs. |
Scaling the Batch Size
If you only need a few eggs for a quick salad, you can easily cut this recipe down. For 1-4 eggs, you can use a smaller saucepan, but keep the 12 minutes cook time the same. The science of the protein setting doesn't change just because there are fewer eggs in the pot.
You'll still want to use the baking soda and vinegar, though you can halve the amounts.
When scaling up for a huge crowd, like 24 eggs or more, you need to work in batches. If you put 24 cold eggs into 2 quarts water, the temperature will drop so significantly that you'll lose the "easy peel" effect. Either use a much larger stockpot with double the water or, better yet, just do two separate rounds.
This ensures every egg gets that necessary heat hit.
Debunking Kitchen Egg Myths
One common myth is that adding salt to the water makes eggs easier to peel. While salt does increase the boiling point slightly, it doesn't actually help with the membrane to white bond like baking soda does.
Salt is better used if an egg cracks while boiling, as it helps the whites coagulate faster so they don't leak out as much.
Another misconception is that you need to "pierce" the fat end of the egg with a pin before boiling. People think this prevents cracking and makes peeling easier by letting air escape. In reality, it often leads to more cracks because you're creating a structural weakness in the shell.
The hot start method combined with an ice bath is far more effective and less tedious than stabbing every egg in the carton.
Keeping and Using Your Eggs
Storage: Hard boiled eggs are best kept in their shells until you're ready to eat them. They stay fresh in the fridge for up to 7 days. I like to keep mine in a marked carton so nobody confuses them with raw eggs.
If you've already peeled them, keep them in a bowl of cold water (change the water daily) or in a sealed container with a damp paper towel for no more than 2-3 days.
Freezing: I don't recommend freezing whole hard boiled eggs. The whites become incredibly rubbery and watery upon thawing, which is a texture nobody enjoys. However, you can freeze the cooked yolks!
If you have leftover yolks from a recipe, you can freeze them in a sealed bag for up to 3 months to use as a garnish later.
Zero Waste: Don't toss those shells! If you have a garden, crushed eggshells are a fantastic source of calcium for your soil, especially for tomato plants. I also like to dry them out and grind them into a fine powder to add to my compost pile.
It’s a great way to ensure nothing from your kitchen goes to waste.
Creative Ways to Serve Eggs
While a simple sprinkle of flaky sea salt and cracked black pepper is classic, there's so much more you can do with a smooth, perfectly boiled egg. I love marinating peeled eggs in a mixture of soy sauce, ginger, and garlic for "Ramen Eggs" (Ajitsuke Tamago).
The salty sweet brine soaks into the whites, turning them a beautiful tan color and adding a massive punch of flavor.
- For a Savory Umami Kick: Soak peeled eggs in a mixture of soy sauce and toasted sesame oil for 4 hours.
- For a Zesty Deviled Base: Mash the yolks with Greek yogurt instead of mayo for a tangier, lighter filling.
- For a Crunchy Texture: Roll a halved egg in "everything bagel" seasoning for an instant breakfast upgrade.
If you're looking for something more substantial, try slicing them over a piece of sourdough toast with smashed avocado and a drizzle of sriracha. The creamy yolk acts almost like a sauce, tying the whole meal together.
Whether you're meal prepping for the week or just looking for a reliable snack, mastering this easy peel method takes all the stress out of the process. No more jagged whites or wasted protein just smooth, beautiful eggs every time.

Recipe FAQs
How do I get my boiled eggs to peel easily?
Use the hot-start method with added baking soda and vinegar. Drop eggs directly into already boiling water (with 1 tsp baking soda and 1 tbsp vinegar added) and cook for exactly 12 minutes, followed immediately by a long ice bath.
How do professional chefs peel hard boiled eggs?
They utilize a rapid temperature shock followed by aging the eggs slightly. Professionals rely on the combination of high initial heat to pull the whites away from the membrane, followed by an immediate, deep ice bath to stop cooking and cause contraction.
Does adding vinegar to water make eggs easier to peel?
Yes, it aids in shell removal by slightly softening the calcium. The acidity helps weaken the shell structure, allowing it to crack off in larger, cleaner pieces rather than splintering into tiny shards.
What is the best method for hard boiled eggs?
The hot-start method (12 minutes simmered in boiling water) is superior for easy peeling. This technique ensures the proteins seize quickly and separate from the membrane before they can bond tightly, resulting in tender whites.
Should I start my eggs in cold water or boiling water for the easiest peel?
Start them directly in boiling water. Starting cold causes the proteins to cook slowly, often bonding them firmly to the inner membrane; the fast thermal shock of boiling water prevents this adhesion.
Is it true that older eggs peel better than very fresh eggs?
Yes, eggs that are 7 to 10 days old peel significantly easier than farm fresh ones. As an egg ages, its internal pH naturally becomes more alkaline, which reduces the membrane's stickiness, a process you can simulate instantly with baking soda.
How long must the eggs sit in the ice bath to guarantee an easy peel?
Rest the eggs in the ice bath for a minimum of 10 minutes until they are completely chilled. This rapid cooling stops the cooking process and causes the egg inside to shrink slightly away from the shell, creating a separation gap.
Easy Peel Hard Boiled Eggs
Ingredients:
Instructions:
Nutrition Facts:
| Calories | 78 kcal |
|---|---|
| Protein | 6.3 g |
| Fat | 5.3 g |
| Carbs | 0.6 g |
| Fiber | 0 g |
| Sugar | 0.6 g |
| Sodium | 124 mg |
