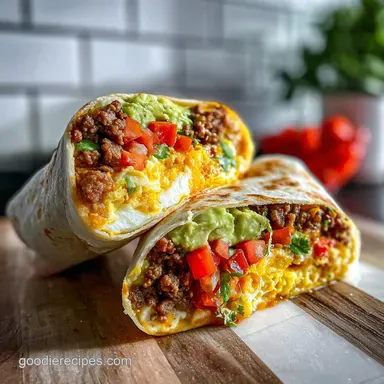
High Protein Quick Breakfast Burritos for Meal Prep
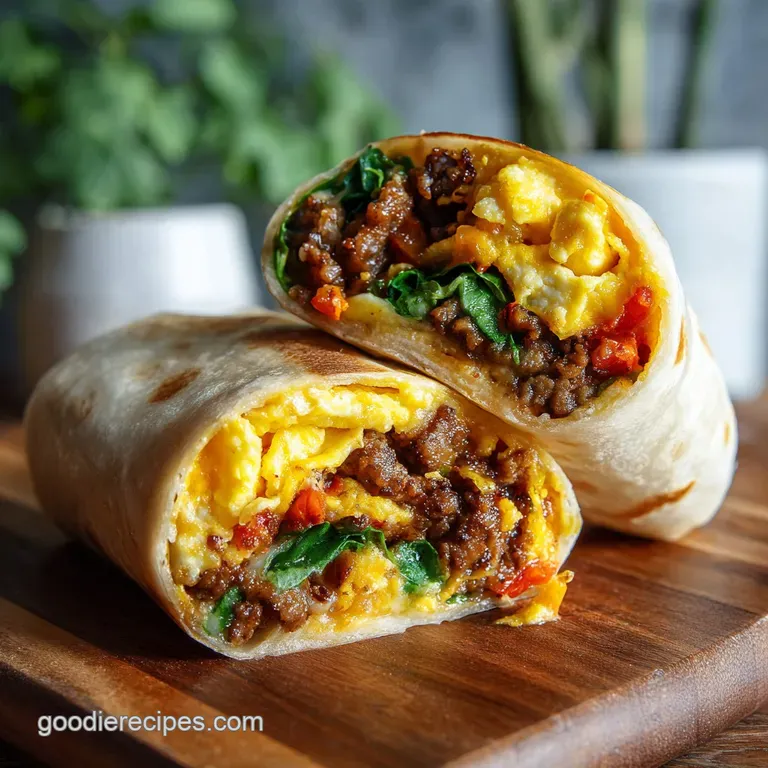
- Time: 20 min active + 10 min cooking (50 min total)
- Flavor/Texture Hook: Hearty, savory filling with a crisp, seared exterior
- Perfect for: High protein weekday mornings and freezer stocking
Ever wonder why store-bought freezer burritos always have that weird, gummy texture? I used to think it was just the preservatives. Then I tried making my own and realized I was making a huge mistake by rolling them while the filling was still steaming.
The steam gets trapped, turns into water, and turns your tortilla into a wet rag. Once I figured out the physics of the "cool down," everything changed. Now, my Quick Breakfast Burritos for Meal Prep actually stay firm and hearty, even after a trip through the microwave.
We are looking at a focused approach here. No fancy fluff, just the right ratios of fat, protein, and moisture to ensure you have a reliable breakfast that doesn't fall apart in your hands.
Quick Breakfast Burritos for Meal Prep
Precision Checkpoints:
- Cooling Window: Filling must sit for 15-20 minutes.
- Internal Safety: USDA guidance puts the safe internal temperature for ground meat at 165°F.
- Elasticity Fix: Microwave tortillas for 20 seconds under a damp paper towel.
Decision Shortcut:
- More protein? → add 1/2 cup black beans.
- Less salt? → swap sausage for ground turkey.
- Extra kick? → add 1 tbsp chopped jalapeños.
How to Nail the Texture
The Moisture Barrier: Layering cheese directly against the wrap creates a fat based shield. This prevents the egg moisture from soaking into the flour.
Thermal Stability: Cooling the filling to room temperature stops condensation. If you wrap it hot, you are essentially steaming the tortilla from the inside out.
Over Low heat Curds: Cooking eggs on medium low prevents them from over coagulating. This keeps the eggs moist after they are frozen and reheated.
| Method | Time | Texture | Best For |
|---|---|---|---|
| Stovetop | 10 min | Crisp, seared shell | Daily use or small batches |
| Oven | 15 min | Evenly toasted | Massive batches (12+ burritos) |
Why These Ingredients Work
| Component | Purpose | Substitute Notes |
|---|---|---|
| Ground Turkey Sausage | Protein and fat base | Chicken sausage: Leaner, less savory |
| Shredded Cheddar | Moisture barrier | Monterey Jack: Melts smoother, milder |
| Whole Milk | Egg tenderness | Heavy cream: Richer, denser curd |
| Flour Tortillas | Structural wrap | Corn: gluten-free, more prone to cracking |
What You'll Need
- 1 lb (450g) ground turkey sausage Why this? Provides savory depth and necessary fat for the wrap.
- 8 large (400g) eggs Why this? Main protein binder.
- 1/4 cup (60ml) whole milk Why this? Dilutes egg proteins for a softer scramble.
- 1 medium (150g) yellow onion, finely diced Why this? Adds aromatic sweetness.
- 1 red (100g) bell pepper, diced Why this? Texture contrast and vitamins.
- 2 cups (115g) shredded sharp cheddar cheese Why this? Acts as the water resistant layer.
- 1 tsp (5g) salt
- 1/2 tsp (3g) cracked black pepper
- 1/2 tsp (3g) garlic powder
- 8 large (10 inch) flour tortillas Why this? Large enough to seal tightly.
- 2 tbsp (30g) melted butter Why this? For the final sear.
Necessary Kitchen Gear
- 12 inch non stick skillet (prevents egg sticking)
- Large mixing bowl
- Baking sheet (for the cooling phase)
- Silicone spatula
- Aluminum foil (for freezing)
- Freezer safe Ziploc bags
Assembly Steps
Phase 1: The Sauté and Scramble
- Using medium high heat, brown the sausage in a wide pan. Use a spatula to crumble the meat until it reaches a deep mahogany hue and is fully cooked. Set the sausage aside, keeping the rendered fat in the pan.
- Add the chopped onion and bell pepper. Cook for 4-5 minutes until the onions go translucent and the peppers soften.
- In a bowl, whisk together the eggs, milk, salt, pepper, and garlic powder. Reduce the temperature to medium low.
- Pour the eggs into the pan and stir softly until moist, tender curds form. Stir the browned sausage back into the mix.
Phase 2: The Critical Cool Down
- Transfer the mixture to a large baking tray. Allow it to cool for 15-20 minutes until it is at room temperature. This crucial step ensures the best results for these Quick Breakfast Burritos for Meal Prep.
Phase 3: Assembly and Rolling
- Place a tortilla on a flat surface. Start by sprinkling some shredded cheese in the middle.
- Top the cheese with a scoop of the chilled egg and sausage filling.
- Fold the sides inward and roll the tortilla tightly from the bottom.
- Toast the burritos in a pan with melted butter for 2 minutes on each side until golden brown.
Fixing Common Issues
If your tortilla is too cold, it will snap. I've had a few burritos explode because I didn't warm the wraps first. A quick 20 second zap in the microwave restores the elasticity.
Another common issue is "leaking" where the filling pushes out the ends. The fix is a tighter tuck. Pull the sides in firmly before you start the final roll.
Finally, if you find your burritos are gummy after reheating, you likely didn't cool the filling enough or overcooked the eggs initially. Stick to the medium low heat for the scramble.
| Problem | Fix |
|---|---|
| Tortilla Cracking | Microwave wraps for 20 seconds under damp paper towel |
| Filling Leaking | Use the "tuck and roll" method, pulling sides in tighter |
| Gummy Texture | Ensure filling is completely room temperature before rolling |
Mix It Up
To change the flavor profile, try substituting the turkey sausage with chorizo or soy-based crumbles. For a "Southwest" twist, simply stir a can of drained black beans and some diced green chiles into the sauté.
You might prefer homemade flour tortillas, which offer more flexibility than store-bought options. Just ensure they are fully cooled before you start assembling.
To increase the protein content, I recommend adding a dollop of cottage cheese or Greek yogurt inside the wrap just before reheating. This adds a creamy, tangy element with very little effort.
Storage and Waste Tips
Keep these refrigerated for 4 days or frozen for 3 months. Wrap each one in foil before placing them in a freezer bag to avoid freezer burn and make them easy to access.
To reheat from frozen, remove the foil. Microwave for 2-3 minutes, flipping halfway through. For a better texture, sear the microwaved burrito in a hot pan for 60 seconds to crisp the shell.
Save your leftover bell pepper and onion scraps. I typically collect them in a freezer bag along with other veggie ends. When the bag is full, I simmer the contents with water and a bay leaf to create a quick vegetable stock for soups.
What to Serve Alongside
While these are quite filling, a side of sliced avocado or fresh fruit helps balance the richness. I personally love dipping mine in a blend of salsa and lime juice.
To round out the meal, roasted chickpeas provide a satisfying crunch that contrasts the tender inside of the wrap.
For a drink, a spicy Bloody Mary or a strong black coffee pairs perfectly. The acidity cuts through the fat of the cheese and sausage, refreshing your palate between bites of these Quick Breakfast Burritos for Meal Prep.
Recipe FAQs
Can I freeze these burritos?
Yes, they stay fresh for up to 3 months. Wrap each burrito individually in foil and store them in freezer safe Ziploc bags to prevent freezer burn.
Why are my burritos getting soggy?
The filling was likely too hot during assembly. Let the egg and sausage mixture cool for 15-20 minutes before rolling, and ensure shredded cheese is placed directly against the tortilla as a moisture barrier.
How to reheat from frozen?
Microwave for 2-3 minutes without foil, flipping halfway through. For a better texture, sear the burrito in a hot pan for 60 seconds to crisp the shell.
Is it true that I can skip the cooling step to save time?
No, and here's why. Adding hot filling to a tortilla creates steam, which makes the wrap mushy and unstable during storage.
What sides pair best with this meal?
Light, acidic dishes balance the richness. A classic Greek salad provides a refreshing, crisp contrast to the savory sausage and cheese.
Quick Breakfast Burritos