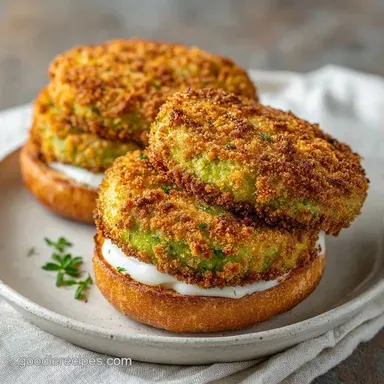
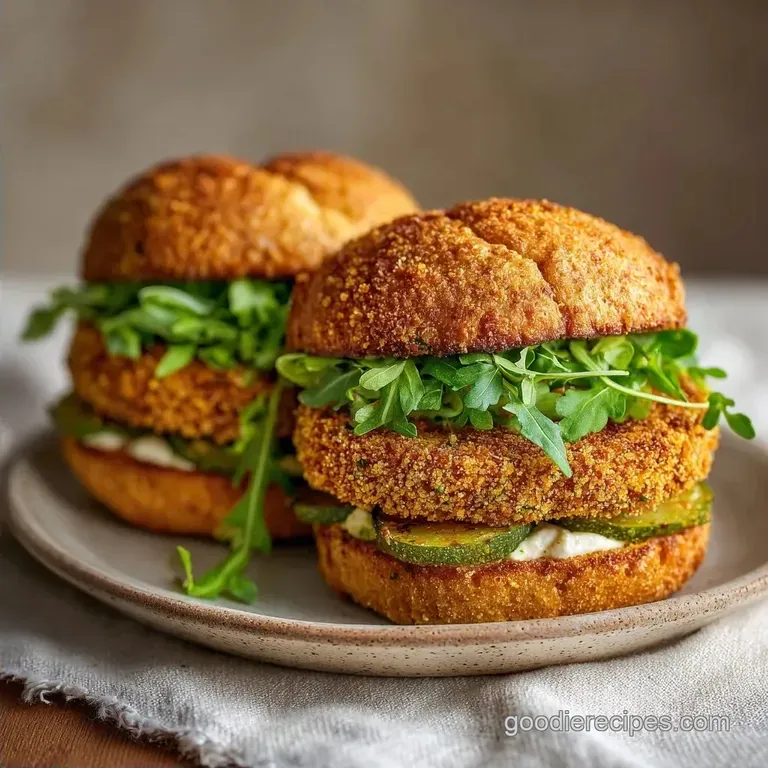
Fried Green Tomato Sliders: Southern Style
- Time:15 minutes active + 15 minutes cooking
- Flavor/Texture Hook: Shatter crisp cornmeal crust with a tart, velvety center
- Perfect for: Game day apps, brunch gatherings, or a quirky dinner
- Getting the Best Crunch Every Time
- Ingredient Deep Dive
- Gathering Your Essentials
- Basic Tools Needed
- Key Steps
- Fixing Common Problems
- Troubleshooting Common Issues
- Make It Your Own
- Scaling for the Crowd
- Common Kitchen Myths
- Storage Guidelines
- Serving Suggestions
- Critical Sodium Level
- Recipe FAQs
- 📝 Recipe Card
The smell of cornmeal hitting hot oil is something that just takes me right back to my grandmother's kitchen. I remember watching her slice those hard, pale green tomatoes and dipping them into a bowl of buttermilk. The sound was a constant, aggressive sizzle that meant something good was happening.
For a long time, I thought green tomatoes were just "not yet-ripe" red ones, but I eventually realized the tartness is exactly what makes this dish work.
If you've ever tried to make these and found the breading sliding off like a wet coat, you're not alone. I spent a few years fighting with soggy crusts before I realized it's all about the "press." You can't just toss them in the flour, you have to actually push the cornmeal into the tomato.
When you get it right, you get these Fried Green Tomato Sliders that have a mahogany colored crust and a center that's almost like a savory custard.
We're keeping this simple because that's how comfort food should be. No fancy equipment, just a good skillet and a few basic pantry staples. These sliders aren't trying to be "fine dining," they're just designed to be messy, tangy, and satisfying.
Trust me on this, the addition of smoked paprika in the breading is the little secret that makes people ask what's in the crust.
Getting the Best Crunch Every Time
To get that specific texture, we have to look at how the ingredients interact. It's not just about frying; it's about building a wall around the tomato that can withstand the moisture.
- Cornmeal Grit
- The coarse texture of yellow cornmeal creates tiny air pockets, which is why the crust feels like it shatters when you bite into it.
- Buttermilk Bind
- The acidity in buttermilk tenderizes the tomato slightly, while the thick proteins act like a glue for the flour and cornmeal.
- Temperature Control
- Frying at a steady medium high heat ensures the outside browns before the tomato inside turns into mush.
- The Fat Barrier
- Using a cast iron skillet helps maintain a consistent temperature, preventing the oil from dipping and making the crust greasy.
| Method | Time | Texture | Best For |
|---|---|---|---|
| pan fried | 15 mins | Extra Crispy | Small batches / Maximum flavor |
| Oven Baked | 25 mins | Lighter Crunch | Healthier options / Large crowds |
| air fried | 12 mins | Dry Crisp | Single servings / Quick snacks |
This is where most people get confused. You might think any flour will do, but the blend is what creates that classic Southern feel. If you're looking for other crispy ideas, my Salmon Patties recipe uses a similar approach to get that golden exterior.
Ingredient Deep Dive
| Ingredient | Science Role | Pro Secret |
|---|---|---|
| Yellow Cornmeal | Structural Crunch | Use stone ground for a more rustic, harder shatter |
| Buttermilk | Protein Glue | Room temperature buttermilk adheres better than ice cold |
| Green Tomato | Acidic Core | Slice exactly 1/4 inch; too thick and they won't soften |
| Smoked Paprika | Flavor Depth | Adds a "charred" note without needing a grill |
Gathering Your Essentials
For the tomatoes, you want the firmest ones you can find. They should feel like apples, not sponges. If they're too soft, they'll collapse in the pan.
For the Fried Tomatoes
- 2 large firm green tomatoes, sliced 1/4 inch thick (300g)Why this? Provides the necessary tartness and structure
- 1/2 cup all purpose flour (65g)Why this? Helps the cornmeal stick to the surface
- 1/2 cup yellow cornmeal (70g)Why this? Creates the signature gritty crunch
- 1 tsp smoked paprika (5g)Why this? Adds a subtle wood smoke aroma
- 1/2 tsp garlic powder (3g)
- 1/2 tsp salt (3g)
- 1/4 tsp black pepper (1g)
- 1 large egg, beatenWhy this? Emulsifies the wash for better coating
- 1/4 cup buttermilk (60ml)Why this? Adds tang and binds the breading
- 1/2 cup vegetable oil (120ml)
For the Zesty Slider Sauce
- 1/2 cup mayonnaise (115g)
- 1 tbsp lemon juice (15ml)
- 1 clove garlic, minced (5g)
- 1/2 tsp cayenne pepper (2g)
For Assembly
- 8 slider buns (400g)
- 2 tbsp unsalted butter, melted (30g)
- 4 slices sharp cheddar cheese
- Fresh arugula
- Red onion, thinly sliced
| Original Ingredient | Substitute | Why It Works |
|---|---|---|
| Buttermilk (1/4 cup) | Milk + 1 tsp Vinegar | Mimics acidity. Note: Slightly thinner consistency |
| Yellow Cornmeal | Polenta | Similar grit. Note: May be slightly softer |
| Sharp Cheddar | Pepper Jack | Adds heat. Note: Changes the flavor profile to spicy |
| Arugula | Spinach | Mild flavor. Note: Lacks the peppery bite of arugula |
Right then, before we start, make sure your oil is the right kind. Don't use extra virgin olive oil here; it has too low a smoke point and will start tasting burnt and bitter. Stick to vegetable or canola oil.
Basic Tools Needed
You don't need a professional kitchen for this. Honestly, a couple of bowls and a heavy pan are all that matter.
- Cast Iron Skillet: This is my go to because it holds heat so well. If you don't have one, a heavy stainless steel pan works.
- Wire Cooling Rack: Never put fried tomatoes directly on a paper towel. They'll steam from the bottom and get soggy. A rack lets them breathe.
- Three Mixing Bowls: One for the dry mix, one for the wash, and one for the sliced tomatoes.
- Tongs: For flipping without breaking the delicate crust.
Key Steps
Let's get into the process. The goal here is to build layers. Think of it like painting a house: primer first, then the main coat.
Step 1: The Breading Station
Set up your three bowls. In the first, whisk together the flour, cornmeal, smoked paprika, garlic powder, salt, and black pepper. In the second, whisk the beaten egg and buttermilk until smooth. Place your sliced tomatoes in the third bowl.
Step 2: The Coating Process
Take a tomato slice and dredge it in the flour mixture. Dip it completely into the buttermilk egg wash, then press it firmly back into the flour/cornmeal mix. Note: Really press the breading in with your palms so it doesn't flake off later.
Step 3: The Sizzle
Heat the vegetable oil in your skillet over medium high heat. To check if it's ready, drop a pinch of cornmeal in; if it sizzles immediately, you're good to go. Fry the slices for 3–4 minutes per side until they reach a mahogany colored, golden brown crust.
Move them to the wire rack.
Step 4: The Sauce
While the tomatoes drain, mix your mayonnaise, lemon juice, minced garlic, and cayenne pepper in a small bowl. Stir until it's velvety and smooth.
Step 5: Toasting the Buns
Brush the cut sides of your slider buns with melted butter. Place them in the pan you used for frying (just wipe out excess oil first) and sear for 60 seconds until golden and toasted.
Step 6: Final Assembly
Spread a generous dollop of zesty sauce on the bottom bun. Layer on a handful of arugula, a hot fried green tomato slice, a piece of cheddar cheese, and a few rings of red onion. The heat from the tomato should make the cheese just start to slump.
Chef's Tip: If you want a more intense flavor, add a tiny pinch of espresso powder to the cornmeal mix. It doesn't make it taste like coffee, but it deepens the savory notes of the paprika.
Fixing Common Problems
Even with the best plan, frying can be temperamental. Most issues come down to temperature or moisture.
Troubleshooting Common Issues

| Issue | Solution |
|---|---|
| Breading falling off | This usually happens because the tomato was too wet or the breading wasn't pressed in. If the tomato surface is slippery, the flour can't grip. |
| Why are my tomatoes burning | If the outside is dark brown but the inside is still hard and raw, your oil is too hot. Lower the heat slightly and give the tomatoes a bit more time to soften. |
| Why is the crust soggy | Putting the tomatoes on a flat plate or paper towel creates a vacuum of steam. The bottom side essentially "steams" itself. Always use a wire rack to keep air flowing around the entire slice. |
Common Mistakes Checklist
- ✓ Patting tomatoes dry before the first dredge.
- ✓ Not overcrowding the pan (fry in batches!).
- ✓ Using room temperature egg and buttermilk.
- ✓ Letting the oil reach the correct temperature before adding food.
- ✓ Resting the tomatoes on a wire rack, not a plate.
Make It Your Own
These Fried Green Tomato Sliders are a great base, but you can easily pivot them depending on who you're feeding.
The BLT Version You can easily turn these into Fried Green Tomato BLT Sliders by adding two strips of crispy bacon on top of the cheese. The saltiness of the bacon cuts through the acidity of the tomato beautifully.
The Oven Method If you're not in the mood to fry, you can make Southern oven fried green tomatoes. Place the breaded slices on a parchment lined sheet and spray them generously with oil. Bake at 200°C for about 15–20 minutes, flipping halfway through.
They won't be as "shatter crispy" as the pan-fried version, but they're still great.
Adding Protein For a heartier meal, add a grilled chicken breast or a slice of ham. If you're looking for other slider inspiration, my Hot Brown Sliders recipe shows how a rich sauce can transform a small sandwich into a full meal.
Vegan Adaptation To make these vegan, swap the egg and buttermilk for a mixture of almond milk and apple cider vinegar (let it sit for 5 mins to curdle). Use a vegan mayo and a dairy-free cheddar. The crunch remains exactly the same.
| If you want... | Do this... |
|---|---|
| Extra Heat | Add sliced jalapeños to the assembly |
| More Tang | Swap cheddar for a sharp goat cheese |
| Lighter Option | Use a whole wheat slider bun and bake |
Scaling for the Crowd
Making a few sliders is easy, but when you're cooking for ten people, the logistics change.
Scaling Down If you're just making two sliders, you'll have leftover breading. Don't throw it away! You can use the remaining cornmeal mix to coat some zucchini slices or onion rings. When beating the egg, beat one full egg and just use half of it.
Scaling Up When doubling or tripling the recipe, do not double the spices exactly. Start with 1.5x the paprika and garlic powder, then taste. The biggest mistake people make when scaling is overcrowding the pan.
If you put too many tomatoes in at once, the oil temperature drops, and you'll end up with greasy, soggy slices instead of crispy ones. Work in batches of 3 or 4.
Baking in Bulk If you're baking 20+ tomatoes, lower the oven temperature by about 10°C and extend the time by 5 minutes. This ensures the middle of the tray gets as much heat as the edges.
Common Kitchen Myths
There are a few things people tell you about frying green tomatoes that just aren't true.
Myth: You have to deep fry them. You absolutely do not. A shallow pan with half an inch of oil is actually better because it allows you to see the color change more clearly. Deep frying often leads to overcooking the center before the crust is done.
Myth: Only "unripe" tomatoes work. While we call them green tomatoes, you can actually use "firm ripe" tomatoes if you can't find green ones. However, the texture will be softer and less "snappy," so you'll need to fry them for a shorter time to avoid them falling apart.
Storage Guidelines
Fried foods are best eaten immediately, but we've all had leftovers. The challenge is keeping that crunch.
Fridge Storage Store the fried tomato slices in a container with a paper towel at the bottom to absorb excess moisture. They'll stay okay for about 2 days. Don't assemble the sliders until you're ready to eat, or the buns will turn into mush.
Freezing You can actually freeze the breaded tomatoes before frying. Place them on a tray in the freezer for an hour, then move them to a freezer bag. Fry them straight from frozen just add 2 minutes to the cook time per side.
Reheating Never use a microwave. It will make the cornmeal rubbery. Use an air fryer at 180°C for 3–5 minutes or a toaster oven. This brings back that shatter crisp exterior.
Zero Waste Tip If you have leftover buttermilk, don't toss it. Use it as a marinade for chicken or whisk it into your pancake batter the next morning for a tangy twist. If you have leftover cornmeal breading, you can mix it with a bit of water and oil to make a quick corn cake patty.
Serving Suggestions
These sliders are rich and acidic, so you want sides that provide a cool or sweet contrast.
The Perfect Pairings A cold coleslaw with a vinegar base is the traditional choice here. The creaminess of the slaw complements the crunch of the tomato. Alternatively, a side of honey glazed carrots can add a sweetness that balances the tartness of the green tomato.
Dipping Sauces While the zesty sauce is built into the slider, some people love a dip on the side. A ranch dipping sauce for fried green tomatoes is a fan favorite. Just mix ranch dressing with a pinch of smoked paprika and a squeeze of lime.
Drink Pairings For a non alcoholic option, a sweet iced tea with lemon is the ultimate companion. If you're serving these at a party with cocktails, a spicy Bloody Mary matches the savory and acidic profile of the dish perfectly.
Critical Sodium Level
1410 mg 1,410 mg of sodium per serving (61% 61% of daily value)
The American Heart Association recommends a daily limit of 2,300 mg of sodium, while an ideal limit for most adults is 1,500 mg to lower blood pressure.
Tips to Reduce Sodium
-
Omit Added Salt-25%
Remove the 1/2 tsp of salt from the cornmeal breading; the cheese and buns already provide ample sodium for seasoning.
-
Swap the Buns-20%
Replace the processed slider buns with lettuce wraps or a low-sodium homemade bread alternative to significantly cut processed salt.
-
Mayo Alternative-15%
Substitute the mayonnaise with plain Greek yogurt or mashed avocado to reduce sodium while keeping the creamy texture.
-
Adjust the Cheese-15%
Use a low-sodium Swiss cheese or reduce the amount of sharp cheddar to one thin slice per slider.
-
Enhance with Aromatics
Increase the smoked paprika, black pepper, and minced garlic to add depth and flavor without adding any extra sodium.
Recipe FAQs
Why is the breading falling off my tomatoes?
Ensure the tomato surface isn't too wet. If the slices are slippery, the flour cannot grip, so press the breading firmly into the slice during the second coating.
Is it true that quick browning means the tomatoes are cooked through?
No, this is a common misconception. Fast browning often means the oil is too hot, which can leave the inside hard and raw while the outside burns.
How to keep the crust crispy after frying?
Transfer slices to a wire rack immediately. Placing them on a flat plate or paper towel creates a vacuum of steam that makes the bottom side soggy.
Can I store assembled sliders in the fridge?
No, keep the components separate. Store fried slices in a container with a paper towel for up to 2 days and assemble just before eating to prevent the buns from turning into mush.
How to freeze the breaded tomatoes for later?
Flash freeze slices on a tray for one hour. Move them to a freezer bag and fry them straight from frozen, adding 2 minutes to the total cook time.
How to melt the cheddar cheese on the slider?
Place the cheese directly on the hot tomato. The residual heat from the slice, which was fried for 3 4 minutes per side, will naturally melt the cheese.
What side dishes pair well with these sliders?
Pair them with a savory, garlic forward side. If you enjoyed the flavor profile here, see how a similar approach works in these garlic bites.
Fried Green Tomato Sliders