Simple Ground Beef Taco with Seasoning and Cheese for Family
- Time: Active 10 minutes, Passive 10 minutes, Total 20 minutes
- Flavor/Texture Hook: Savory, velvety beef inside a shatter crisp shell
- Perfect for: Busy weeknights, budget-friendly family gatherings, and beginner cooks
- Simple Ground Beef Taco with Seasoning and Cheese for Family Dinner
- The Science of Why it Works
- Essential Metrics for Beef Tacos
- Foundation of Traditional Beef Tacos
- Minimal Tools for Taco Meat
- Traditional Method for Browning Beef
- Correcting Taco Meat Texture Issues
- Substitutions for Busy Family Nights
- Storing and Reviving Leftover Meat
- Debunking Common Taco Misconceptions
- Assembling a Classic Taco Spread
- Recipe FAQs
- 📝 Recipe Card
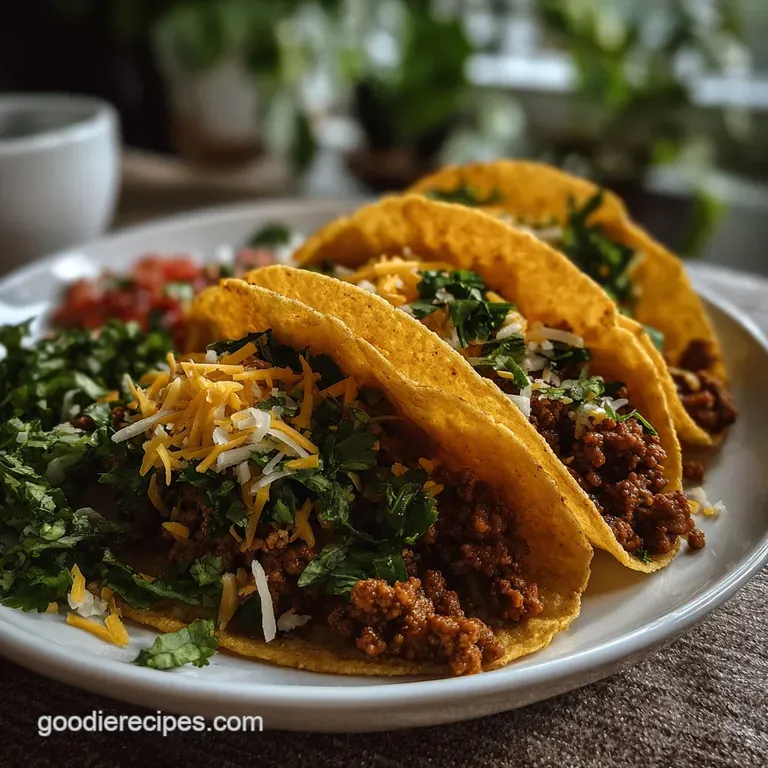
Simple Ground Beef Taco with Seasoning and Cheese for Family Dinner
The sound of that first pound of beef hitting a hot skillet is basically the universal dinner bell for my house. You know that specific sizzle? It's the promise of a meal that doesn't require a culinary degree but still manages to vanish from the table in under ten minutes.
This simple ground beef taco recipe with seasoning and cheese is perfect for an easy family dinner.
I’ve spent years trying to figure out why restaurant tacos always felt more cohesive than my dry, crumbly home versions. It turns out, I was skipping the one ingredient that actually binds everything together, and it's probably sitting in your pantry right now.
We aren't just browning meat; we are creating a silken sauce that coats every single morsel of beef.
We’ve all been there, staring at a packet of pre mixed seasoning and wondering if we can do better. Trust me, once you see how a little cornstarch and a few pantry staples transform basic ground beef into something crave worthy, you'll never go back to the yellow envelopes.
Let's get into the details of making this comfort classic.
The Science of Why it Works
Maillard Reaction: High heat creates a chemical reaction between amino acids and reducing sugars, resulting in the deep brown crust and savory depth on the beef.
Starch Gelatinization: The cornstarch granules swell and absorb the water and rendered fat, creating a stable emulsion that clings to the meat instead of pooling at the bottom of the shell.
| Meat Thickness | Internal Temp | Rest Time | Visual Cue |
|---|---|---|---|
| Crumbled Grain | 160°F | 2 minutes | No pink remains, deep brown color |
| Large Chunks | 160°F | 3 minutes | Surface is seared and matte |
| Fine Mince | 160°F | 1 minute | Uniform color with glossy sauce |
When you hit that 160°F mark, the proteins have fully denatured and any bacteria are gone, but you want to stop right there to keep the fat from completely rendering out and leaving the meat parched.
This table helps you gauge exactly when to pull the pan off the heat depending on how fine you like your taco meat crumbled.
Essential Metrics for Beef Tacos
Achieving the Maillard Reaction
Most people crowd the pan with cold meat, which drops the temperature and causes the beef to steam in its own juices rather than sear. To get that savory crust, you need the pan surface to stay above 300°F.
I always let my skillet preheat until a drop of water flicked onto it dances and evaporates instantly.
Emulsifying the Spice Sauce
The magic happens when the water, fat from the 80/20 beef, and cornstarch meet the heat. This trio forms an emulsion, a mixture of two liquids that usually don't mix. Without the cornstarch, the spices just sit on the surface of the meat; with it, they become a velvety coating that prevents the "dry throat" feeling of overcooked ground beef.
Creating a Moisture Barrier
The biggest tragedy in a family dinner is a soggy taco shell that falls apart on the first bite. By using a layer of shredded cheese or a leaf of lettuce at the very bottom of the shell, you create a physical barrier.
This stops the moisture from the beef from migrating into the toasted corn, keeping that shatter crisp texture intact until the last bite.
| Component | Science Role | Pro Secret |
|---|---|---|
| 80/20 Beef | Fat Content | The 20% fat provides the liquid base for the sauce emulsion. |
| Cornstarch | Thickener | Prevents "grease runoff" by binding fat and water together. |
| Yellow Onion | Hygroscopic | Releases moisture slowly to help deglaze the savory bits from the pan. |
Adding the onion early is non negotiable because the natural sugars in the onion caramelize alongside the beef, adding a subtle sweetness that balances the smoky paprika. If you skip the fresh onion for powder alone, you lose that structural texture that makes the filling feel substantial.
Foundation of Traditional Beef Tacos
For this recipe, we are sticking to the classics that actually deliver on flavor. I'm talking about 1 lb ground beef with an 80/20 lean to fat ratio. This is the sweet spot for tacos because it yields enough rendered fat to bloom the spices without leaving the meat swimming in oil.
We also need 0.5 cup yellow onion, finely diced, and 2 cloves of garlic, minced.
The spice profile is where the personality lives. You'll need 1 tbsp chili powder, 1 tsp ground cumin, 1 tsp smoked paprika, and 0.5 tsp each of onion powder, garlic powder, and fine sea salt. Don't forget the 0.25 tsp black pepper for a bit of back end heat.
To bind it all, 1 tsp cornstarch and 0.33 cup water are essential. Finally, we finish with 12 hard taco shells, 2 cups sharp cheddar cheese, 2 cups shredded iceberg lettuce, and 1 cup diced Roma tomatoes.
| Original Ingredient | Substitute | Why It Works |
|---|---|---|
| 1 lb Ground Beef (80/20) | Ground Turkey (93/7) | Leaner protein. Note: Needs 1 tbsp oil to prevent sticking and mimic beef fat. |
| 1 tsp Cornstarch | All Purpose Flour | Acts as a thickener. Note: Requires 1 extra minute of cooking to remove raw flour taste. |
| 0.5 cup Yellow Onion | 1 tsp Onion Powder | Provides flavor profile. Note: Lacks the soft texture and moisture of fresh onions. |
| 2 cloves Garlic | 0.5 tsp Garlic Powder | Concentrated flavor. Note: Less pungent than fresh but distributes more evenly. |
Chef's Tip: Freeze your block of cheddar for 10 minutes before grating. It makes the cheese firmer, so you get those long, beautiful shreds that melt perfectly without clumping together into a waxy mess.
Minimal Tools for Taco Meat
You really don't need a kitchen full of gadgets for this. A heavy 12 inch skillet is your best friend here. I prefer cast iron or stainless steel because they hold heat better than thin non stick pans. You’ll also need a sturdy spatula or a wooden spoon to break up the beef as it browns.
A sharp chef's knife for dicing the 0.5 cup yellow onion and 1 cup Roma tomatoes is a must. If you have a box grater, use it for the 2 cups of sharp cheddar. Honestly, don't even bother with the pre shredded bags; they are coated in cellulose (wood pulp) to prevent sticking, which also prevents them from melting into that gooey, velvety texture we want.
Traditional Method for Browning Beef
1. Searing the Ground Beef
Set your skillet over medium high heat. Once hot, add the 1 lb ground beef and 0.5 cup finely diced yellow onion. Use your spatula to break the meat into small, even crumbles. Cook for about 5 to 7 minutes until the beef is browned and the onions are translucent.
If there is an excessive amount of liquid fat, you can spoon some out, but leave about a tablespoon for the spices.
2. Infusing the Spices
Lower the heat to medium. Stir in the 2 cloves of minced garlic, 1 tbsp chili powder, 1 tsp cumin, 1 tsp smoked paprika, 0.5 tsp onion powder, 0.5 tsp garlic powder, 0.5 tsp sea salt, and 0.25 tsp black pepper. Cook for 1 minute until the spices smell toasted and fragrant.
This "blooming" step is what separates a flat taco from a multi dimensional one.
3. Simmering for Consistency
In a small bowl, whisk the 1 tsp cornstarch into the 0.33 cup water until dissolved. Pour this slurry into the skillet. Stir constantly for 2 to 3 minutes until the liquid thickens into a glossy sauce that coats every piece of beef. The meat should look moist and rich, not soupy.
4. Constructing the Taco
While the meat rests for a minute, warm your 12 hard taco shells in a 350°F oven for 5 minutes until they are fragrant and slightly oily to the touch.
To assemble, place a pinch of the 2 cups shredded cheese at the bottom of the shell, followed by a generous spoonful of the beef. Top with 2 cups shredded lettuce and 1 cup diced Roma tomatoes.
Correcting Taco Meat Texture Issues
Why Your Taco Meat Is Gritty
If the beef feels "sandy" or gritty, it’s usually because it was cooked too fast over extreme heat without enough moisture. When protein fibers shrink too quickly, they squeeze out all their water and become tough.
To fix this, add an extra splash of water and a tiny bit more cornstarch to create a thicker "cushion" of sauce.
Why Your Tacos Are Greasy
If you see a pool of orange oil at the bottom of your plate, you likely didn't drain enough fat before adding the water and spices. Different brands of 80/20 beef can vary wildly in actual fat content.
If this happens, you can tilt the pan and use a rolled up paper towel held with tongs to blot the excess oil before it hits the shells.
| Problem | Root Cause | Solution |
|---|---|---|
| Dry, crumbly meat | Overcooked or no binder | Add 2 tbsp water mixed with a pinch of cornstarch; simmer 1 min. |
| Soggy shells | Heat transfer/moisture | Place cheese at the bottom of the shell before the hot meat. |
| Dull flavor | Spices didn't bloom | Add a squeeze of lime juice or a teaspoon of white vinegar to brighten. |
Common Mistakes Checklist: ✓ Don't add the garlic at the start; it burns while the beef browns. ✓ Preheat the oven for the shells; cold shells taste stale and chewy. ✓ Use a wide skillet to allow moisture to evaporate quickly.
✓ Always whisk the cornstarch into cold water before adding to the hot pan to avoid lumps. ✓ Shred your own cheese for a superior melt and better flavor profile.
Substitutions for Busy Family Nights
If you find yourself missing an ingredient, don't panic. Tacos are the most forgiving meal in the world. If you want something pre prepped for mornings, these Breakfast Burritos for recipe use a similar seasoning profile and can be a great way to use up leftover taco meat.
Swapping for Leaner Proteins
You can easily swap the beef for ground turkey or chicken. Just remember that these meats have much less fat, so they can turn into a dry block very quickly. I recommend adding a tablespoon of olive oil to the pan when browning turkey to ensure the spices have something to latch onto.
Kid Friendly Taco Version
For kids who are sensitive to "green things" or spice, you can pulse the 0.5 cup yellow onion in a food processor until it’s a paste. It will melt into the beef unseen while providing all the flavor.
You can also swap the smoked paprika for regular sweet paprika to reduce that deep earthy "heat" that some children find overwhelming.
Scaling for the Crowd
When doubling this recipe for a party (2 lbs of beef), don't double the salt or chili powder immediately. Start with 1.5x the spices and taste. Spices don't always scale linearly, and it's much easier to add more than to fix a salt bomb.
Also, work in two batches if your skillet isn't at least 14 inches wide to ensure proper browning.
| Method | Time | Texture | Best For |
|---|---|---|---|
| Stovetop (Classic) | 10 mins | Seared and saucy | Everyday family dinner |
| Slow Cooker | 4 hours | Shredded and soft | Large parties or meal prep |
| Instant Pot | 15 mins | Very tender/moist | Frozen ground beef situations |
Storing and Reviving Leftover Meat
Storage: You can keep the cooked taco beef in an airtight container in the fridge for up to 4 days. It actually tastes better the next day as the spices continue to meld. For the freezer, place the cooled meat in a heavy duty freezer bag, squeeze out the air, and store for up to 3 months.
Zero Waste: Don't toss the tiny broken shards at the bottom of the taco shell box. Crush them up and use them as a "crunchy topping" for a salad the next day. If you have leftover diced tomatoes and onions, toss them with a little lime juice and salt for a quick pico de gallo to serve with eggs in the morning.
Reheating: To avoid the meat getting rubbery, reheat it in a skillet over medium low heat with a tablespoon of water. This helps re activate the cornstarch and brings back that velvety sauce texture. Microwave works in a pinch, but cover it with a damp paper towel to trap the steam.
Debunking Common Taco Misconceptions
One major myth is that you need to "seal in the juices" by searing the meat at the highest possible temperature. In reality, moisture loss happens as soon as the protein fibers contract. The sear is purely for flavor (that Maillard reaction we talked about), not for moisture retention.
The cornstarch sauce is what actually keeps the meat "juicy."
Another misconception is that hard shells don't need to be heated. Most store-bought shells are slightly under baked to allow for shelf stability. Putting them in the oven for 5 minutes doesn't just warm them; it "wakes up" the corn oils, making them taste fresh pressed and significantly crispier.
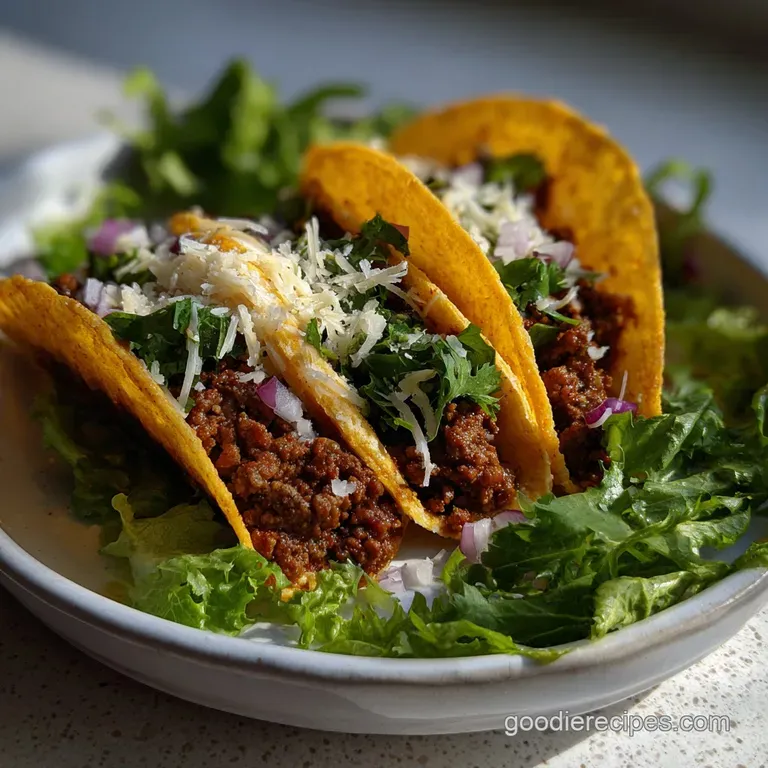
Assembling a Classic Taco Spread
The presentation is half the fun with a family dinner. I like to set everything out in separate bowls the 2 cups of shredded sharp cheddar, the 2 cups of lettuce, and the 1 cup of Roma tomatoes so everyone can customize their plate.
It’s a great way to get kids involved in the kitchen without the stress of actual cooking.
Chef's Tip: Add a teaspoon of instant espresso powder or a square of dark chocolate to the beef while it simmers with the spices. It won't taste like coffee or candy, but it will add a massive amount of "dark" depth to the chili powder that makes the beef taste expensive.
Family Taco Bar Setup
To keep the shells from tipping over and spilling the 1 lb of beef all over the table, you can use a muffin tin flipped upside down. Place the shells in the gaps between the muffin humps. It’s a perfect DIY taco holder that saves a lot of cleanup time.
Charring the Tortillas
If you ever switch to soft corn tortillas, try charring them directly over a gas flame for 10 seconds per side. It adds a smoky aroma that mimics a street food vibe and makes the simple ground beef taco with seasoning and cheese for family dinner feel like a special occasion meal. Just use tongs and stay close!

Recipe FAQs
How much ground beef do I need for 4 people?
Aim for 1 pound of ground beef. This amount typically yields about 4-6 servings, so it's a good starting point for four people with potential for a small amount of leftovers.
How much ground beef do you need for 3 people?
About 0.75 to 1 pound of ground beef. For three people, a full pound is generous and ensures everyone gets enough, or you can scale back slightly if you prefer smaller portions.
Can you just add taco seasoning to ground beef?
Yes, you can, but it's better with a binder. Simply adding dry seasoning can result in uneven flavor distribution and a drier texture; adding a little water and cornstarch creates a sauce that coats the beef nicely.
What's the secret ingredient in the best taco seasoning?
Cornstarch is the unsung hero. It acts as a binder and thickener, creating a velvety sauce that clings to the beef, preventing it from being dry and crumbly.
How do I make ground beef taco meat taste like restaurant style?
Achieve a flavorful sear and bind with cornstarch. Browning the beef and onions well for the Maillard reaction, then adding a cornstarch slurry to create a cohesive, glossy sauce is key.
Why is my taco meat dry and crumbly?
Likely from overcooking or lack of a binder. If the beef is cooked too long without moisture, or if the spices aren't incorporated into a sauce, it can easily become dry and crumbly.
How can I make my hard taco shells crisper?
Warm them briefly in the oven. Baking hard taco shells for about 5 minutes at 350°F helps to "wake up" the corn oils, making them taste fresher and significantly crispier.
Ground Beef Taco Recipe
Ingredients:
Instructions:
Nutrition Facts:
| Calories | 481 kcal |
|---|---|
| Protein | 24 g |
| Fat | 30 g |
| Carbs | 19 g |
| Fiber | 3 g |
| Sugar | 2 g |
| Sodium | 710 mg |
