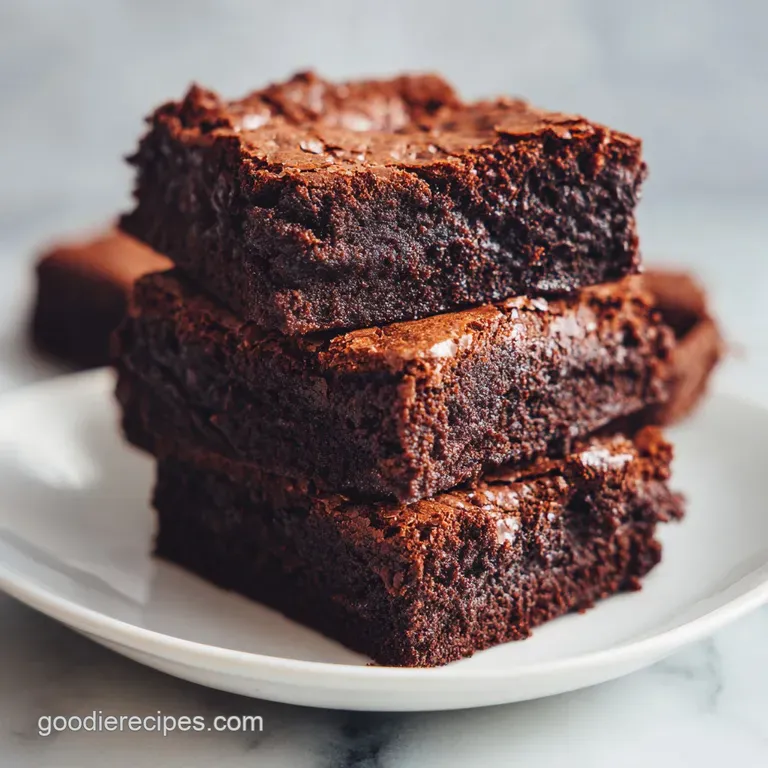
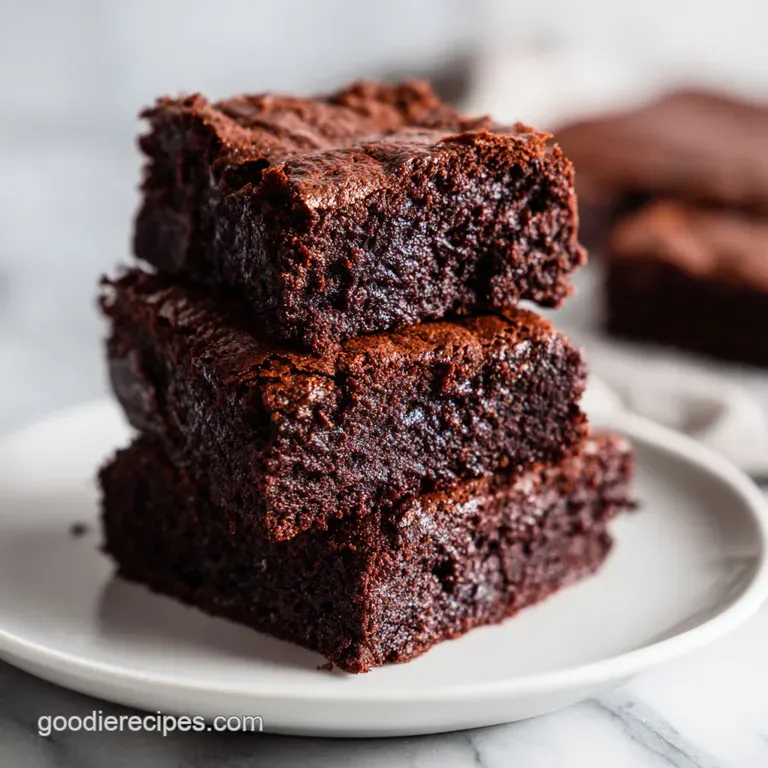
Fudgy Brownies: Dense and Rich
- Time: Active 10 minutes, Passive 25 minutes, Total 35 minutes
- Flavor/Texture Hook: Deep cocoa intensity with a dense, fudgy bite and a wafer thin crackly crust.
- Perfect for: Late night cravings, potlucks, or when you need a reliable crowd pleaser with zero fuss.
- The Secret to Fudgy Brownies
- Why This Works
- Essential Baking Metrics and Yield
- Selecting Your Best Ingredients
- Basic Kitchen Tools Required
- Mastering the Mixing Process
- Fixing Common Brownie Mistakes
- Customizing Your Favorite Treat
- Myths About Brownie Baking
- Storage and Waste Reduction
- Best Ways to Serve
- Recipe FAQs
- 📝 Recipe Card
The Secret to Fudgy Brownies
Imagine the kitchen filling with that heavy, dark aroma of melting butter hitting Dutch process cocoa. You know that specific sound? The rhythmic whisk whisk whisk against a glass bowl as the batter transforms from a grainy yellow mix into a thick, glossy obsidian ribbon.
I remember the first time I actually stopped trying to make "cakey" brownies and leaned into the fudge. I was sitting on my kitchen floor, staring through the oven glass, watching the edges bubble and the center stay perfectly still. It was a revelation.
You don't need fancy mixers or a degree in pastry arts to get these right. In fact, using a simple hand whisk is better because it gives you total control over the aeration. We want just enough air to lift the top into a delicate crust, but not so much that we end up with a chocolate sponge cake.
Trust me, once you see those first few cracks appear on the surface around the 20 minute mark, you'll know exactly what I'm talking about.
We're going for a texture that is almost like a set ganache. It should be rich, slightly chewy at the edges, and incredibly moist in the center. If you've ever felt disappointed by a boxed mix that tasted like "chocolate air," this is the antidote.
We're using real butter, plenty of sugar to lock in that moisture, and just enough flour to hold everything together. It’s simple, it’s honest, and it’s exactly what a brownie should be.
Why This Works
Fat Saturation: Using a full cup of melted butter ensures every flour particle is coated, which inhibits gluten development and creates a tender, fudgy crumb.
Sugar Dissolution: Mixing warm butter with sugar helps the sugar start to dissolve before the eggs enter the mix, leading to a smoother texture.
Egg Aeration: Whisking the eggs vigorously for a full minute creates a stable foam that rises and then collapses, forming the signature crackly "meringue" top.
Zero Leavening: By omitting baking powder, we prevent the brownies from rising too much, keeping the structure dense and fudgy rather than airy.
Cocoa Suspension: Sifting the cocoa powder removes clumps, allowing it to hydrate instantly in the fat, which intensifies the chocolate flavor throughout the batter.
| Method | Time | Texture | Best For |
|---|---|---|---|
| From Scratch | 35 minutes | Dense, rich, truffle like | Pure chocolate lovers |
| Boxed Shortcut | 30 minutes | Airy, sweet, consistent | Quick kid snacks |
| One Bowl Melt | 40 minutes | Chewy, buttery edges | Minimal cleanup |
There is a huge difference between a brownie made with cocoa and one made with melted bars. Cocoa powder provides a more concentrated chocolate punch without the added cocoa butter and lecithin found in bars, which can sometimes make the batter finicky or overly greasy if not balanced correctly.
Component Deep Dive
| Ingredient | Science Role | Pro Secret |
|---|---|---|
| Dutch Process Cocoa | Provides deep color and neutralized acidity. | Always sift it to avoid "cocoa bombs" in the finished bite. |
| Unsalted Butter | Provides the fat base for moisture and flavor. | Use it warm (not hot) to help dissolve the granulated sugar. |
| Large Eggs | Act as the primary binder and leavening agent. | Ensure they are room temperature so they emulsify properly. |
| Granulated Sugar | Retains moisture and creates the shiny top crust. | Whisking this well with eggs is what creates the crinkle top. |
Essential Baking Metrics and Yield
When you are baking, precision is your best friend, even in a "minimal tool" recipe like this one. This recipe is designed for a standard 20x20 cm (8x8 inch) square pan. Using a larger pan will result in thin, overcooked brittle, while a smaller pan will leave the center raw while the edges burn.
- Yield: 16 generous squares
- Oven Temp:175°C (350°F)
- Pan Size: 20x20 cm square
- Internal Temp: 88-93°C (190-200°F) for perfect fudginess
I've found that using parchment paper with a bit of "overhang" or a "sling" is the most important part of the setup. It allows you to lift the entire block of brownies out of the pan once they've cooled, making those clean, sharp cuts much easier to achieve.
If you just grease the pan, you'll be digging out the first corner piece with a spoon, and while it still tastes great, it won't look like those professional bakery shots.
Selecting Your Best Ingredients
- Unsalted Butter (225g): Melted and kept warm. Why this? Warm butter helps the sugar dissolve into a cohesive, fudgy base.
- Granulated Sugar (400g): White sugar is best here for the crust. Why this? It provides the structure and the classic shiny, crackly top surface.
- Large Eggs (4): Must be room temperature. Why this? Room temp eggs whisk into a much higher volume foam than cold ones.
- Vanilla Extract (1 tbsp): Use the real stuff, not essence. Why this? high-quality vanilla rounds out the bitterness of the dark cocoa powder.
- Dutch Process Cocoa (100g): Sifted carefully. Why this? It has a smoother, deeper flavor than natural unsweetened cocoa powder.
- All Purpose Flour (125g): Standard plain flour. Why this? A low protein count keeps the brownies tender rather than bread like.
- Sea Salt (1/2 tsp): Fine grain. Why this? Salt is essential to balance the high sugar content and enhance chocolate.
- Semi Sweet Chocolate Chips (130g): high-quality chips. Why this? These create little "pockets" of melted chocolate for extra texture contrast.
| Original Ingredient | Substitute | Why It Works |
|---|---|---|
| Dutch Process Cocoa | Natural Cocoa Powder | More acidic and lighter color; result will be slightly tangier. |
| Unsalted Butter | Coconut Oil (refined) | Same fat ratio; gives a slightly fudgier, more tropical finish. |
| All Purpose Flour | 1 to-1 gluten-free Blend | Rice based blends mimic the structure well in dense bakes. |
| Semi Sweet Chips | Chopped Walnuts | Adds crunch and earthy flavor instead of extra sweetness. |
If you find yourself running low on vanilla or want to try something different, these Brown Butter Snickerdoodles are a fantastic way to practice the "brown butter" technique which also works beautifully in this brownie base.
Basic Kitchen Tools Required
We are keeping this simple. You don't need a stand mixer. Honestly, using a stand mixer often incorporates too much air, turning these into chocolate cake. A sturdy glass or metal mixing bowl and a stainless steel whisk are all you need for the first half of the process.
Once you add the flour and cocoa, switch to a silicone spatula. The goal is to "fold" the dry ingredients in. This means you gently cut through the center of the batter and lift from the bottom, rotating the bowl as you go. This preserves the delicate egg bubbles we worked so hard to create.
You'll also need that 20cm square baking tin and some parchment paper. That is it. No fancy gadgets, just a bit of arm strength.
Mastering the Mixing Process
- Prep the station. Preheat your oven to 175°C (350°F) and line your 20cm square pan with parchment paper. Note: Leave an overhang to act as a handle later.
- Combine fats and sugars. In a large bowl, whisk the 225g of warm melted butter and 400g of sugar for 30 seconds until the mixture looks like wet sand.
- Incorporate eggs. Add the 4 eggs one at a time, whisking thoroughly after each addition. Note: This ensures a stable emulsion.
- Emulsify the base. Add the vanilla and whisk vigorously for a full minute until the batter is glossy and pale.
- Add dry ingredients. Sift the 100g cocoa, 125g flour, and 1/2 tsp salt directly into the bowl.
- Fold gently. Use a spatula to fold the dry mix into the wet until no white streaks remain. Note: Do not overmix or they will be tough.
- Add the chips. Gently stir in the 130g of chocolate chips.
- Transfer the batter. Pour the mixture into the prepared pan and smooth the top with your spatula.
- Bake the batch. Bake for 25 minutes until the edges are firm and the center is set.
- Test for doneness. Insert a toothpick; it should come out with a few moist, sticky crumbs attached.
Fixing Common Brownie Mistakes
Brownies turned out cakey
This usually happens because too much air was whipped into the batter or too much flour was added. If you used a whisk for the entire process, including the flour stage, you likely over aerated it.
Also, check your flour measurement; if you "scoop" with the measuring cup rather than spooning it in, you might be using 20-30% more flour than required.
Oily bottom issues
If your brownies have a layer of oil at the bottom, the butter and sugar didn't emulsify properly with the eggs. This often happens if the eggs were too cold or if the butter was boiling hot when added. The "one minute whisk" after adding eggs is the most critical part of preventing this.
It binds the fats and liquids into a stable structure.
Missing the shiny top
That beautiful crackly top is actually a thin layer of meringue. It forms when the sugar dissolves into the egg whites and migrates to the surface during baking. if you didn't whisk the eggs and sugar long enough, or if you reduced the sugar amount significantly, you won't get that classic "shatter" effect.
| Problem | Root Cause | Solution |
|---|---|---|
| Hard, dry edges | Overbaking or thin pan | Check doneness 5 mins early; use a heavy gauge pan. |
| Raw, liquid center | Underbaking or cold oven | Ensure oven is fully preheated; bake until crumbs stick to pick. |
| Gritty texture | Sugar didn't dissolve | Use warm butter and whisk sugar/eggs longer before adding flour. |
Common Mistakes Checklist
- ✓ Use room temperature eggs to ensure the fat and water emulsify perfectly.
- ✓ Sift the cocoa powder; it is prone to clumping and won't dissolve properly otherwise.
- ✓ Don't overbake - the brownies continue to cook for several minutes after leaving the oven.
- ✓ Let them cool completely (at least 1 hour) before cutting for the cleanest squares.
- ✓ Use a metal baking pan rather than glass for more even heat distribution.
Customizing Your Favorite Treat
If you're looking for a change of pace, you might enjoy this Fudgy Blondie Recipe which uses a similar ratio of fat to flour but swaps the cocoa for brown sugar and vanilla notes.
Adjusting for Batch Size
- Cutting the recipe (1/2 batch): Use a 9x5 inch loaf pan. Keep the temperature the same but start checking for doneness at 18 minutes. For the eggs, whisk two eggs and use the whole amount.
- Doubling the recipe (2x batch): Use a 9x13 inch pan. The baking time will likely increase to 30-35 minutes. Reduce the liquid (vanilla) by about 10% to ensure it sets properly.
- Baking at high altitude: Increase the oven temperature by 10°C (15°F) and reduce the sugar by 2 tablespoons to prevent the structure from collapsing.
Flavor and Texture Swaps
- The Nutty Crunch: Add 1 cup of toasted pecans or walnuts during the folding stage. The tannins in the nuts pair beautifully with the dark cocoa.
- The Salted Caramel: Drizzle 1/4 cup of salted caramel over the batter in the pan and swirl it with a knife before baking.
- The Mocha Kick: Add 1 teaspoon of espresso powder to the dry ingredients. It won't make them taste like coffee; it just makes the chocolate taste "more" like chocolate.
Myths About Brownie Baking
"You must use melted chocolate for the best texture." This is actually a preference, not a rule. While melted chocolate bars provide a very specific "set" fudge texture, high-quality Dutch process cocoa powder actually provides a more intense chocolate flavor.
Because cocoa powder is essentially "pure" chocolate solids without the extra fat and sugar of a bar, you have more control over the final result.
"Brownies are better the next day." This one is mostly true! As brownies sit, the moisture redistributes and the flavors of the cocoa and vanilla have time to meld. The fats also solidify completely, giving you that dense, fudgy bite that is often missing when you eat them straight out of the oven.
If you can wait, let them sit overnight in an airtight container.
Storage and Waste Reduction
Store your brownies in an airtight container at room temperature for up to 4 days. If you like them extra fudgy, you can keep them in the fridge for up to a week. They also freeze beautifully! Wrap individual squares in plastic wrap and then place them in a freezer bag. They will stay fresh for up to 3 months.
To eat, just let them thaw on the counter for 20 minutes or give them a 10 second zap in the microwave.
If you happen to have any "scraps" or brownies that have gone a bit stale, don't throw them away. You can crumble them up and use them as a topping for vanilla ice cream, or even better, fold them into a batch of brownie timber bread pudding.
The high sugar and fat content means they won't spoil quickly, but they might lose that perfect edge to center contrast.
Best Ways to Serve
For the ultimate experience, serve a slightly warm brownie with a scoop of cold vanilla bean ice cream. The contrast between the melting cream and the dense, warm chocolate is hard to beat.
If you want something a bit more sophisticated, a dollop of unsweetened whipped cream and a few fresh raspberries can cut through the richness beautifully.
Another trick is to sprinkle a tiny pinch of flaky sea salt (like Maldon) over the top right as they come out of the oven. This enhances the chocolate flavor and makes the sweetness pop. Honestly, though, most days I just grab one with a cold glass of milk and call it a win.
It’s the ultimate comfort food for a reason. Regardless of how you serve them, remember that the "best" brownie is the one you share with a friend. Enjoy the process and don't stress the small stuff - even a "failed" brownie is still a delicious chocolate treat.

Recipe FAQs
What is the secret to super fudgy brownies?
Whisking the melted butter and sugar vigorously for 30 seconds is the primary secret. This creates a shiny, dense base that ensures a fudgy texture rather than a cakey one.
What makes the best fudgy brownies?
Using Dutch process cocoa powder and not overbaking are the keys to excellence. If you enjoyed mastering rich Dutch cocoa here, you will notice that same depth of flavor translates beautifully to other chocolate forward treats.
Can a diabetic eat brownies?
No, this recipe contains significant amounts of granulated sugar and should be consumed with caution. Please consult a healthcare professional regarding specific dietary needs and portion control for high sugar desserts.
What is the secret to the best brownies?
Sifting your dry ingredients and using room temperature eggs creates a perfectly smooth batter. Ensuring the eggs are properly emulsified prevents the fat from separating and yields that characteristic fudgy bite.
How to ensure brownies don't stick to the pan?
Line your 8x8 baking pan with parchment paper, leaving an overhang on two sides. This creates a handle that allows you to lift the entire block out once cooled, ensuring perfectly clean squares.
Is it true I must use glass bakeware for even baking?
No, this is a common misconception. A metal pan is actually superior for brownies because it conducts heat more efficiently, helping the edges set while keeping the center fudgy.
How to tell when brownies are finished baking?
Remove them when a toothpick inserted into the center comes out with a few moist crumbs. If the toothpick is completely clean, the brownies have been overbaked and will lose their fudgy texture.
Homemade Fudgy Brownies

Ingredients:
Instructions:
Nutrition Facts:
| Calories | 299 kcal |
|---|---|
| Protein | 4.1 g |
| Fat | 15.9 g |
| Carbs | 40.1 g |
| Fiber | 2.6 g |
| Sugar | 29.3 g |
| Sodium | 74 mg |
