Saltine Toffee: Buttery and Crispy Homemade Bars
- Time: Active 10 minutes, Passive 15 minutes, Total 25 minutes
- Flavor/Texture Hook: A buttery, brittle snap with a velvety chocolate finish.
- Perfect for: Holiday gifting, last minute party platters, and beginner friendly candy making.
- Mastering the Irresistible Crunch of Saltine Toffee
- Why This Recipe Works
- Essential Metrics for Crunchy Success
- Analyzing the Four Core Elements
- Tools for a Flawless Batch
- From Crackers to Caramel Shards
- Navigating Potential Toffee Pitfalls
- Modifying the Classic Crunch Profile
- Preservation and Freshness Tactics
- Visual Appeal and Gifting Ideas
- Recipe FAQs
- 📝 Recipe Card
Mastering the Irresistible Crunch of Saltine Toffee
Picture this: it’s late December, the kitchen is filled with the scent of pine and cinnamon, and the counter is a chaotic landscape of flour and rolling pins. Then, someone walks in with a tin of what looks like broken glass made of gold and chocolate.
You take one bite, and that distinctive shatter echoes in your ears while the salt hits the back of your tongue. It’s a sensory overload that makes every other cookie on the tray look dull.
That was my introduction to this recipe at a chaotic neighborhood potluck where the host literally had to hide the container to keep people from fighting over the last shard.
We’ve all been there, hovering over a pot of bubbling sugar, praying it doesn't seize or turn into a greasy mess. But this isn't that kind of fussy candy making. We are taking the humble, everyday cracker - the kind you usually eat with soup when you're under the weather - and turning it into a canvas for a mahogany hued caramel.
The way the boiling toffee seeps into the perforated holes of the crackers creates a unified sheet of brittle that defies logic. It shouldn't be this easy to create something that tastes like it came from a high end confectionery shop, but here we are.
This isn't just about melting things together; it’s about the chemistry of a hard crack stage achieved through a timed boil. We are looking for that specific moment when the butter and sugar lose their individual identities and become a singular, glossy liquid.
When that hits the salty, airy structure of the saltines, it creates a texture that is simultaneously light and decadently rich. Let’s get into the mechanics of why this works and how you can avoid the oily separation that plagues so many first time attempts.
Why This Recipe Works
Emulsification Stability: By maintaining a rolling boil for exactly 3 minutes, we force the fat in the butter to bond with the sugar crystals, creating a stable syrup that won't separate during the baking phase.
Starch Lattice Reinforcement: The saltine crackers act as a structural base, preventing the toffee from becoming a sticky puddle and providing "air pockets" that contribute to a lighter shatter rather than a tooth breaking hardness.
Maillard Reaction Acceleration: The 400°F (200°C) oven temperature briefly toasts the crackers while the toffee is setting, deepening the flavor profile from "sweet" to a complex, toasted nuttiness without actually using nuts.
Controlled Recrystallization: Adding the chocolate chips to the piping hot toffee allows them to melt via residual heat, which helps maintain a glossy, tempered like finish once they set in the refrigerator.
| Method | Time | Texture | Best For |
|---|---|---|---|
| Classic Stovetop | 25 minutes | Crisp, clean snap | Gifting and long term storage |
| Microwave Shortcut | 15 minutes | Chewy, slightly grainy | Immediate snacking (eaten same day) |
| No Bake Version | 20 minutes | Soft, fudge like | Low effort cravings |
Using the stovetop method outlined here ensures the sugar reaches the correct temperature for a brittle finish. While microwave versions exist, they often lack the depth of flavor that comes from the direct heat of a heavy bottomed saucepan. This classic approach gives you that professional "crack" every single time.
Essential Metrics for Crunchy Success
| Component | Science Role | Pro Secret |
|---|---|---|
| Unsalted Butter | Provides the fat for a silky mouthfeel and prevents the sugar from becoming rock hard. | Use high fat European butter for a more "velvety" finish. |
| Light Brown Sugar | Contains molasses which adds acidity and moisture, facilitating a faster caramelization. | Pack it firmly to ensure the ratio of sugar to butter is perfectly balanced. |
| Semi Sweet Chocolate | Acts as a bitter counterpoint to the salt and sugar, balancing the overall profile. | Freeze the chips for 5 minutes before use to control the melting rate. |
The interaction between the molasses in the brown sugar and the salt on the crackers is what creates that addictive "one more piece" quality. If you used white sugar, the recipe would be one dimensionally sweet; the brown sugar provides the necessary complexity.
Analyzing the Four Core Elements
For this Saltine Toffee, we are keeping the ingredient list tight and focused. Every element serves a specific purpose in the architecture of the final bite.
- 48 saltine crackers (approx. 130g): These provide the salty, yeasty base. Why this? They stay crisp under the hot toffee and provide a built in portioning grid.
- Substitute: Ritz crackers for a richer, more buttery base, though they are more prone to crumbling.
- 1 cup unsalted butter (225g): This is the engine of the toffee. Why this? Using unsalted allows us to control the salt level coming from the crackers.
- Substitute: Salted butter (just omit any extra sea salt sprinkles at the end).
- 1 cup light brown sugar (200g): This provides the caramel notes and the "chew" within the crunch. Why this? The moisture content helps the toffee spread evenly across the pan.
- Substitute: Dark brown sugar for a deeper, more intense molasses flavor.
- 2 cups semi sweet chocolate chips (340g): The final velvety layer that seals everything in. Why this? Semi sweet has the right cocoa to sugar ratio to cut through the toffee.
- Substitute: Dark chocolate chunks (60% cacao) for a more sophisticated, less sugary finish.
This toffee is the ultimate post dinner treat after a big bowl of rich chili, providing that hit of sweetness needed after a spicy, savory meal. Trust me, the contrast is exactly what your palate craves.
Tools for a Flawless Batch

Having the right gear is the difference between a clean cleanup and scrubbing scorched sugar off your favorite sheet pan for three days. You absolutely need a 12x17 inch jelly roll pan.
A standard cookie sheet often lacks the high sides required to contain the bubbling toffee, and you don't want liquid sugar dripping onto the floor of your oven.
Lining the pan is non negotiable. I use a double layer strategy: aluminum foil first to protect the pan and make it easy to lift the whole sheet out later, topped with parchment paper.
Toffee is notorious for sticking to foil if the sugar gets too hot, but parchment paper releases it like a dream. An offset spatula is also your best friend here for spreading the chocolate into a perfectly smooth, mirror like layer.
From Crackers to Caramel Shards
- Preheat your oven to 400°F (200°C). Line a 12x17 inch jelly roll pan with aluminum foil and top with parchment paper. Note: The parchment prevents sticking while the foil makes for easy cleanup.
- Arrange the 48 saltine crackers in a single, tight layer on the prepared baking sheet. Work them edge to edge until the pan is fully paved.
- In a medium heavy bottomed saucepan, combine the 1 cup unsalted butter and 1 cup light brown sugar over medium heat.
- Stir constantly until the butter is melted. Once the mixture begins to bubble, stop stirring and start a timer for exactly 3 minutes of a rolling boil to ensure proper emulsification. It should look like thick, golden lava.
- Carefully pour the hot toffee mixture over the crackers and spread evenly using an offset spatula. Note: Work quickly as the toffee begins to set as soon as it hits the cooler crackers.
- Bake in the preheated oven for 5 minutes. The toffee should be bubbling vigorously and covering the crackers completely.
- Remove from the oven and immediately sprinkle the 2 cups semi sweet chocolate chips over the hot toffee. Let sit for 1-2 minutes until softened and glossy, then spread into a smooth layer.
- Allow to cool completely at room temperature, then refrigerate until set before breaking into pieces.
Chef's Tip: If your toffee looks like it's separating (oily on top) when you pull it out of the oven, don't panic. Quickly whisk the surface with a fork for 10 seconds before adding the chocolate; the agitation can often pull the emulsion back together.
If you can't get enough of that deep, nutty sugar profile, you'll love these brown butter toffee cookies. They use a similar chemistry of toasted milk solids to achieve that signature flavor we love in this cracker candy.
Navigating Potential Toffee Pitfalls
The most common issue people face is "The Oil Slick." This happens when the butter and sugar refuse to stay together, leaving a layer of grease on top of the toffee. Usually, this is caused by stirring too much during the boil or using a saucepan that is too thin, causing "hot spots" that break the emulsion.
To Prevent Toffee Separation
The key is the "Hands Off" rule. Once that mixture hits a rolling boil, put the spoon down. Stirring introduces air and can knock the fat molecules loose from the sugar. If it does separate, the 5 minute bake at 400°F often acts as a secondary emulsifier, forcing the ingredients back together through intense heat.
| Problem | Root Cause | Solution |
|---|---|---|
| Grainy Toffee | Sugar crystals didn't melt or re crystallized. | Ensure butter is fully melted before sugar starts to boil. |
| Soggy Crackers | Toffee didn't reach high enough temperature. | Use a timer for the full 3 minute rolling boil. |
| Chocolate Sliding Off | Toffee was too oily or didn't set before chocolate was added. | Blot excess oil with a paper towel before adding chips. |
Common Mistakes Checklist
- ✓ Ensure the butter and sugar are at a full, "foamy" boil before starting the 3 minute timer.
- ✓ Do not use "tub" margarine or low-fat butter spreads; the water content will ruin the snap.
- ✓ Avoid making this on a very humid day, as the sugar will absorb moisture from the air and become sticky.
- ✓ Let the toffee cool to room temperature before putting it in the fridge to prevent "sweating."
- ✓ Use a heavy bottomed pot to distribute heat evenly and prevent scorching the sugar.
Modifying the Classic Crunch Profile
Once you’ve mastered the base version of Saltine Toffee, the world is your oyster. For a gluten-free Alternative, simply swap the saltines for your favorite gluten-free square crackers.
I’ve found that many GF crackers are actually crunchier than the wheat versions, which makes for an even better "shatter" factor. Just ensure they are plain or salted, not flavored with garlic or herbs.
For a Vegan Friendly Version
You can achieve a similar result using a high-quality vegan butter stick (look for one with a high fat content like Miyoko's) and dairy-free chocolate chips. Be aware that vegan butter can sometimes separate more easily, so keep a close eye on the emulsion during that 3 minute boil.
Coconut sugar can be used in place of brown sugar, but it will result in a darker, more "toasted" flavor that is slightly less sweet.
If you want to deviate from the traditional chocolate topper, try a White Chocolate and Peppermint variation. Use white chocolate chips and sprinkle crushed candy canes over the top while the chocolate is still wet. The coolness of the mint against the warm toffee is a fantastic contrast.
Alternatively, a Dark Chocolate and Sea Salt version with a sprinkle of flaky Maldon salt is perfect for those who prefer a more sophisticated, less sugary treat.
Preservation and Freshness Tactics
Storing this Saltine Toffee correctly is the difference between a crisp snack and a gummy mess. Because sugar is hygroscopic (it pulls moisture from the air), you must keep it in an airtight environment.
- Fridge: Place shards in an airtight container with layers of parchment paper between them. It will stay fresh for up to 2 weeks.
- Freezer: This toffee actually tastes incredible frozen. Wrap the pieces tightly in plastic wrap and then place them in a freezer bag. It will keep for up to 3 months.
- Zero Waste Tip: If you find yourself with a bunch of "toffee dust" or small crumbs at the bottom of the container, don't throw them out! Those shards are pure gold. Fold them into vanilla ice cream, sprinkle them over a morning bowl of oatmeal, or use them as a crunchy topping for a chocolate tart.
Avoid storing the toffee at room temperature if your house is warm, as the chocolate will soften and the toffee may lose its signature snap. Always keep it in a cool, dry place.
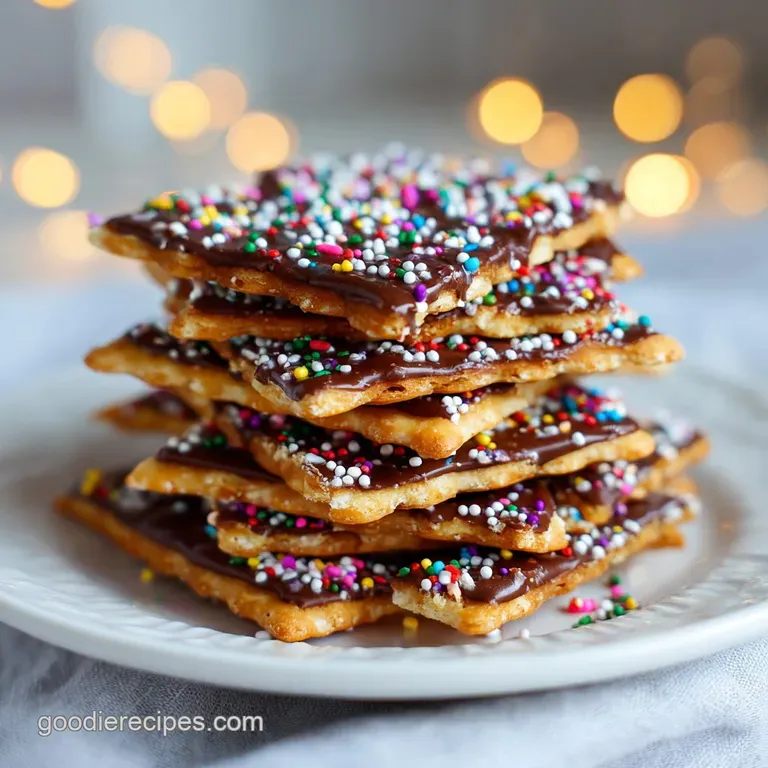
Visual Appeal and Gifting Ideas
The beauty of "cracker candy" is its rustic, shattered look. Don't try to cut it into perfect squares; it's much more charming when broken into irregular, jagged pieces. To get the best break, wait until the toffee is completely cold and firm from the fridge, then lift the entire sheet using the foil and drop it onto a clean counter.
The impact will naturally start the cracks, and you can finish the job by hand.
For Professional Gifting
If you're giving this away, presentation is everything. I like to use clear cellophane bags tied with a simple piece of baker's twine. For an extra touch of "bold flavor," sprinkle a few dried rose petals or a light dusting of espresso powder over the chocolate before it sets.
This signals to the recipient that this isn't just a basic kitchen snack it's a curated treat.
For a Flavor Contrast
Consider a "Flavor Map" for your toppings. If you use semi sweet chocolate, top one half with toasted pecans for a nutty crunch and the other half with a drizzle of white chocolate for a "zebra" effect. The visual contrast of the dark and white chocolate makes the tray look like it came from a professional bakery.
Remember, the goal is to play with textures: the smooth chocolate, the hard toffee, and the airy cracker lattice. It's a trifecta of snacking perfection that never fails to impress.

Recipe FAQs
What are common saltine toffee mistakes?
Failing to reach a full, foamy boil is the most frequent error. You must allow the butter and brown sugar mixture to reach a rolling boil for exactly 3 minutes to ensure proper emulsification, or the toffee will separate.
How long does saltine toffee last?
Store for up to one week in an airtight container at room temperature. If you keep it in the refrigerator, it can last for up to two weeks, though the saltine crackers may lose some of their crispness over time.
Why is my saltine toffee grainy?
This usually happens if you stir the mixture during the 3-minute boil. Once the butter and sugar begin to bubble, you must stop stirring completely to prevent the sugar from recrystallizing, which creates a sandy or grainy texture.
What is another name for Christmas crack?
It is most commonly called saltine toffee. The name "Christmas crack" is simply a colloquial nickname based on its addictive quality and its frequent appearance at holiday gatherings.
How to prevent saltine toffee from becoming sticky?
Avoid making the recipe on a highly humid day. Because sugar is hygroscopic, it absorbs moisture from the air, which can cause the finished toffee to become tacky or soft instead of maintaining its signature snap.
Is it true I must use a heavy bottomed pot?
Yes, this is essential for consistent heat distribution. Using a heavy bottomed saucepan prevents hot spots that can easily scorch the brown sugar and butter, ensuring the toffee cooks evenly during the 3-minute boil.
How to properly cool the toffee to avoid sweating?
Let the tray sit at room temperature until it is completely cool before placing it in the refrigerator. Moving it to a cold environment while it is still warm causes condensation to form on the surface, making the toffee "sweat" and ruining the chocolate finish.
Homemade Saltine Toffee
Ingredients:
Instructions:
Nutrition Facts:
| Calories | 113 kcal |
|---|---|
| Protein | 0.7 g |
| Fat | 7.4 g |
| Carbs | 12.4 g |
| Fiber | 0.4 g |
| Sugar | 9.6 g |
| Sodium | 31.2 mg |
