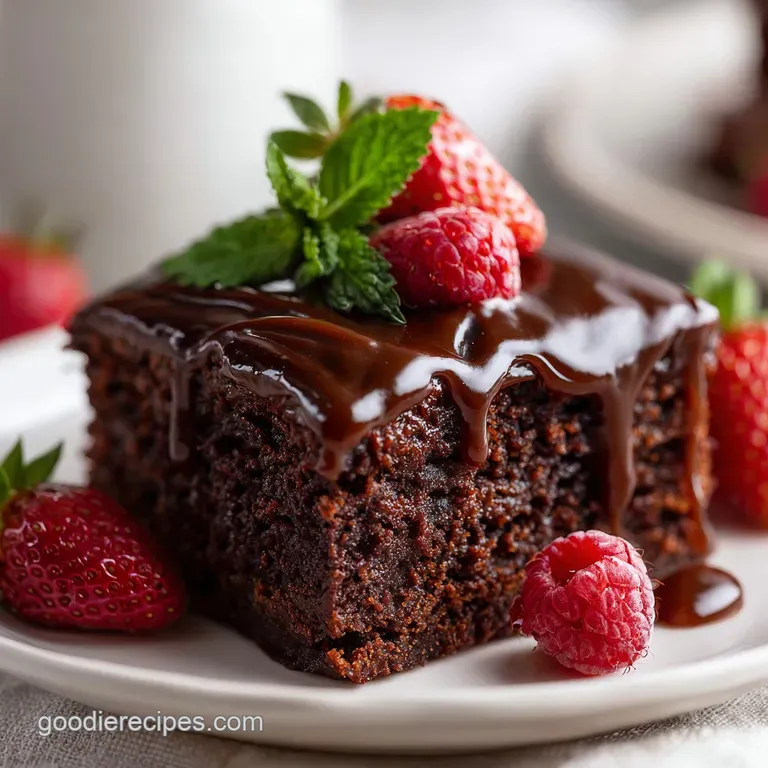
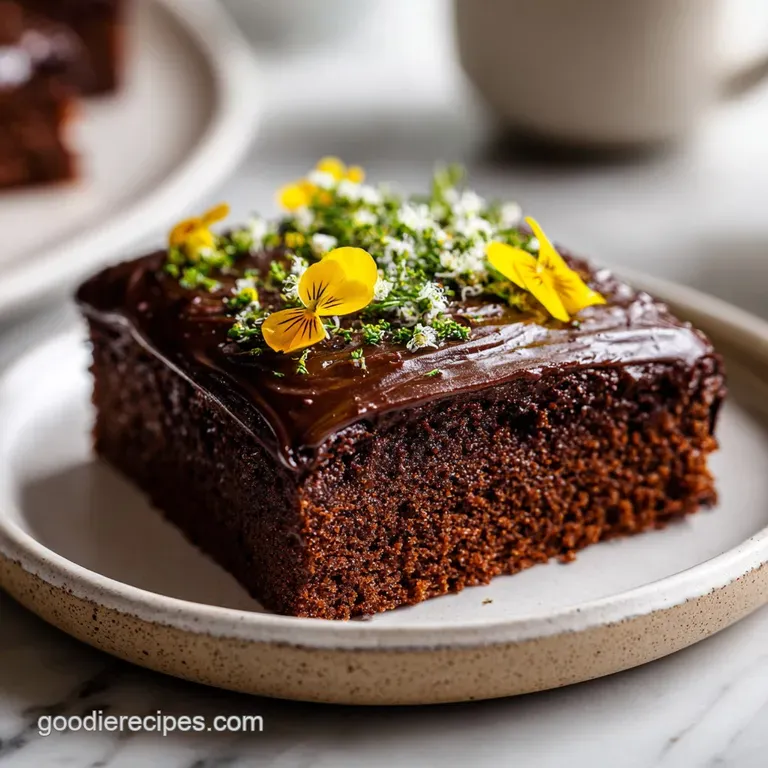
Moist Chocolate Sheet Cake Recipe
- Master the Ultimate Homemade Chocolate Sheet Cake
- Key Specifications for Baking Success
- Essential Components for a Fudgy Crumb
- Simple Tools for Better Results
- Step by Step to Chocolate Perfection
- Preventing Common Baking Mishaps
- Personalize Your Chocolate Sheet Cake
- Scaling for Different Crowds
- Proper Storage and Waste Reduction
- Ideal Side Dishes and Drink Pairings
- Recipe FAQs
- 📝 Recipe Card
Master the Ultimate Homemade Chocolate Sheet Cake
That rich, earthy aroma of cocoa hitting boiling water is something I’ll never get tired of. It’s the smell of my childhood kitchen on a Sunday afternoon, right when the house starts feeling cozy and the kettle begins to whistle.
I remember watching my aunt pour that dark, bubbling chocolate mixture over the flour, and the way the batter transformed from dry clumps into a glossy, velvety river. It’s a sensory trigger that instantly tells my brain: comfort is coming.
We’ve all been there with dry, crumbly cakes that need a gallon of milk just to swallow. This Chocolate Sheet Cake is the total opposite. It’s remarkably moist, almost fudgy, and has that signature crackly top that shatters perfectly under a fork.
Whether you’re feeding a crowd at a backyard cookout or just need a reliable win for a family birthday, this is the one. We’re keeping things simple with minimal tools - no fancy stand mixer required here - just a couple of bowls and a whisk.
Key Specifications for Baking Success
The beauty of this recipe lies in its efficiency. While some cakes demand hours of labor, this one is built for the busy home cook who doesn't want to sacrifice quality. We are aiming for a cake that is sturdy enough to slice into clean squares but tender enough to melt away.
It's the kind of reliable bake that has saved me more times than I can count when I realized I needed a dessert for twenty people in under an hour.
The Physics of the Bloom
Mechanism: Boiling liquid dissolves the cocoa solids and breaks down clumps, releasing intense flavor trapped in the fat. This ensures the chocolate notes are deep and resonant throughout the entire crumb rather than just sitting on the surface.
| Baking Method | Active Time | Resulting Texture | Best For |
|---|---|---|---|
| Standard Oven | 15 mins | Fluffy, even crumb with a delicate crackle top | Traditional family gatherings and clean slicing |
| Stovetop "Steam" | 25 mins | Denser, pudding like consistency, very moist | Small portions or when the oven is occupied by a roast |
Choosing the right method depends on your desired vibe. The oven version gives you those classic clean edges and a slightly lighter feel. If you ever find yourself without an oven, the stovetop method (using a water bath) creates a texture almost like a steamed pudding, which is incredible with a scoop of cold vanilla ice cream.
Chef's Tip: Grate your cold butter directly into the flour mixture if you're in a hurry. The small shreds incorporate much faster than cubes, ensuring you don't overwork the gluten while trying to get it smooth.
Essential Components for a Fudgy Crumb
To get that world class texture, every ingredient plays a specific role. We aren't just throwing things in a bowl; we are balancing fats, acids, and sugars to create a cake that stays fresh for days.
Using coconut sugar or raw cane sugar adds a subtle caramel note that you just don't get from standard white sugar, and the Greek yogurt provides the acidity needed to activate the baking soda for a perfect rise.
| Ingredient | Science Role | Pro Secret |
|---|---|---|
| Unsweetened Cocoa | Flavor Base | Bloom it in hot coffee to unlock hidden fruity and nutty notes |
| Greek Yogurt | Acid & Moisture | Use full fat for a richer mouthfeel and more tender protein structure |
| Light Olive Oil | Fat Stability | Keeps the cake moist even when refrigerated, unlike butter only cakes |
| Boiling Liquid | Hydration | Using coffee instead of water intensifies the chocolate without tasting like espresso |
Why use Greek yogurt?
The yogurt provides a thick, acidic base that reacts beautifully with the baking soda. This creates tiny air bubbles that lift the heavy chocolate batter, preventing it from becoming a leaden brick.
The Power of Boiling Water
Hot liquid doesn't just bloom the cocoa; it also starts the starch gelatinization process in the flour immediately. This results in a much softer, more "melt in-your mouth" texture once the cake is fully baked.
Simple Tools for Better Results
You don't need a kitchen full of gadgets to pull this off. In fact, I prefer using a simple hand whisk because it gives me a better feel for the batter's consistency. A standard 9x13 inch baking pan is your best friend here.
It provides the perfect surface area for that thin, iconic layer of cake and that generous pour of warm glaze.
- Large Mixing Bowl: For the dry base and final batter assembly.
- Medium Saucepan: To melt the butter and bloom the cocoa.
- Whisk and Spatula: For a smooth, lump free finish.
- Sifter: Absolutely mandatory for the powdered sugar in the glaze to avoid lumps.
- 9x13 Inch Pan: Metal pans are preferred for sharper edges and even heat distribution.
If you love the flavor profile of this cake but want something in cookie form for a bake sale, my Texas Sheet Cake recipe is a fantastic alternative that uses many of the same science principles in a handheld format.
step-by-step to Chocolate Perfection
Let’s get into the process. The key here is the "warm pour" technique. Unlike many cakes where you wait for things to cool, this glaze needs to hit the cake while both are still warm.
This allows a tiny bit of the glaze to seep into the top layer of the cake, creating a fudgy interface that is honestly the best part of the whole experience.
- Prep the station. Preheat your oven to 350°F (180°C) and grease a 9x13 inch pan with a bit of oil or butter.
- Combine dry ingredients. In a large bowl, whisk together 250g all purpose flour, 300g coconut sugar, 45g cocoa powder, 1 tsp baking soda, and 0.5 tsp fine sea salt. Note: Whisking helps aerate the flour and remove large lumps.
- Melt and bloom. In a saucepan, combine 115g unsalted butter, 120ml oil, and 240ml boiling water (or coffee). Whisk until the butter is completely melted and the mixture is sizzling slightly at the edges.
- Emulsify the base. Pour the hot liquid into the dry ingredients. Whisk gently until no dry streaks of flour remain.
- Add the dairy. Stir in 120g Greek yogurt, 2 large eggs, and 1 tbsp vanilla extract. Note: Adding these last prevents the hot liquid from scrambling the eggs.
- Bake the cake. Pour into the pan and bake for 20 minutes until a toothpick comes out with just a few moist crumbs.
- Start the glaze. While the cake bakes, melt 115g butter (extra, for glaze) in a pan with 30g cocoa powder and 60ml milk. Bring to a simmer then remove from heat.
- Finish the frosting. Whisk in 240g sifted powdered sugar and 1 tsp vanilla until the glaze is silky and glossy.
- The pour. Pour the warm glaze over the hot cake immediately after taking it out of the oven. Tilt the pan to ensure it reaches every corner.
- Set and serve. Let it sit for at least 20 minutes. The glaze will develop a thin, delicate shell as it cools.
Preventing Common Baking Mishaps
Even the best of us hit a snag sometimes. One mistake I once made was skipping the sifting step for the powdered sugar. I thought I could just whisk the lumps out in the pan, but they just sat there like little white pebbles in my beautiful dark glaze. It was a lesson learned the hard way!
The Sinking Middle Syndrome
If your cake looks like a crater, it’s usually because the oven door was opened too early. That rush of cool air collapses the air bubbles before the protein structure has set. Keep that door closed until at least the 18 minute mark.
| Problem | Root Cause | Solution |
|---|---|---|
| Dry/Crumbly Texture | Overbaking or too much flour | Pull the cake when a few moist crumbs still cling to the tester |
| Grainy Frosting | Sugar not dissolved or sifted | Sift sugar and whisk into the warm butter mixture immediately |
| Greasy Surface | Oil/Butter separation | Ensure yogurt and eggs are at room temperature to help emulsification |
To keep your baking game strong, keep this checklist in mind before you even turn on the oven. These small habits make the difference between a "good" cake and one people beg you for the recipe for.
- ✓ Always use a kitchen scale for the flour (250g) to avoid the "packing" effect of measuring cups.
- ✓ Ensure the liquid is truly boiling when it hits the cocoa to maximize the bloom.
- ✓ Sift your powdered sugar twice if it looks particularly clumpy; it’s worth the 30 seconds.
- ✓ Don't overmix once the eggs are in; stop as soon as the batter looks uniform.
- ✓ Pour the glaze while the cake is steaming hot to get that perfect "bonded" layer.
Personalize Your Chocolate Sheet Cake
This recipe is a wonderful canvas for your own creativity. While the classic version is hard to beat, I often find myself tweaking it based on what I have in the pantry or who I'm serving. If you're looking for something with a different flavor profile for a celebration, you might also enjoy the vibrant colors of a Red Velvet Cake recipe, which uses a similar acidic base to achieve that silky crumb.
- The Nutty Crunch: Sprinkle toasted pecans or walnuts over the warm glaze before it sets. The saltiness of the nuts cuts through the sweetness beautifully.
- Mexican Hot Chocolate: Add 1 tsp of ground cinnamon and a tiny pinch of cayenne pepper to the dry ingredients for a subtle, warming kick.
- Mocha Blast: Use a very strong dark roast coffee for the boiling liquid and add a teaspoon of espresso powder to the glaze.
Chef's Note: If you want a more "grown up" version, replace the vanilla in the glaze with a tablespoon of bourbon or dark rum. It adds a sophisticated depth that pairs perfectly with the dark cocoa.
Scaling for Different Crowds
Adjusting this recipe for smaller or larger pans is fairly straightforward, but you have to watch your timing. Because it’s a sheet cake, the depth is everything.
- To Halve It: Use an 8x8 inch square pan. Reduce the bake time by about 5 minutes. Use one large egg and follow the same "warm pour" rule for the glaze.
- To Double It: You'll need two 9x13 pans or one giant commercial style sheet pan. Keep the spices and salt at 1.5x the original amount to avoid overpowering the batter.
- Pan Substitutes: If you only have a circular bundt pan, increase the bake time to 45-50 minutes. Note that the glaze will act more like a drizzle than a solid sheet in this format.
Proper Storage and Waste Reduction
This cake is the gift that keeps on giving because it actually tastes better the second day. The moisture from the yogurt and oil settles in, and the glaze softens the top layer of the cake just a bit more.
- Fridge
- Keep in an airtight container for up to 5 days. The oil base ensures it doesn't turn into a rock when chilled.
- Freezer
- Wrap individual squares in plastic wrap, then foil. They stay fresh for 3 months. Thaw at room temperature for an hour before eating.
- Reheating
- 10 seconds in the microwave makes the glaze slightly melty and the cake feel like it’s fresh out of the oven.
Zero Waste Tips: If you happen to have leftovers that have gone a bit dry (though unlikely!), crumble them up and mix with a little leftover frosting to make cake pops. You can also use cake scraps as a base for a chocolate trifle, layering them with whipped cream and fresh berries.
Don't throw away those "ugly" edge pieces; they are the best parts for snacking while you wait for the rest to set!
Ideal Side Dishes and Drink Pairings
While this cake is a star on its own, the right pairing can turn it into a full on event. I personally love serving it with a side of tart raspberries to balance out the sugar.
- Cold Milk: The absolute classic. The fats in the milk cleanse the palate between rich bites of chocolate.
- Salted Caramel Drizzle: If you're feeling extra, a tiny drizzle of salted caramel over the set glaze adds a professional touch.
- Coffee: A sharp, acidic pour over coffee complements the earthy cocoa notes perfectly.
If you are planning a big dessert spread and want more variety, consider adding a fruit based option like this Pineapple Upside Down recipe to provide a bright, citrusy contrast to the deep chocolate. It makes for a beautiful table presentation with the dark sheet cake and the golden, caramelized pineapple side-by-side.
Trust me, once you master the timing of that warm glaze, you’ll be the designated dessert person for every family event. It's a "low effort, high reward" bake that never fails to impress. Now, let's get that kettle boiling and start blooming that cocoa!

Recipe FAQs
Can I substitute oil for butter entirely in the cake batter?
Yes, you absolutely can. Using oil instead of butter ensures the cake stays incredibly moist, even when chilled, because oil remains liquid at lower temperatures than butter.
Why does my cake glaze crackle when cooling?
The crackle occurs because you poured the warm glaze over a hot cake. This creates a thin, solidified shell on the surface, which contrasts beautifully with the soft crumb underneath, much like the top of a classic brownie.
How to ensure the chocolate flavor is truly deep and intense?
Bloom the cocoa powder in the boiling liquid. Dissolving the cocoa solids in hot liquid releases their trapped flavor compounds, ensuring maximum chocolate richness throughout the crumb.
Is it okay to use regular milk instead of water for the glaze?
No, stick with whole milk or water for the glaze base. Using cream or buttermilk in the glaze can cause the sugar to seize up due to the different fat and protein structures, leading to a grainy texture rather than a silky one.
How to keep the sheet cake from sinking in the center after baking?
Avoid opening the oven door before the 18-minute mark. A sudden drop in temperature causes the developing air bubbles to collapse before the cake structure sets, resulting in a sunken middle.
How to adapt this recipe for a smaller 8x8 inch pan?
Halve all ingredients and reduce the baking time by about five minutes. Since you are reducing the overall volume, the same principles of warm glazing apply, but you must watch the smaller depth carefully.
What is the purpose of adding Greek yogurt to the batter?
The yogurt provides essential acidity to activate the baking soda, leading to a superior rise. This acidic component also dramatically increases the final moisture content of the cake, similar to the acid balance needed for a tender crumb in our Red Velvet Cupcakes recipe.
Moist Chocolate Sheet Cake
Ingredients:
Instructions:
Nutrition Facts:
| Calories | 218 kcal |
|---|---|
| Protein | 2.8 g |
| Fat | 9.8 g |
| Carbs | 32.5 g |
| Fiber | 1.1 g |
| Sugar | 22.6 g |
| Sodium | 96 mg |
