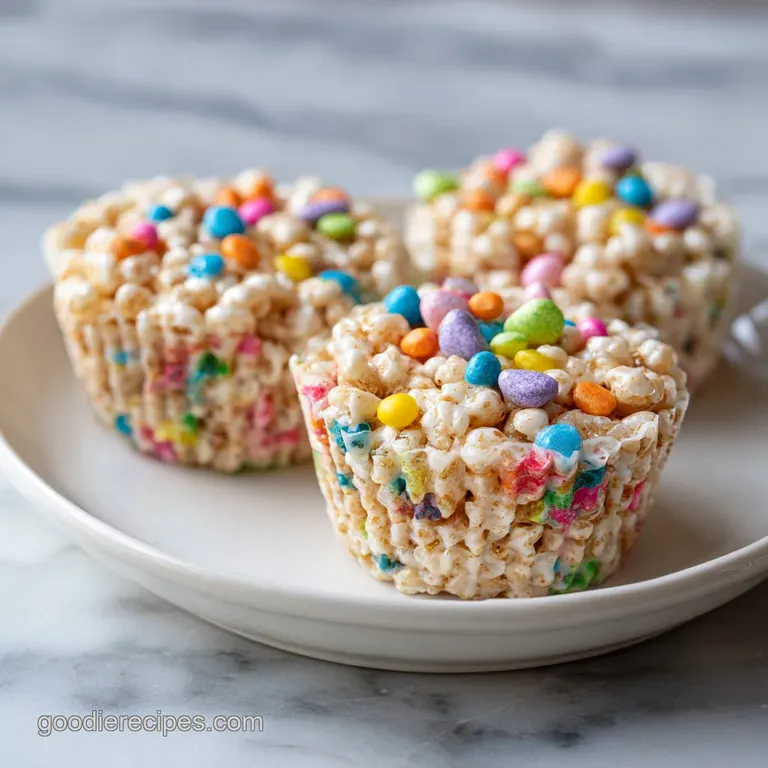
Rice Krispies Easter Cups: Chewy & Nostalgic
- Time: Active 15 minutes, Passive 5 minutes, Total 20 minutes
- Flavor/Texture Hook: Shatter crisp cereal held together by velvety, vanilla flecked marshmallow
- Perfect for: School bake sales, kid friendly kitchen projects, or a budget-friendly Easter centerpiece
- Why Everyone Loves These Rice Krispies Easter Cups
- The Molecular Bond of the Gooey Nest
- Component Analysis for Better Results
- Essential Elements for Your Festive Nests
- Simple Tools for Shaping Your Cups
- Step by Step Guide to Perfect Results
- Fixing Common Problems with Cereal Treats
- Scaling the Recipe for Large Crowds
- Budget Friendly Swaps and Festive Variations
- Proper Storage Tips to Keep Your Cereal Cups Crispy
- Fun Ways to Present and Enjoy Your Easter Desserts
- Common Myths About Cereal Treats
- Recipe FAQs
- 📝 Recipe Card
Why Everyone Loves These Rice Krispies Easter Cups
The scent of melting grass fed butter hitting a warm pot is one of those kitchen smells that instantly transports me back to my grandmother's linoleum floored kitchen. She used to make these every spring, though her version was a bit more "rustic" - mostly just a heap of cereal and sugar that would practically shatter your teeth if you didn't eat them within ten minutes.
I remember sitting on a high stool, my fingers sticky with marshmallow goo, trying to press little chocolate eggs into nests that were already hardening like cement.
Years of making these for my own kids taught me that the traditional recipe needs a little help to stay soft. We have all been there: you make a beautiful batch of treats, but by the time the Easter egg hunt is over, they are as hard as actual stones.
I started experimenting with adding a tiny bit of almond butter and changing the way I heat the marshmallows. It's a small change that makes a massive difference in the final texture.
These rice krispies easter cups are now the most requested item at our family brunch. There is something so satisfying about the way the dark chocolate drizzle sets against the pastel sprinkles.
It's not just about the sugar, it's about that perfect balance of salt, vanilla, and the toasted flavor of the brown rice cereal. Plus, it's a budget friendly way to make a big impact without spending hours near a hot oven.
The Molecular Bond of the Gooey Nest
The Sugar Buffer: Adding almond butter introduces healthy fats that coat the sugar molecules in the marshmallows, preventing them from forming tight, crystalline bonds that lead to a rock hard texture.
Starch Integrity: Using brown rice cereal provides a sturdier structure than white rice versions, meaning the cups won't collapse or become soggy when the melted chocolate is added.
Temperature Control: Melting the butter and marshmallows on low heat prevents the sugar from reaching the "hard ball" stage, ensuring the cups remain pliable and chewy at room temperature.
| Method | Prep Time | Final Texture | Best For |
|---|---|---|---|
| Traditional Stovetop | 15 minutes | Chewy and soft | Maximum flavor and control |
| Microwave Shortcut | 8 minutes | Denser and stickier | Last minute treats with kids |
| Brown Butter Style | 20 minutes | Nutty and deep | A more "grown up" dessert profile |
Whenever I am deciding which route to take, I usually stick to the stovetop. It takes a few minutes longer, but the way the vanilla bean paste incorporates into the butter is much more even.
If you are in a massive rush, the microwave works, but be careful not to overheat the marshmallows or they will turn into brittle candy.
Component Analysis for Better Results
| Ingredient | Science Role | Pro Secret |
|---|---|---|
| Mini Marshmallows | Act as the primary binder and sweetener | Use fresh bags only; old marshmallows have lost moisture and won't melt smoothly |
| Grass fed Butter | Provides fat for a velvety mouthfeel | Browning the butter slightly adds a toasted note that mimics expensive pralines |
| Almond Butter | Inhibits sugar crystallization | Ensure it is "smooth" style to blend seamlessly into the marshmallow cream |
Choosing the right cereal is half the battle here. I prefer the crispy brown rice cereal because it has a slightly more toasted flavor than the standard blue box version. It also holds up better to the moisture in the marshmallows, which is vital if you want that "shatter" crunch rather than a damp chew.
Essential Elements for Your Festive Nests
To get started, you will need to gather a few simple ingredients. This recipe is designed to be affordable, so do not feel pressured to buy the most expensive brands. However, a good vanilla bean paste is worth the small splurge for those beautiful black specks.
- 6 cups (165g) crispy brown rice cereal: The backbone of the recipe.
- 10 oz (285g) mini marshmallows: These melt faster and more evenly than the large ones.
- 3 tbsp (42g) grass fed butter: Provides that classic, rich flavor.
- 1 tbsp (15g) smooth almond butter: The secret weapon for long lasting chewiness. Why this? The fat content keeps the marshmallow mixture pliable for days.
- 1 tsp (5ml) pure vanilla bean paste: Much more aromatic than standard extract.
- 1/4 tsp (1.5g) sea salt: Cuts through the sugar to highlight the toasted rice.
- 1/2 cup (85g) dark chocolate chips: Melted for the "nest" lining.
- 1/4 cup (40g) pastel nonpareil sprinkles: For that essential festive look.
- 36 mini candy coated chocolate eggs: Three for each nest.
If you don't have almond butter on hand, peanut butter works too, though it will add a distinct nutty flavor. If you're looking for another great cereal based treat, you might want to try my Churro Rice Krispie recipe which uses a similar base but with a cinnamon sugar twist.
Simple Tools for Shaping Your Cups
You don't need a professional pastry kitchen to pull this off. A standard 12 cup muffin tin is the perfect mold for our nests. I also highly recommend using a large, heavy bottomed pot. A thin pot will create hot spots that can scorch the marshmallows, giving your treats a burnt sugar taste that is hard to hide.
A silicone spatula is your best friend here. Marshmallow is incredibly tacky, and a wooden spoon will often just become a permanent part of the sticky mess. I like to keep a small bowl of room temperature butter nearby to grease my fingers when it comes time to shape the cups.
It is much more effective than water, which can actually make the cereal soggy.
step-by-step Guide to Perfect Results
- Prep the mold. Lightly grease a 12 cup muffin tin with butter or a neutral oil spray. Note: This ensures the cups pop out without losing their base.
- Melt the fats. Place 3 tbsp grass fed butter and 1 tbsp almond butter in a large pot over low heat.
- Liquefy the marshmallows. Add 10 oz mini marshmallows to the pot. Stir constantly until they are about 90% melted.
- Infuse flavor. Remove from heat and stir in 1 tsp vanilla bean paste and 1/4 tsp sea salt until the mixture looks silky.
- Fold the cereal. Gently pour in 6 cups of crispy brown rice cereal. Use a folding motion until every grain is coated in white goo.
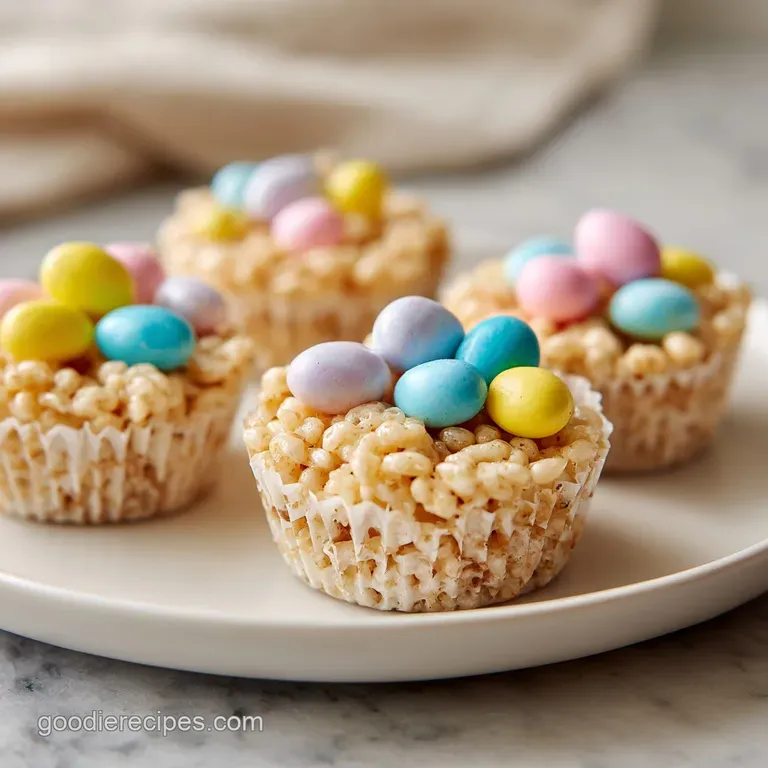
- Form the cups. Scoop about 1/2 cup of the mixture into each muffin cavity. Grease your fingers and press the center down until a nest shape forms.
- Cool and set. Let the nests sit for at least 15 minutes at room temperature. Note: Don't refrigerate them or they will become too hard to bite.
- Add the chocolate. Spoon 1-2 teaspoons of melted dark chocolate into the center of each nest.
- Garnish and finish. Immediately top with sprinkles and place 3 mini chocolate eggs into the wet chocolate until they are anchored firmly.
While you are waiting for these to set, you could even start thinking about dinner. These treats pair really well after a comforting meal like my Rice Pudding recipe if you are having a truly rice centric day!
Fixing Common Problems with Cereal Treats
Why Your Cereal Cups Are Too Hard
The most common reason for a "brick like" treat is high heat. When sugar is heated too quickly or too long, it loses its moisture and sets into a hard candy. Another culprit is packing the mixture too tightly into the muffin tin.
You want to use a gentle touch - just enough pressure to make the shape hold, but not so much that you crush the air out of the cereal.
Sticky and Messy Molding
If the mixture is sticking to everything but the tin, your kitchen might be too warm, or your hands aren't greased enough. I have made the mistake of trying to mold these while the mixture was still piping hot. Not only does it hurt, but the marshmallow is also at its stickiest state then.
Wait just a minute or two until it is warm but manageable.
| Problem | Root Cause | Solution |
|---|---|---|
| Cups fall apart | Not enough marshmallow binder | Press more firmly or add 1/2 cup extra melted marshmallows next time |
| Soggy cereal | Overheated marshmallows or humidity | Melt on lowest heat possible and store in a cool, dry place |
| Dull appearance | Marshmallows were old/stale | Use a fresh bag and add 1/2 tsp of coconut oil for shine |
Common Mistakes Checklist
- ✓ Never use high heat to melt marshmallows - low and slow is the only way.
- ✓ Don't skip the salt; it is essential to balance the cloying sweetness of the candy eggs.
- ✓ Avoid the fridge for cooling - room temperature keeps the texture "velvety" and soft.
- ✓ Work quickly once the cereal is mixed, as the marshmallow sets faster than you think.
- ✓ Grease your hands AND the spoon to prevent a giant sticky mess on your counter.
Scaling the Recipe for Large Crowds
If you are hosting a big Easter party, you can easily double this recipe. However, I suggest working in two separate batches rather than one massive pot. When you double the cereal and marshmallow in one go, it becomes very difficult to stir efficiently, and the bottom layer often gets too hot while you are still trying to incorporate the top.
For a half batch (6 cups), simply halve all the ingredients. If you are doing this, use a smaller pot to ensure the butter and almond butter don't just coat the bottom of a giant pan. For the sprinkles and eggs, you can just use as many as look "right" to you - there is no such thing as too many sprinkles in my house!
Budget Friendly Swaps and Festive Variations
Chef's Tip: If mini chocolate eggs are sold out, use jelly beans or even small grapes for a "healthier" fruit filled nest look.
If you are looking to save a few dollars, the dark chocolate drizzle can be swapped for a simple powdered sugar glaze colored with a drop of green food dye to look like grass. You can also use generic store brand rice cereal; in a blind taste test, most people can't tell the difference once it's covered in marshmallow and vanilla.
The Vegan Swap
You can make these vegan friendly by using vegan marshmallows (like Dandies) and a plant based butter substitute. Note that vegan marshmallows often take a bit longer to melt and can be a little stickier, so you might need to add an extra teaspoon of neutral oil to the pot to keep things moving.
The Chocolate Base Variation
For a "Coco Nest", replace 1 cup of the rice cereal with 1 cup of cocoa flavored rice cereal. This gives the nests a deeper color and a subtle chocolate flavor throughout the base. It looks particularly striking when topped with white chocolate eggs for contrast.
Proper Storage Tips to Keep Your Cereal Cups Crispy
These rice krispies easter cups are best eaten within 48 hours, but they will stay good for up to 4 days if handled correctly. The main enemy here is air. Once the air hits the marshmallow, it starts to draw out the moisture, leading to that dreaded stale texture.
- Fridge: Honestly, don't even bother. The humidity in the fridge will turn the cereal into a soggy mess.
- Freezing: You can freeze these! Wrap each cup individually in plastic wrap and store in a freezer bag for up to 2 months. Thaw at room temperature for 30 minutes before serving.
- Zero Waste: If you have leftover cereal crumbs at the bottom of the bag, don't toss them. Toast them in a pan with a little butter and sugar to use as a crunchy topping for yogurt or oatmeal the next morning.
Fun Ways to Present and Enjoy Your Easter Desserts
I love placing these in individual cupcake liners before serving. It makes them look like they came from a high end bakery and also keeps sticky fingers at bay. If you're feeling extra fancy, you can place each nest on a bed of edible "Easter grass" (which is usually just shredded, dyed wafer paper) on a large white platter.
If you want a different texture, try "The Tension Free Mold" technique. Instead of pressing them into a muffin tin, you can just drop mounds onto parchment paper and use the back of a spoon to make a small indent.
They will look a bit more organic and "nest like," though they won't have the clean edges of the muffin tin version.
Common Myths About Cereal Treats
One big misconception is that you need to add more butter to make them softer. While butter adds flavor, too much will actually make the treats greasy and prevent them from holding their shape.
It's the almond butter and the over low heat melting technique that actually provide the long lasting softness you are looking for.
Another myth is that you can't use large marshmallows. You can, but you'll need to snip them into smaller pieces with kitchen shears first. If you put whole large marshmallows in the pot, the outside will overcook and become tough before the inside has even begun to soften. It’s all about surface area!
Finally, many people think you have to use white rice cereal. As I mentioned earlier, the brown rice cereal is actually a better choice for structural integrity. It has a slightly thicker hull that prevents the "soggy cereal" disaster that can happen if you live in a humid climate.
Trust me, the extra fiber is just a bonus - the real win is the crunch.
These rice krispies easter cups are a reminder that the best holiday traditions don't have to be expensive or complicated. They just need a little bit of science, a lot of butter, and someone to share them with. Happy Easter and happy snacking!

Recipe FAQs
Is it true you must refrigerate these Easter cups to set the chocolate?
No, avoid the refrigerator entirely. Chilling cereal treats draws ambient moisture into the marshmallow matrix, causing them to become unpleasantly hard and stale quickly.
How to ensure the cups stay soft for more than 24 hours?
Incorporate a fat stabilizer like nut butter into the melted marshmallow mixture. The fat coats the sugar molecules, inhibiting crystallization and keeping the texture pliable, similar to the fat balance needed for our 7-Layer Dip with recipe to keep its creamy texture.
How to prevent the chocolate drizzle from looking dull or streaky?
Temper the chocolate or use a microwave at reduced power. Melt chocolate slowly, stirring often, and ensure it is not exposed to any water droplets, which will cause it to seize immediately.
Can I substitute almond butter with a seed butter if I have a severe nut allergy?
Yes, seed butters like sunflower seed butter work well as a direct substitute. The key is the fat content, which inhibits sugar hardening; if you enjoyed achieving the smooth texture here, the same foundational emulsification skill applies to recipes like a quick Honey Garlic Glazed recipe.
What is the best technique for pressing the cereal mixture into the muffin tins?
Lightly grease your fingers with softened butter, not water, and press gently. Press just enough to form the shape and create the nest indentation; over compressing removes essential air pockets, resulting in dense, hard cups.
Why do my marshmallows burn or scorch during melting?
You are using heat that is too high or a pan that is too thin. Always melt marshmallows on low or medium low heat in a heavy bottomed pot, stirring constantly to distribute the heat evenly across the sticky mixture.
Can these be successfully made ahead and frozen for later use?
Yes, they freeze exceptionally well if wrapped properly. Wrap each cooled cup tightly in plastic wrap before placing them in a freezer bag to prevent freezer burn and moisture loss; thaw at room temperature before decorating.
Rice Krispies Easter Cups

Ingredients:
Instructions:
Nutrition Facts:
| Calories | 259 kcal |
|---|---|
| Protein | 2.4 g |
| Fat | 8.3 g |
| Carbs | 43.9 g |
| Fiber | 1.0 g |
| Sugar | 23.8 g |
| Sodium | 62.5 mg |
