Classic Cheesecake Recipe with Vanilla
- Time: Active 20 minutes, Passive 1 hours 10 mins, Total 1 hours 30 mins
- Flavor/Texture Hook: Deeply aromatic vanilla bean notes with a velvety, dense, and ultra creamy finish
- Perfect for: Holiday gatherings, milestone celebrations, or a classic weekend project for the home baker
- Mastering a Classic Cheesecake Recipe with Vanilla
- Why This Texture Is Silky
- Decision Metrics for Serving Size
- Component Analysis for Success
- Ingredients for Your Masterpiece
- Minimal Tools for Results
- Baking the Creamy Filling
- Fixing Typical Baking Mishaps
- Adjusting the Batch Size
- Debunking Common Baking Myths
- Swaps for Custom Desserts
- Storing Your Slices Properly
- Serving Suggestions for Parties
- Recipe FAQs
- 📝 Recipe Card
Mastering a Classic Cheesecake Recipe with Vanilla
I'll never forget the first time I tried to bake this for my grandmother's birthday. I was so nervous about the "dreaded crack" that I stared through the oven glass for the entire hour, watching the batter rise like a slow motion souffle.
The kitchen was filled with that heavy, comforting scent of warming cream cheese and the floral punch of pure vanilla extract. When I finally unlatched the springform pan and heard that soft "shush" of the sides pulling away from the cake, I knew I’d found something special.
That first bite was a revelation. It wasn't just sweet; it was substantial, with a velvety richness that balanced the tang of the sour cream perfectly. Since then, I've made every mistake in the book, from leaky water baths to lumpy batter, and I've boiled all those lessons down into this one reliable method.
We're going to use simple tools and traditional techniques that prioritize texture over gimmicks, ensuring you get that silky, professional finish every single time.
This isn't just about mixing ingredients together; it's about the patience of the chill and the precision of the temperature. We're looking for a crumb that's firm enough to hold its shape but soft enough to melt on your tongue. If you love the aroma of vanilla as much as I do, you'll also adore this Cupcake Recipe with vanilla frosting for your next smaller baking project. But for now, let's focus on the heavy hitter.
Why This Texture Is Silky
Understanding the physics of this bake is the difference between a grainy cake and a velvety one. It all comes down to how we handle the proteins in the eggs and the fats in the cheese.
- The Emulsification Principle: By using room temperature ingredients, the fat molecules in the cream cheese and the water in the eggs can form a stable emulsion, preventing the batter from breaking or becoming lumpy.
- Controlled Protein Coagulation: The low and slow heat of the oven, combined with the humidity of a water bath, ensures that the egg proteins set gently without tightening too much and causing cracks.
- Lactic Acid Tenderization: The inclusion of sour cream and lemon juice slightly lowers the pH, which weakens the protein structure just enough to create a more tender, melt in-the mouth consistency.
Chef's Tip
Wrap your springform pan in a slow cooker liner before the foil layer. It’s a complete life saver that provides a 100% waterproof barrier, ensuring your crust never gets soggy.
Decision Metrics for Serving Size
Before we get the mixer out, it’s helpful to know exactly how much this recipe yields and how to plan your timing. This helps you decide if you need to double the batch or if one standard pan is enough for your guests.
| Servings | Ingredient Adjustments | Pan Size | Total Bake Time |
|---|---|---|---|
| 8 people | Half recipe (use 2 eggs) | 6 inch springform | 50 minutes |
| 16 people | Standard recipe (as listed) | 9 inch springform | 1 hours 10 mins |
| 24 people | 1.5x recipe | 10 inch springform | 1 hours 25 mins |
When you're planning a big dinner party, having these numbers ready means you aren't guessing at the last minute. For those days when you want something more colorful and festive, this Red Velvet Cake recipe offers that same silky texture in a layered format.
Component Analysis for Success
The magic of this Cheesecake Recipe with Vanilla lies in the quality and function of each part. We aren't just adding things for flavor; every gram serves a structural purpose in the final bake.
| Ingredient | Science Role | Pro Secret |
|---|---|---|
| Full Fat Cream Cheese | Provides the dense, fatty base and structural solids. | Use blocks, not the "whipped" tub version, to avoid excess air. |
| Large Eggs | Act as the binder and provide the lift and "set." | Add them one at a time to keep the emulsion stable and smooth. |
| Sour Cream | Adds moisture and a necessary tangy counterpoint to the fat. | Ensure it is full fat to maintain the velvety mouthfeel. |
| Pure Vanilla Extract | Provides the primary aromatic profile and depth. | Double the amount if using a lower grade extract to match the punch. |
Ingredients for Your Masterpiece
This list is built on the classic Philadelphia cheesecake recipe with vanilla foundation, using weights where precision matters most. Stick to full fat versions of everything; this is not the time for "light" alternatives if you want that iconic mouthfeel.
- 1.5 cups (150g) Graham cracker crumbs: Why this? Provides the classic toasted honey flavor and sturdy base.
- 1/3 cup (65g) Granulated sugar: For the crust.
- 6 tbsp (85g) Unsalted butter, melted: Why this? Binds the crumbs together so they shatter rather than crumble.
- 1/4 tsp Salt: Just a pinch to balance the sweetness.
- 32 oz (900g) Philadelphia Cream Cheese: Full fat and softened. Why this? The high fat to protein ratio is essential for smoothness.
- 1 cup (200g) Granulated sugar: For the filling.
- 1 cup (240g) Full fat sour cream: Room temperature. Why this? Adds the signature tang and softens the density.
- 2 tsp Pure vanilla extract: The heart of the flavor profile.
- 1 tsp Fresh lemon juice: To brighten the heavy dairy notes.
- 4 Large eggs: Room temperature.
| Original Ingredient | Substitute | Why It Works |
|---|---|---|
| Graham Cracker Crumbs | Digestive Biscuits | Similar texture but slightly less sweet and more buttery. |
| Sour Cream | Full fat Greek Yogurt | Provides the same acidity but results in a slightly denser cake. |
| Pure Vanilla Extract | Vanilla Bean Paste | Note: Adds beautiful black specks and a more intense floral aroma. |
Minimal Tools for Results
You don't need a kitchen full of gadgets to pull this off, but there are a few non negotiables. We're keeping it simple so the process remains enjoyable rather than a chore.
- 9 inch Springform Pan: This is essential for removing the cake without damaging the sides.
- Hand Mixer or Stand Mixer: A basic hand mixer works perfectly here; you don't need a heavy duty stand mixer.
- Large Roasting Pan: To act as the water bath (bain marie).
- Heavy Duty Aluminum Foil: To waterproof your springform pan.
- Silicone Spatula: For scraping the bottom of the bowl to ensure no lumps are left behind.
Baking the Creamy Filling
Right then, let's get into the actual process. Success here is all about the "low and slow" mindset. Don't rush the mixing, and certainly don't rush the cooling.
- Prep the base. Mix 1.5 cups Graham cracker crumbs, 1/3 cup sugar, and 6 tbsp melted butter. Note: It should look like wet sand.
- Press and par bake. Press the crumbs firmly into a 9 inch pan and bake at 325°F (160°C) for 10 minutes until fragrant and set.
- Cream the cheese. Beat 32 oz cream cheese and 1 cup sugar at medium speed. Note: Scrape the bowl often to prevent hidden lumps.
- Incorporate tang. Add 1 cup sour cream, 2 tsp vanilla, and 1 tsp lemon juice. Mix until completely silky.
- Add eggs gently. Add 4 eggs one at a time on low speed. Stop mixing the second the yellow disappears.
- Waterproof the pan. Wrap the exterior of your cooled springform pan in three layers of heavy duty foil.
- Set the bath. Place the pan in a large roaster and pour 1 inch of boiling water into the roaster.
- Bake slow. Bake at 325°F (160°C) for 1 hours 10 mins until the edges are set but the center wobbles.
- Cool in oven. Turn off the heat, crack the door slightly, and let the cake sit inside for 1 hours.
- Chill thoroughly. Refrigerate for at least 6 hours, preferably overnight, until fully firm and cold.
Fixing Typical Baking Mishaps
Even the best of us hit a snag sometimes. The good news is that most cheesecake "fails" are still incredibly tasty, even if they aren't picture ready. If you find yourself in a pinch, here is how to handle it.
Why Your Cheesecake Cracked
Surface cracks usually happen because the cake cooled too fast or the eggs were overbeaten, incorporating too much air. As that air escapes during baking, the structure collapses and pulls apart.
Next time, keep the mixer on the lowest setting when adding eggs and always use the oven cooling method mentioned in the steps above.
Why Your Filling Is Lumpy
Lumps are almost always caused by cold cream cheese. If the fat is still firm, it won't emulsify with the sugar and eggs, leaving behind tiny "beads" of cheese. If you've already started and see lumps, try passing the batter through a fine mesh sieve before pouring it onto the crust.
| Problem | Root Cause | Solution |
|---|---|---|
| Soggy Crust | Water leaked through foil | Wrap in a slow cooker liner before the foil layer. |
| Grainy Texture | Overbaked proteins | Remove when the center is still "jiggly" like Jello. |
| Surface Browning | Oven temperature too high | Tent with foil halfway through or lower the rack position. |
Common Mistakes Checklist - ✓ Ensure cream cheese is at room temperature for at least 2 hours. - ✓ Avoid over whipping the batter once the eggs are added. - ✓ Always use a water bath to regulate the heat around the pan.
- ✓ Resist the urge to open the oven door during the first 50 minutes. - ✓ Let the cake cool gradually in the oven to prevent thermal shock.
Adjusting the Batch Size
Sometimes you don't need a massive 16 serving cake. If you're scaling down to a 6 inch pan, you'll want to use roughly half of the ingredients. For the eggs, beat one into a cup and use exactly half of the liquid to keep the ratios correct.
Decrease your bake time by about 20 minutes, but keep the cooling time the same.
If you're scaling up for a wedding or a large party, I highly recommend making two separate cakes rather than one giant one. Large cheesecakes are notoriously difficult to bake evenly through the center without burning the edges.
If you must use a larger pan, increase the bake time by 15 minutes and lower the temperature by 25°F (15°C) to ensure a gentle cook.
Debunking Common Baking Myths
There’s a lot of "noise" in the baking world about what you must do for a good cheesecake. Let's clear the air on a few things that people often get wrong.
First, the idea that you must use a water bath is technically a myth, though I highly recommend it for beginners. You can bake a cheesecake without one by using a very low temperature (around 250°F / 120°C) for a longer period, but the risk of a dry, browned edge is much higher.
The water bath provides a safety net of humidity that's hard to beat.
Second, many believe that "more eggs equal a better cake." In reality, too many eggs will make the texture more like a custard or a flan than a traditional dense cheesecake. Stick to the ratio of one egg per 8 oz of cream cheese for that classic Philadelphia style result.
| Premium Ingredient | Budget Alternative | Flavor Impact | Savings |
|---|---|---|---|
| Vanilla Bean Paste | Imitation Vanilla | Slightly less depth, but still very pleasant. | Save $15-20 |
| European Butter | Store Brand Butter | Very minimal difference once baked in the crust. | Save $3-5 |
| Fresh Lemon Juice | Bottled Lemon Juice | Slightly more metallic, but works in a pinch. | Save $1-2 |
Swaps for Custom Desserts
While the vanilla version is the gold standard, it's also the perfect canvas for your own creativity. If you want a deeper flavor, try replacing the granulated sugar in the crust with brown sugar for a molasses like warmth. You can also fold in a cup of chocolate chips or a swirl of fruit preserves just before baking.
For a holiday twist, swap the graham crackers for ginger snaps or Biscoff cookies. The spice from the cookies plays beautifully against the cool, creamy vanilla filling. If you're looking for another decadent layered treat to add to your repertoire, the Cookie Delight Recipe is a fantastic crowd pleaser that uses similar creamy elements.
Storing Your Slices Properly
Cheesecake is one of the few desserts that actually tastes better the second day. The flavors have time to meld and the structure fully sets.
- Fridge: Keep it in an airtight container for up to 5 days. Cover the surface with plastic wrap if it's already sliced to prevent it from picking up fridge odors.
- Freezer: This recipe freezes beautifully. Wrap individual slices in plastic wrap and then foil. They will stay fresh for up to 2 months. Thaw in the fridge overnight before serving.
- Zero Waste: If you have leftover crust crumbs, don't toss them! Toast them in a pan with a little extra butter and use them as a "crunch" topping for vanilla ice cream or yogurt bowls.
Serving Suggestions for Parties
When it's time to serve, precision is key. To get those clean, professional looking slices, use a thin bladed knife dipped in hot water. Wipe the knife clean after every single cut. It's a bit tedious, but it's the only way to keep the velvety filling from dragging and smearing.
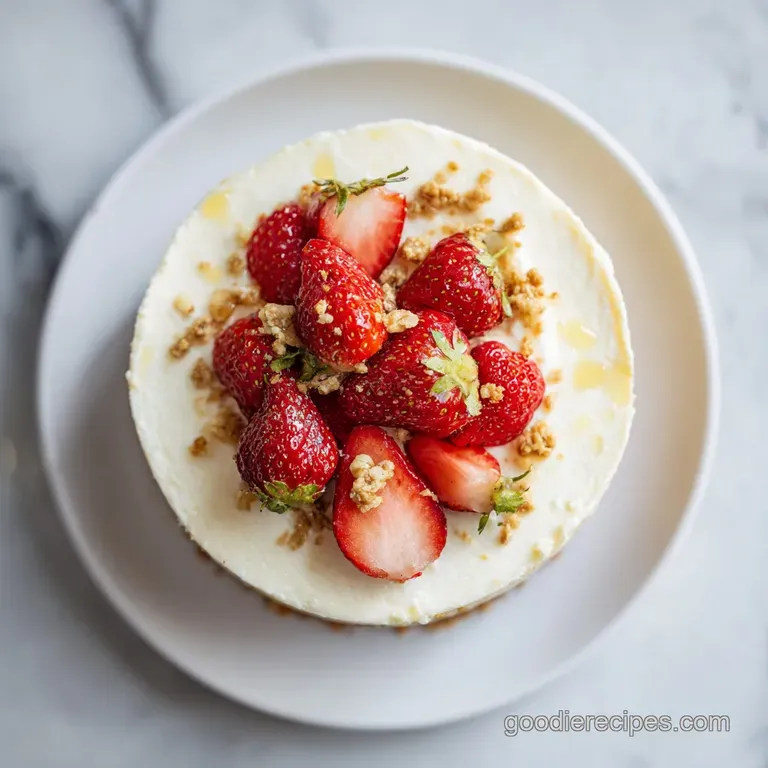
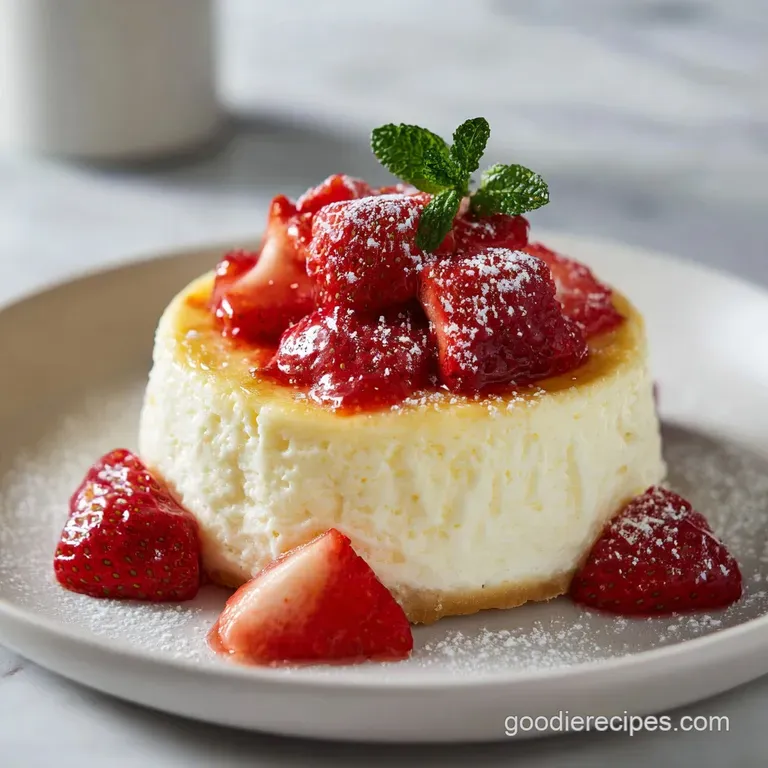
I love serving this plain to let the vanilla shine, but a simple macerated strawberry topping never hurts. Just toss sliced berries with a spoonful of sugar and let them sit for 20 minutes until they release their juices.
The bright acidity of the fruit cuts through the richness of the cheese perfectly. Trust me, once you master this basic method, you'll never go back to store-bought again. It's brilliant, reliable, and always the star of the table.

Recipe FAQs
What is the secret to a creamy cheesecake?
Room temperature ingredients and gentle mixing. The fat in the cream cheese must fully incorporate with the liquid in the eggs to form a stable emulsion, which prevents graininess and ensures a velvety structure.
What does vanilla extract do for cheesecake?
It provides the essential aromatic depth. While the texture comes from the dairy, vanilla enhances the perceived sweetness and cuts through the heavy richness of the cream cheese, balancing the flavor profile.
What is the 3 ingredient cheesecake?
No, this recipe requires more than three main ingredients. A true, classic cheesecake requires cream cheese, sugar, eggs, and a binder/base, unlike simplified no-bake versions that rely on whipped cream and gelatin.
What is the secret to making good cheesecake?
Temperature control during baking and cooling. Use a water bath to maintain humidity and bake low and slow; then, cool the cake gradually inside the turned off oven to prevent thermal shock and cracking. If you master this gentle technique, you'll see similar payoff in texture control when learning our Brown Butter Toffee recipe.
How do I prevent my cheesecake from cracking on top?
Do not overbeat the batter after adding the eggs. Mix the eggs just until the yellow streak disappears on the lowest speed to avoid incorporating excess air, which expands and causes cracks upon cooling.
Is it necessary to use a water bath (bain marie) for this recipe?
No, it is technically optional, but highly recommended. The water bath provides surrounding steam, creating a humid environment that cooks the edges gently and prevents the top from drying out and forming cracks.
How long should I chill the cheesecake before slicing?
Chill for a minimum of 6 hours, preferably overnight. Full chilling allows the fat and protein structure to fully stabilize, resulting in the firmest, creamiest texture possible.
Vanilla Cheesecake Recipe Classic

Ingredients:
Instructions:
Nutrition Facts:
| Calories | 383 calories |
|---|---|
| Protein | 5.9 g |
| Fat | 28.7 g |
| Carbs | 26.4 g |
| Fiber | 0.4 g |
| Sugar | 21.2 g |
| Sodium | 268 mg |
