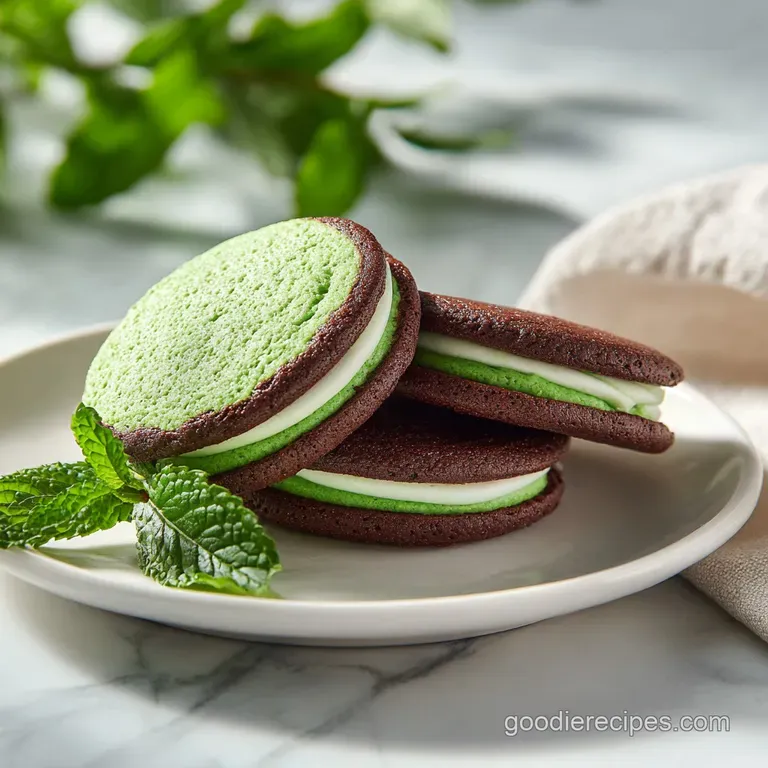
Andes Mint Cookies: Rich and Velvety
- Time: Active 20 minutes, Passive 10 minutes, Total 30 minutes
- Flavor/Texture Hook: Intense dark cocoa with a cooling, velvety mint finish
- Perfect for: Family gatherings, holiday platters, or late night cravings
- Baking the Best Andes Mint Cookies
- What Makes This Recipe Work
- Essential Metrics and Cook Times
- The Components for Minty Bliss
- Required Tools for Success
- Step by Step Baking Process
- Common Baking Hurdles and Fixes
- Clever Swaps and Flavor Twists
- Maintaining Freshness and Cold Storage
- Presentation and Perfect Pairings
- Recipe FAQs
- 📝 Recipe Card
Baking the Best Andes Mint Cookies
Forget everything you have ever heard about mint being a seasonal flavor reserved only for December. There is this persistent myth in the baking world that you need complex peppermint oils or expensive chocolate couvertures to get a "professional" result. Honestly, don't even bother with that.
The secret to that iconic, cooling snap is already sitting in a green foil wrapper in the candy aisle. I remember the first time I pulled these out of the oven, the kitchen smelled like a high end chocolatier shop, but the process was as simple as any weeknight project.
The real magic happens the moment that mint hits the warm surface. It doesn't just melt, it yields. You watch the edges soften, the green center starts to peek through the dark chocolate, and suddenly you are swirling it into a marbled masterpiece.
It is one of those rare recipes where the "mistakes" like a slightly messy swirl actually make the cookies look even more artisanal and tempting. We are looking for a specific contrast here: a deeply dark, almost salty chocolate base that shatters slightly on the outside but stays dense and soft in the middle.
Most people skip the chill time because they are in a rush, but that is exactly why their cookies turn into flat, greasy puddles. We want structure. We want a cookie that can support a whole Andes mint without buckling.
We’re going to walk through how to handle the cocoa, why the butter temperature is your best friend, and how to get that signature swirl without making a sticky mess of your fingers.
What Makes This Recipe Work
The success of these cookies relies on a few fundamental interactions between the fats and the leavening agents. It's not just about mixing things together, it's about the order and temperature of the process.
- Fat Solidification: Chilling the dough for 30 minutes ensures the butter is firm, which slows down the spreading process in the hot oven and creates a thicker, fudgier crumb.
- Alkaline Balance: Using Dutch process cocoa powder neutralizes the natural acidity of chocolate, resulting in a darker color and a smoother, less bitter flavor profile that lets the mint shine.
- Residual Heat Transfer: Placing the mint on the cookie immediately after baking uses the stored thermal energy of the dough to melt the chocolate topping without needing extra oven time.
- Sugar Hybridization: Combining granulated and light brown sugar provides the structural crispness of the former while keeping the moisture rich chewiness of the latter.
| Servings | Ingredient Adjustments | Pan Size | Cook Time |
|---|---|---|---|
| 12 Cookies | Halve all ingredients; use 1/2 a beaten egg | 1 Large Baking Sheet | 8-10 minutes |
| 24 Cookies | Standard Recipe (1.5 cups flour, 113g butter) | 2 Baking Sheets | 10 minutes |
| 48 Cookies | Double ingredients (380g flour, 226g butter) | 4 Baking Sheets | 12-14 minutes (rotate pans) |
When you are planning your baking session, keep in mind that the dough volume remains relatively small even when doubled. Since we are using a 1.5 tablespoon scoop, you can fit about 12 cookies on a standard 13x18 inch rimmed baking sheet without them touching.
If you're making a larger batch for a party, baking them in two separate rounds is often better than trying to cram four sheets into one oven, which can lead to uneven airflow and soggy bottoms.
Essential Metrics and Cook Times
To get these exactly right, we have to look at how the heat interacts with the cocoa fats. Chocolate dough is notoriously tricky to judge visually because you can't see the "browning" as easily as you can with a standard sugar cookie.
| Method | Time | Texture | Best For |
|---|---|---|---|
| Oven (175°C) | 10 minutes | Soft center, crispy edges | Classic fudgy texture |
| Stovetop Skillet | 15 minutes | Dense and brownie like | Single large "pizza" cookie |
| Toaster Oven | 8 minutes | Slightly more "toasted" top | Small batches of 4-6 |
Using a traditional oven at 175°C is the gold standard here because it provides the most even heat distribution. A toaster oven works in a pinch, but because the heating elements are so much closer to the dough, you might find the tops of your Andes Mint Cookies crisping up before the centers have a chance to set.
If you use a skillet on the stovetop, you'll want to keep the heat very low and use a lid to trap the steam, which results in a much more moist, almost steamed chocolate cake texture.
The Components for Minty Bliss
Selecting the right ingredients is the difference between a "good" cookie and one people talk about for weeks. We aren't just looking for sweetness; we're looking for depth.
| Ingredient | Science Role | Pro Secret |
|---|---|---|
| Dutch Process Cocoa | Provides deep color and low acidity | Sift it twice to prevent "cocoa clumps" in the finished dough |
| Light Brown Sugar | Adds moisture through molasses | Pack it tightly to ensure accurate volume measurement |
| Unsalted Butter | Controls the fat to protein ratio | Use "cool" softened butter (around 18°C) for the best aeration |
| Peppermint Extract | Enhances the cooling sensation | A little goes a long way; measure over a separate bowl |
For the dry base, you'll need 190g of all purpose flour and 45g of that Dutch process cocoa powder. This specific cocoa is vital. If you use natural cocoa powder, the cookies will be lighter in color and much more acidic, which can clash with the creamy mint topping.
We also include 1/2 tsp of baking soda to give it just enough lift so it isn't a leaden puck, and 1/4 tsp of kosher salt to make the chocolate flavors "pop."
The fats are equally important. We use 113g of unsalted butter and one large egg at room temperature. Cold eggs can seize the creamed butter, leading to a broken emulsion. You also want to have your 24 individual Andes Mints (about 132g total) unwrapped and ready to go before the timer dings.
There is a very short "molten window" once the cookies leave the oven, and you don't want to be fumbling with foil wrappers while the cookies cool down.
Required Tools for Success

You don't need a professional pastry kitchen, but a few specific items will make your life much easier. I always reach for my stand mixer, such as a KitchenAid, but a hand mixer works perfectly fine too. The goal is to aerate the butter and sugar until it looks like pale frosting.
Chef's Note: If you don't have a cookie scoop, use a tablespoon and your hands, but try to keep them cool. Warm hands will melt the butter in the dough before it ever hits the oven.
A sifter or a fine mesh strainer is non negotiable here. Cocoa powder is notorious for forming small, hard balls that don't break down during mixing. If you skip sifting, you might end up with a bitter explosion of dry powder in the middle of a cookie. You'll also want parchment paper or silicone mats.
These cookies have a high sugar content, and they will stick to a bare metal pan, especially once the mint topping starts to melt and swirl near the edges.
step-by-step Baking Process
Follow these steps closely to ensure that the texture remains fudgy. The timing of the mint placement is the most critical part of the entire operation.
- Cream the fats. In a large bowl, beat 113g softened butter with 150g granulated sugar and 50g light brown sugar for 3 minutes until pale and aerated.
- Emulsify the liquids. Beat in one large egg, 1 tsp vanilla extract, and 1/4 tsp peppermint extract until the mixture is silky.
- Prepare dry ingredients. Sift 190g all purpose flour, 45g cocoa powder, 1/2 tsp baking soda, and 1/4 tsp salt together. Note: This prevents dry clumps.
- Combine the dough. Gradually add the flour mixture to the butter until no white streaks remain.
- Refrigerate the dough. Cover and chill for 30 minutes until firm to the touch.
- Shape the cookies. Use a 1.5 tablespoon scoop to place rounded balls on a parchment lined sheet.
- Bake the batch. Place in a 175°C oven for 8–10 minutes until the edges are set but centers are soft.
- Apply the mints. Immediately place one unwrapped Andes mint on the center of each hot cookie.
- Wait for softening. Let the mints sit for 2 minutes until the chocolate looks shiny and melted.
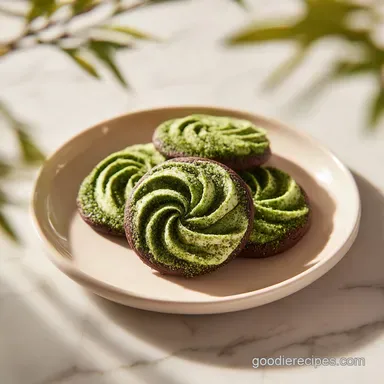
- Swirl the top. Use an offset spatula or spoon to spread the mint until a smooth velvet finish forms.
When you are swirling the mint, try to do it in one or two circular motions. If you over work it, the green and brown layers of the candy will blend into a murky gray color. We want that beautiful marbling. For another treat that handles heat beautifully, you might want to try my Chocolate Chip Cookies, which use a similar creaming method but focus on brown butter notes.
Common Baking Hurdles and Fixes
One of the biggest frustrations with this recipe is when the cookies spread into one giant "mega cookie" on the pan. This usually happens because the butter was too warm or the oven wasn't properly preheated.
Why Your Cookies Spread Too Thin
If your cookies are coming out like pancakes, it’s almost certainly a temperature issue. If you skip the 30 minute chill, the butter melts the second it hits the oven, before the flour and egg have a chance to set the structure.
Another culprit is "over creaming." While we want the butter and sugar to be light, beating them for ten minutes instead of three introduces too much air, which collapses in the oven.
Avoiding a Grainy Mint Swirl
Sometimes the Andes mints don't melt smoothly, leaving a gritty or "broken" appearance on top. This happens if the cookies have cooled too much before you put the mint on. You have a window of about 60 seconds after the tray comes out of the oven.
If you wait longer, the residual heat isn't enough to penetrate the center of the candy.
| Problem | Root Cause | Solution |
|---|---|---|
| Hard/Dry Cookie | Over baked or too much flour | Reduce bake time by 1 minute; use a scale for flour |
| Mint won't melt | Cookies cooled too fast | Return the tray to the warm (off) oven for 30 seconds |
| Greasy bottoms | Butter was too soft/melted | Chill the dough for an extra 15 minutes before scooping |
Common Mistakes Checklist
- ✓ Always use room temperature eggs to prevent the butter from curdling.
- ✓ Do not over mix once the flour is added; stop as soon as it's combined.
- ✓ Ensure the oven is fully preheated to 175°C for at least 15 minutes.
- ✓ Use a cooling rack after the mints have set to prevent soggy bottoms.
- ✓ Never place dough balls on a hot baking sheet from a previous batch.
Clever Swaps and Flavor Twists
If you find yourself without certain ingredients, don't panic. There are ways to adapt this recipe without losing the soul of the dish. For instance, if you love the combination of heat and chocolate, you might enjoy my Mexican Hot Chocolate Cookies, which bring a spicy kick to a similar dark base.
| Original Ingredient | Substitute | Why It Works |
|---|---|---|
| Light Brown Sugar | Dark Brown Sugar | More molasses for a deeper, chewier texture. |
| Dutch Process Cocoa | Natural Cocoa + 1/4 tsp Baking Soda | Adjusts the pH to mimic the dark color. |
| Andes Mints | Mint Chocolate Chips | Similar flavor profile. Note: Won't give the "swirl" look. |
The Essential Chill
Many people ask if they can just use a "cake mix" version of this. While you can make Andes Mint Cookies with cake mix, the texture will be much lighter and airier, more like a muffin top than a cookie. If you want that dense, fudge like consistency, sticking to the scratch made flour and cocoa ratio is the way to go.
Double Mint Crunch
If you really want to lean into the peppermint aspect, you can crush up some candy canes or peppermint bark and fold them into the dough along with the dry ingredients. This adds a "shatter" texture inside the cookie that contrasts beautifully with the velvety smooth topping.
Maintaining Freshness and Cold Storage
Because these cookies have a high moisture content from the brown sugar and the melted chocolate topping, they need to be handled carefully once they are done.
Storage Guidelines: Keep the cookies in an airtight container at room temperature for up to 5 days. If you find they are starting to get a bit firm, tuck a small piece of white bread into the container. The cookies will absorb the moisture from the bread and stay soft.
For longer storage, they last in the fridge for up to 2 weeks, though the mint topping may lose some of its luster.
Freezing and Reheating: You can freeze the baked cookies for up to 3 months. I recommend freezing them in a single layer on a tray first so the mint tops don't stick together, then transferring them to a freezer bag. To reheat, just let them sit at room temperature for an hour.
If you want that "just out of the oven" feel, 10 seconds in the microwave will soften the chocolate center beautifully.
Zero Waste Tip: If you have broken cookies or crumbs at the bottom of the container, don't throw them away. Pulse them in a food blender and use them as a "mint chocolate soil" over vanilla ice cream.
You can also use leftover unwrapped mints by chopping them up and stirring them into your morning coffee for a DIY peppermint mocha.
Presentation and Perfect Pairings
These cookies are naturally dark and dramatic, so they look best on a light colored platter. I love serving them alongside a cold glass of whole milk or a bitter espresso. The bitterness of the coffee cuts through the sugar of the mint, creating a balanced experience.
Precision Flour to Fat Ratio
The reason these cookies hold their shape so well is the 190g of flour compared to the 113g of butter. This ratio is specifically designed to handle the weight of the mint on top. If you try to make these gluten-free, use a high-quality 1 to-1 flour blend that contains xanthan gum to ensure the cookies don't crumble into dust when you try to swirl the topping.
The Residual Heat Melt
Remember that the "cooking" process continues even after you pull the tray out of the oven. This is called carryover cooking. If the cookies look slightly underdone in the very center, that is actually perfect. They will firm up as they cool on the pan.
If you bake them until the center is hard, they will become crunchy like a biscuit once they are fully cool.
Flavor Development
Interestingly, the flavor of these cookies actually improves the day after they are made. The peppermint extract and the cocoa have time to "marry," resulting in a more cohesive taste. If you are making these for a party, I actually suggest baking them the evening before and letting them sit overnight.
Just be sure to keep them away from any strong smelling foods like onions or garlic in the pantry, as chocolate is very porous and will absorb those scents.
One final thought: when you're creaming the butter and sugar, don't be afraid to scrape down the sides of the bowl. It seems like a small step, but it ensures that every single cookie has the same ratio of sugar to fat.
There's nothing worse than having half a batch that spreads and half a batch that stays in a ball because the ingredients weren't fully incorporated. Take your time, enjoy the minty aroma, and watch those mints melt into the most beautiful swirls you've ever seen.
Frequently Asked Questions
Can I use peppermint oil instead of extract?
You can, but be extremely careful. Peppermint oil is much more concentrated than extract. Generally, a 1:4 ratio works, so if the recipe calls for 1/4 tsp of extract, you would only need a tiny drop of oil. Using too much will make the cookies taste like toothpaste.
Why did my cookies turn out dry?
The most common cause for dry cookies is over measuring the flour. If you use a measuring cup to "scoop" the flour, you pack it down and end up with much more than 190g. Always use a spoon to fill the cup and level it off, or better yet, use a kitchen scale.
Do I have to use Andes Mints?
While they provide the classic look and flavor, you can use any thin mint chocolate. However, thicker chocolate bars won't melt as quickly or evenly from the residual heat of the cookie, so you might need to pop the tray back in the oven for 30 seconds to get them soft enough to swirl.
Can I make the dough ahead of time?
Yes, this dough actually benefits from a longer chill. You can keep it in the fridge for up to 48 hours. Just let it sit on the counter for 10 minutes before scooping so it's not rock hard and difficult to handle.
My mint swirl looks messy, how do I fix it?
Don't worry! A "messy" swirl often looks more homemade and appetizing. If the chocolate has already set and you aren't happy with it, you can place a few more mint shavings on top and give it a 5 second blast with a kitchen torch or under the broiler to reset the surface for a new swirl.

Recipe FAQs
Why is chilling the dough for 30 minutes necessary?
It prevents the cookies from spreading too thin during baking. Chilling firms the butter, which results in the dense, fudgy texture characteristic of this recipe.
How to ensure the mint topping spreads perfectly?
Wait exactly two minutes after placing the mint on the hot cookie. This allows the residual heat to soften the mint without melting it into a puddle, making it easy to swirl into a velvet finish with a spoon.
Is it possible to bake these without Dutch process cocoa?
No, Dutch process cocoa is essential for the correct acidity and deep color. If you enjoyed learning how specific cocoa types affect the crumb structure here, see how we balance flavor and texture in our zesty lemon cookies.
How to tell when the cookies are finished baking?
Pull them from the oven when the edges are set but the centers still look soft. If you wait for the centers to look fully baked, they will become dry instead of fudgy once they cool.
Can I use regular granulated sugar instead of light brown sugar?
No, the light brown sugar provides necessary moisture and chewiness. Replacing it with granulated sugar will result in a crisper, thinner cookie that lacks the signature fudge like bite.
How to store the finished Andes Mint cookies?
Keep them in an airtight container at room temperature for up to five days. Placing them in the refrigerator can cause the chocolate mint topping to bloom or lose its glossy finish.
Is it true I can use a different type of mint chocolate?
No, this is a common misconception. Other brands may have different cocoa butter contents that won't soften correctly under residual heat, preventing the signature swirl finish.
Velvet Swirl Andes Mint Cookies
Ingredients:
Instructions:
Nutrition Facts:
| Calories | 131 kcal |
|---|---|
| Protein | 1.6 g |
| Fat | 6.1 g |
| Carbs | 18.9 g |
| Fiber | 0.9 g |
| Sugar | 11.7 g |
| Sodium | 55 mg |
