Sweet and Sour Sauce: Glossy & Tangy

- Time: Active 5 minutes, Passive 5 minutes, Total 10 minutes
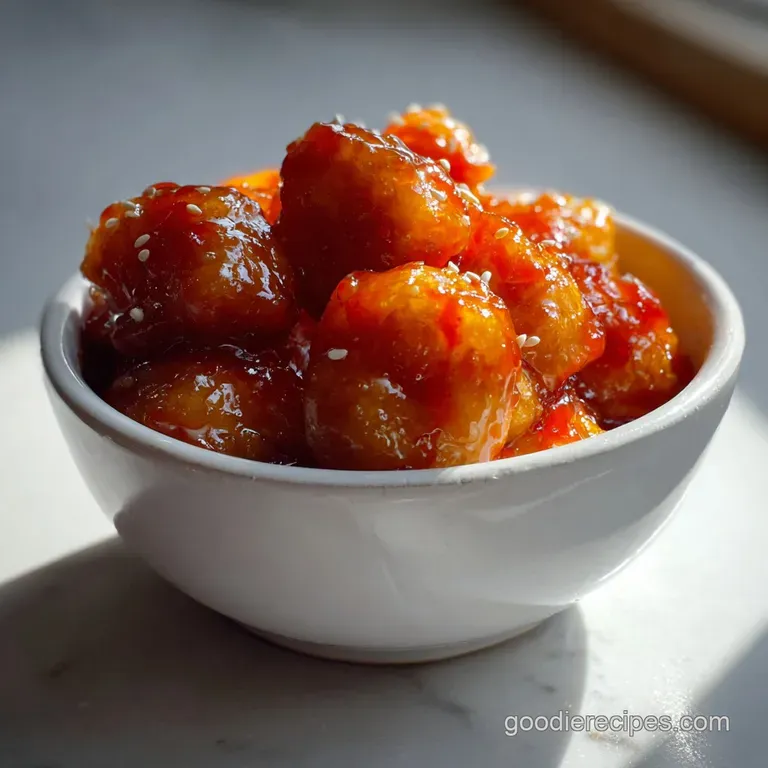
- Flavor/Texture Hook: A velvety, glass like finish with a sharp, tangy bite.
- Perfect for: Weeknight stir fry, family gatherings, or an easy dipping sauce for meatballs.
- Mastering Your Homemade Sweet and Sour Sauce
- Essential Specs for This Recipe
- Pantry Elements for Deep Flavor
- Using Basic Kitchen Tools Daily
- Achieving a Glossy Velvety Finish
- Fixing Lumps and Flavor Issues
- Creative Swaps for Every Meal
- Storing Your Glaze for Later
- Best Ways to Serve Sauce
- Recipe FAQs
- 📝 Recipe Card
Mastering Your Homemade Sweet and Sour Sauce
The smell of vinegar hitting a warm pan is something I’ll never forget from my early days in the kitchen. I remember trying to recreate that "neon pink" takeaway flavor for my family, only to end up with a watery mess that tasted like pure sugar.
It took a few scorched pots and some stubborn persistence to realize that the secret isn't some exotic ingredient; it’s all about how you handle the starch.
When you finally get that thick, translucent simmer just right, the sauce transforms from a dull liquid into a shimmering glaze. This homemade sweet and sour sauce recipe is my absolute favorite because it doesn't rely on food coloring or artificial thickeners.
It’s honest, bright, and has that perfect balance that makes your mouth water before the first bite even hits your tongue.
We've all been there staring at a bottle of store-bought stuff that’s been in the fridge for six months. Trust me, once you realize you can whisk this together in about the same time it takes to boil a kettle, you'll never go back.
It's brilliant for those nights when the kitchen feels a bit chaotic but you still want something that tastes like a proper classic meal.
The Science of the Gloss: Cornstarch molecules undergo "gelatinization" when heated, swelling up to absorb water and forming a translucent, viscous network. This creates the signature shine and prevents the sauce from becoming opaque or cloudy.
| Feature | Quick Homemade | Classic Restaurant |
|---|---|---|
| Active Time | 5 minutes | 45 minutes |
| Color | Natural orange red | Bright neon pink (dye) |
| Main Note | Sharp and tangy | Heavily sweet |
Essential Specs for This Recipe
Getting the consistency right is purely about precision and timing. If you pull it off the heat too early, it’ll be runny; wait too long, and it turns into a gummy paste. I always look for that moment when the liquid stops being cloudy and suddenly clears up that's the "sweet spot" where the starch has fully hydrated.
- Viscosity Goal: The sauce should coat the back of a spoon and hold a line when you run your finger through it.
- Boiling Point: You must reach a full simmer (around 100°C) to activate the cornstarch, or it will taste "floury."
- Yield: This makes exactly 12 servings, which is about 3/4 of a cup total.
Chef Tip
For an extra velvety texture, pass your finished sauce through a fine mesh strainer. It catches any tiny ginger clumps or undissolved garlic powder that might have escaped the whisk.
Pantry Elements for Deep Flavor
The beauty of this recipe lies in its simplicity. You likely have everything you need sitting in the cupboard right now, which is a total win for those last minute dinners. Using ketchup as a base provides the acidity and tomato depth without needing a long reduction time, similar to the balanced flavors found in a Creamy Tomato Basil recipe.
| Ingredient | Science Role | Pro Secret |
|---|---|---|
| White Vinegar | Acidic backbone | Use rice vinegar for a softer edge |
| Granulated Sugar | Viscosity and balance | Adjust by 10g for personal sweetness |
| Cornstarch | Structural thickener | Always mix with cold water first |
| Ketchup | Emulsifier and color | Adds natural pectin for better body |
Why use ketchup specifically?
Ketchup acts as a shortcut because it's already a stabilized emulsion of vinegar, sugar, and aromatics. It gives the sauce a familiar "takeout" profile while providing enough pectin to help the cornstarch create a smooth, velvety finish.
Vinegar to sugar ratio tips
We use a 1:1 ratio of white vinegar to sugar (1/2 cup each). This creates a bold, sharp flavor profile. If you prefer something more subtle, you can swap the white vinegar for apple cider vinegar, which brings a fruitier, less aggressive acidity to the pot.
Using Basic Kitchen Tools Daily
You don't need a fancy setup for this. A simple small saucepan and a sturdy whisk are your best friends here. I've tried using a fork in a pinch, but it usually leads to those dreaded cornstarch lumps that are nearly impossible to get out once they cook.
- Small Saucepan: Stainless steel or non stick works best to prevent the sugar from scorching.
- Whisk: A balloon whisk ensures the cornstarch is perfectly integrated into the cold liquid.
- Measuring Cups: Accuracy is key for the vinegar to sugar balance.
| Servings | Water Amount | Cornstarch Amount | Pan Size |
|---|---|---|---|
| 12 Servings | 1/2 cup | 1 tbsp | 1 quart pot |
| 24 Servings | 1 cup | 2 tbsp | 2 quart pot |
| 6 Servings | 1/4 cup | 1/2 tbsp | Small butter warmer |
Achieving a Glossy Velvety Finish
The method is fast, so stay close to the stove. It moves from liquid to "glaze" in about 60 seconds once it starts steaming. This quick sweet and sour sauce is perfect for tossing with crispy proteins, much like how you'd dress a Lemon Herb Chicken recipe.
- Whisk the 1 tbsp cornstarch into the 1/2 cup cold water in a small bowl. Note: This prevents lumps later.
- Combine the 1/2 cup white vinegar, 1/2 cup sugar, 1/4 cup ketchup, and 1 tsp soy sauce in your saucepan.
- Add the 1/2 tsp garlic powder and 1/4 tsp ground ginger to the pot.
- Pour the cornstarch slurry into the saucepan while the liquid is still cold.
- Place the pot over medium heat and begin whisking constantly.
- Heat the mixture until it begins to simmer and bubble.
- Cook for 1 minute until the sauce turns translucent and thickens.
- Remove from heat immediately to prevent over thickening.
- Cool slightly before serving to let the flavors meld.
Chef Tip
Grate a tiny bit of fresh orange zest into the pot at the very end. The citrus oils provide a bright, aromatic punch that cuts through the heavy sugar perfectly.
Fixing Lumps and Flavor Issues
If things go sideways, don't panic. Most sauce issues are easily fixed with a little heat or an extra splash of liquid. The most common mistake is letting the cornstarch settle at the bottom of the pot before you start heating it.
Why is my sauce lumpy?
This usually happens if the cornstarch wasn't fully dissolved in cold water first, or if it was added to boiling liquid. When starch hits boiling water, the outside cooks instantly, trapping dry powder inside a "gel" shell. You can usually fix this by running the sauce through a blender or a sieve.
Why is my sauce thin?
If it hasn't thickened, you likely didn't reach a high enough temperature. Cornstarch needs to hit roughly 95°C to 100°C to fully activate. Give it another minute of simmering.
If it’s still thin, whisk another teaspoon of cornstarch with a teaspoon of cold water and stir it back into the simmering sauce.
| Problem | Root Cause | Solution |
|---|---|---|
| Dull Color | Overcooked starch | Add a teaspoon of ketchup at the end for shine |
| Too Sour | Vinegar evaporated slowly | Add 1 tbsp of water and 1 tsp of sugar |
| Too Thick | Evaporated too much | Whisk in water 1 tbsp at a time while warm |
Common Mistakes Checklist
- ✓ Always mix cornstarch with cold liquid; never add it directly to hot sauce.
- ✓ Whisk continuously as the sauce heats to prevent the bottom from scorching.
- ✓ Don't boil for more than 2 minutes, as the starch bonds can actually break down and become watery again.
- ✓ Use granulated sugar; brown sugar changes the flavor profile to something more like BBQ sauce.
Creative Swaps for Every Meal
While this is an easy sweet and sour sauce recipe as written, you can easily tweak it based on what you’re serving. It's incredibly versatile for different proteins and dietary needs.
- For Chicken: Add 1 tablespoon of pineapple juice to the water for a fruitier finish.
- For Pork: Increase the soy sauce by 1/2 teaspoon for a deeper, savory umami note.
- For Meatballs: Use this as a 4 ingredient sweet and sour sauce by skipping the spices and just using vinegar, sugar, ketchup, and cornstarch.
| Original Ingredient | Substitute | Why It Works |
|---|---|---|
| White Vinegar | Rice Vinegar | Softer acidity. Note: Gives a more traditional Asian flavor profile |
| Granulated Sugar | Honey | Adds a floral note. Note: Makes the sauce slightly stickier |
| Soy Sauce | Tamari | Keeps the recipe gluten-free without losing the salt |
Storing Your Glaze for Later
Since this is a homemade sweet and sour sauce without pineapple (in the base), it has a surprisingly long shelf life. The high sugar and vinegar content act as natural preservatives, keeping it fresh and vibrant for quite a while.
- Fridge: Store in an airtight glass jar for up to 2 weeks. The sauce will "set" into a jelly like consistency when cold this is normal.
- Freezing: I don't recommend freezing starch based sauces. When they thaw, the starch molecules often weep water, leaving you with a spongy, separated mess.
- Reheating: Put it back in a saucepan over low heat. Add a splash of water (about 1 tablespoon) and whisk constantly until it becomes glossy and fluid again.
Zero Waste Tip: If you have just a tablespoon or two left in the jar, don't toss it! Add a little oil and lime juice to the jar, shake it up, and you have a quick tangy vinaigrette for a crunchy cabbage slaw.
Best Ways to Serve Sauce
This sauce is a workhorse in my kitchen. While it’s the classic sweet and sour sauce for pork, we use it for everything from dipping spring rolls to glazing roasted vegetables.
It’s also the perfect sweet and sour sauce recipe for meatballs if you're hosting a party just toss them in a slow cooker with the sauce for an hour.
- The Classic Stir Fry: Toss with fried chicken pieces and bell peppers for that iconic crispy texture.
- The Dip: Serve it alongside some crispy wontons or even chicken nuggets for the kids.
- The Glaze: Brush it onto grilled shrimp during the last 2 minutes of cooking for a charred, tangy crust.
Myths about this sauce: Some people believe you must use pineapple juice to make it "authentic." The truth is, many traditional versions rely entirely on the balance of vinegar and sugar. Pineapple adds a lovely dimension, but it's not a requirement for a high-quality glaze.
Another myth is that the sauce needs hours to "develop" flavor. Because we are using ketchup and ground spices, the flavor is immediate no long simmering required.
Whether you're making this for a quick Tuesday night dinner or a big weekend feast, this recipe is a reliable staple that never lets me down. Just remember to watch for that shimmer!

Recipe FAQs
What are the ingredients of sweet and sour sauce?
Typically, the base ingredients are white vinegar, sugar, ketchup, and cornstarch. Additional common additions include soy sauce, water, and sometimes garlic and ginger powder for extra flavor.
What are the 4 ingredients in sweet and sour sauce?
The core four ingredients are white vinegar, sugar, ketchup, and cornstarch. Ketchup provides a ready-made emulsion of tomato, vinegar, and sugar, acting as a flavor base and thickening agent.
Why is Chinese sweet and sour sauce red?
The red color primarily comes from ketchup, which contains tomato paste. Some recipes might also use a small amount of food coloring for that iconic vibrant hue, but natural ingredients like ketchup provide a good base.
What's the secret to great sweet & sour?
The secret lies in achieving the perfect balance of sweet and sour, plus texture. Getting the right ratio of vinegar to sugar is key, and ensuring the cornstarch is cooked properly to create a glossy, not gummy, finish is essential for that "takeout" quality.
Can I use fruit juice in sweet and sour sauce?
Yes, fruit juice can add a lovely fruity note. For a chicken dish, adding a tablespoon of pineapple juice can enhance the sweetness and tang, much like the fruit forward approach in many stir fry recipes.
How do I fix lumpy sweet and sour sauce?
Whisk vigorously and strain. Lumps usually form if cornstarch isn't mixed with cold liquid first or if added to boiling liquid. Reheating gently while whisking or passing the sauce through a fine mesh sieve can often correct this.
How long can I store homemade sweet and sour sauce?
Store in an airtight container in the fridge for up to 2 weeks. The high vinegar and sugar content act as natural preservatives, keeping it fresh. It will firm up when cold but can be easily reheated.
Sweet And Sour Sauce

Ingredients:
Instructions:
Nutrition Facts:
| Calories | 43 kcal |
|---|---|
| Protein | 0.1 g |
| Fat | 0.1 g |
| Carbs | 11 g |
| Fiber | 0.1 g |
| Sugar | 10 g |
| Sodium | 76 mg |
