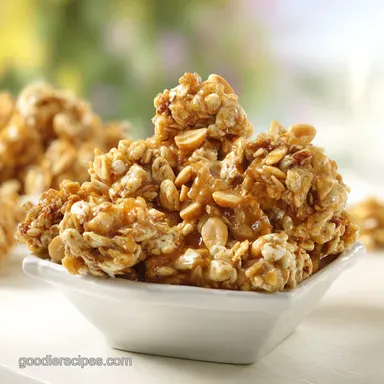
Failure-Proof Peanut Butter Granola: Extra Crispy
- Time: 5 min active + 30 min cook + 60 min cooling = Total 1 hour 35 mins
- Flavor/Texture Hook: Salty sweet aroma with a velvety honey glaze and heavy crunch
- Perfect for: High protein meal prep or a bold topping for Greek yogurt
Ever had that moment where you open the oven and the smell of toasted honey and warm cinnamon just hits you like a hug? That is exactly what happens when this batch starts to caramelize. I remember my first attempt at making homemade granola, and I thought "healthy" meant omitting the fats.
I ended up with a bowl of toasted oats that felt like eating dry birdseed. It was a total disaster.
Then I realized that the magic isn't in the oats, it is in the glue. Once I swapped the basic oil for a thick, salty peanut butter and honey blend, everything changed. The oats stopped being individual grains and started forming these huge, chunky clusters that actually stay crunchy in milk.
This Peanut Butter Granola is all about that balance between the deep, roasted nuttiness of the peanuts and the floral sweetness of the honey. It's bold, it's satisfying, and it actually keeps you full until lunch. Trust me on this, once you taste the homemade version, the store-bought bags will taste like cardboard.
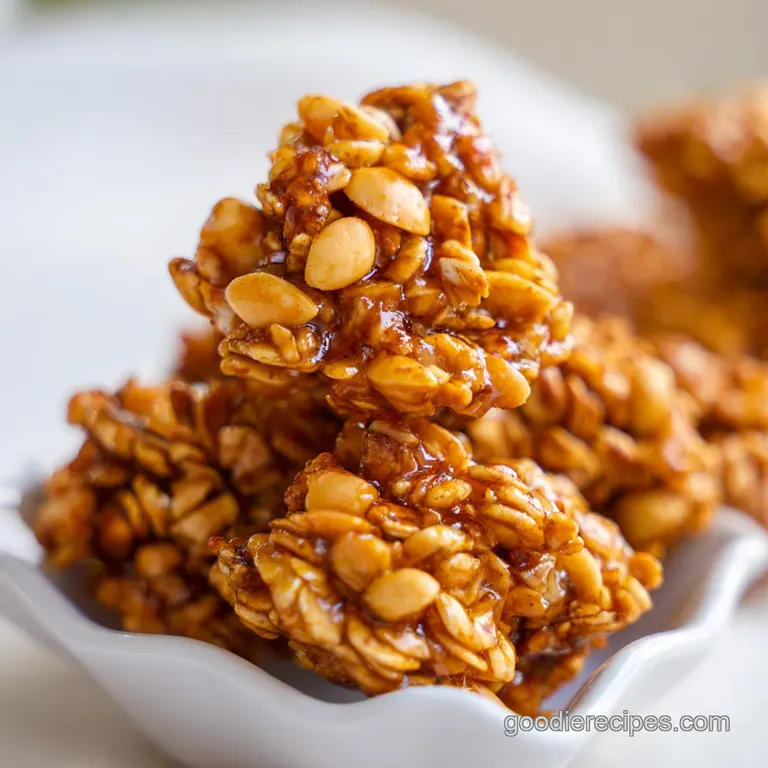
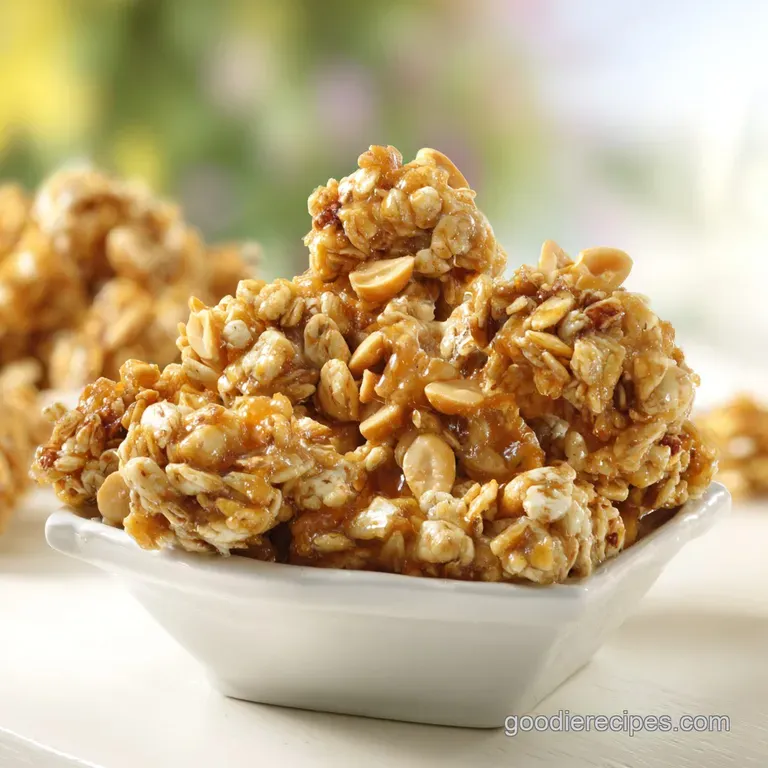
Peanut Butter Granola
The Binder Secret
You might wonder why some granolas are just loose oats while others have those chunky pieces. Here is the deal:
- Fat Saturation: The peanut butter coats every single oat, creating a barrier that prevents them from absorbing too much moisture from the air.
- Sugar Crystallization: Honey creates a liquid syrup that hardens as it cools, acting like a sweet cement for the nuts and grains.
- Pressure Packing: Pressing the mixture firmly into the pan forces the oats to bond together, which is how you get those massive clusters.
- Low Heat Toasting: Baking at 325°F allows the moisture to evaporate slowly without burning the sugars too quickly.
| Method | Time | Texture | Best For |
|---|---|---|---|
| Classic Oven | 95 mins | Shatter crisp clusters | Large batches, long storage |
| Fast Stovetop | 20 mins | Loose and toasted | Quick cravings, small portions |
Component Analysis
| Ingredient | Science Role | Pro Secret |
|---|---|---|
| Rolled Oats | Structural Base | Use Old-fashioned, not instant, for better chew |
| Honey | Bonding Agent | Adds floral notes and helps with browning |
| Peanut Butter | Fat & Flavor | Use creamy for an even, velvety coating |
| Sea Salt | Flavor Contrast | Balances the honey so it isn't cloying |
Essential Recipe Details
When picking your ingredients, the quality of the peanut butter makes a huge difference. I always go for a brand with just peanuts and salt. If you use the kind with added palm oil or sugar, the granola can end up tasting a bit greasy or overly sweet.
For the honey, any standard clover or wildflower honey works. If you want a bolder flavor, a darker buckwheat honey adds a rich, almost malty depth that pairs beautifully with the roasted peanuts.
Right then, let's look at what you need to get this on your counter.
The Ingredient List
- 3 cups (270g) Old-fashioned rolled oats Why this? Provides the necessary structure and chew
- 1 cup (150g) Unsalted roasted peanuts, roughly chopped Why this? Adds a double dose of nutty flavor
- 1/2 tsp (3g) Sea salt Why this? Cuts through the richness of the PB
- 1 tsp (2g) Ground cinnamon Why this? Adds warmth and a classic aroma
- 1/2 cup (125g) Creamy peanut butter Why this? Acts as the primary flavor and binder
- 1/3 cup (110ml) Honey Why this? Creates the sweet, crunchy glaze
- 2 tbsp (30ml) Coconut oil Why this? Helps the granola crisp up evenly
- 1 tsp (5ml) Vanilla extract Why this? Rounds out the sweetness with aroma
Substitution Guide
| Original Ingredient | Substitute | Why It Works |
|---|---|---|
| Honey (1/3 cup) | Maple Syrup (1/3 cup) | Similar liquid sugar. Note: Slightly less "sticky" clusters |
| Peanut Butter | Almond Butter (1/2 cup) | Similar fat content. Note: Milder, more buttery flavor |
| Coconut Oil | Melted Butter (2 tbsp) | Classic fat. Note: Adds a rich, savory note |
| Rolled Oats | gluten-free Certified Oats | Same texture. Note: Essential for Celiac diets |
Necessary Kitchen Tools
You don't need a professional setup for this, but a few specific things make it easier. First, a rimmed baking sheet is non negotiable. You don't want honey leaking onto the bottom of your oven, because that is a nightmare to clean.
Parchment paper is your best friend here. Without it, the honey peanut butter mixture will glue itself to your pan, and you'll end up scrubbing for an hour. I also suggest a large mixing bowl where you have plenty of room to fold the ingredients without spilling oats everywhere.
Finally,, a sturdy spatula is key for the "press down" phase. You want to really squash the granola into the pan to ensure those clusters form.
Step-by-step Baking Guide
Let's crack on with the actual making. Follow these steps closely, and pay attention to the smells coming from the oven.
- Preheat your oven to 325°F (160°C) and line your baking sheet with parchment paper.
- Whisk the peanut butter, honey, coconut oil, and vanilla extract in a medium bowl. Note: If it's too thick, microwave it for 20 seconds to make it pourable
- Toss the rolled oats, chopped peanuts, sea salt, and cinnamon in a large mixing bowl.
- Pour the velvety peanut butter mixture over the dry oats.
- Fold with a spatula until every single oat is glossy and coated.
- Spread the mixture on the pan and press it down firmly with your spatula to form one flat, solid layer.
- Bake for 25–30 minutes, rotating the pan every 10 minutes. Note: Do NOT stir the granola during baking
- Remove from the oven when the edges are deep golden and the kitchen smells like toasted nuts.
- Let the pan sit undisturbed for at least 60 minutes. Note: This is when the clusters actually solidify
Chef's Tip: To get even bigger clusters, try freezing your coconut oil for 10 minutes before melting it with the honey. This creates a slightly different emulsion that grips the oats more aggressively.
Fixing Common Baking Issues
The most common struggle with homemade granola is the "crumb" problem, where everything just falls apart into tiny bits. Usually, this happens because the granola wasn't pressed down enough or was stirred during the baking process.
Another issue is the "burnt bottom." Since honey is a sugar, it can scorch quickly if your oven runs hot. If you notice the bottom browning too fast, move your rack to the upper middle position.
Why Your Granola Is Too Loose
If you ended up with loose oats instead of chunks, you likely didn't let it cool long enough. The sugars are still liquid when the pan comes out of the oven. According to guides on Serious Eats, patience during the cooling phase is what transforms a soft mixture into a shatter crisp snack.
| Problem | Root Cause | Solution |
|---|---|---|
| Burnt edges | Oven temp too high | Lower heat to 300°F; bake longer |
| Soggy texture | Not cooled enough | Wait full 60 mins before breaking |
| Bland taste | Not enough salt | Add a pinch of flaky salt after baking |
Cluster Success Checklist
- ✓ Pressed firmly into the pan before baking
- ✓ Rotated pan without stirring the oats
- ✓ Removed while still slightly soft in the center
- ✓ Cooled completely before touching
- ✓ Used a high fat binder (peanut butter + honey)
Bold Flavor Variations
Once you've nailed the basic Peanut Butter Granola, you can start playing with the profile. I love adding a handful of dried cranberries or dark chocolate chips. If you add chocolate, wait until the granola is completely cool, otherwise, you'll just have a melted chocolate puddle.
For those who like a bit of a savory twist, try mixing in some Roasted Chickpeas after the bake. It adds an extra layer of protein and a different kind of crunch that complements the peanut butter perfectly.
Transitioning to Peanut Butter Granola Bars
If you want to turn this into bars, simply increase the honey by 2 tablespoons and the peanut butter by 1/4 cup. After baking and cooling, press the mixture into a square pan and refrigerate for 2 hours before slicing. This creates a denser, chewier bar that is great for hiking.
Creating a Vegan Profile
To make this vegan, swap the honey for maple syrup and use a coconut based vegan butter if you prefer that over coconut oil. The texture remains almost identical, though the maple syrup gives it a more woody, autumnal flavor.
Storage and Waste Tips
Keep your granola in an airtight glass jar. In the pantry, it stays crisp for about 2 weeks. If you live in a humid area, I actually recommend keeping it in the fridge, which keeps the fats stable and the crunch intact for up to a month.
You can even freeze it! Just put it in a freezer safe bag. It doesn't freeze solid because of the sugar and fat content, so you can scoop it out whenever you need it.
Zero Waste Idea: Don't throw away the residue in your peanut butter jar. Pour the melted honey and coconut oil directly into the jar, shake it up to get every last bit of peanut butter, and then pour that mixture over your oats. It saves a bowl and ensures no flavor is wasted.
Best Pairing Ideas
This stuff is incredible on its own, but it really shines when you pair it with something creamy. A bowl of thick Greek yogurt with fresh blueberries and a sprinkle of this granola is my go to breakfast.
If you're feeling indulgent, try serving it over vanilla bean ice cream. For a truly decadent treat, drizzle some Brown Butter Caramel Sauce over the top. The saltiness of the peanut butter cuts right through the richness of the caramel.
Decision Shortcut If you want maximum clusters → Press firmly and do NOT stir. If you want a lighter, loose toast → Stir every 10 minutes. If you want a chewier result → Add 2 extra tablespoons of honey.
Common Granola Misconceptions
Some people think that you need to "toast" the oats in a dry pan before adding the wet ingredients. Honestly, don't even bother with that. The oven does all the work, and pre toasting just increases the risk of burning the oats before the honey has a chance to caramelize.
Another myth is that adding more oil makes it crispier. In reality, too much oil just makes the granola greasy and prevents the honey from acting as a glue. Stick to the ratios in the recipe for the best shatter crisp results.
Recipe FAQs
Are peanut butter and granola healthy?
Yes, in moderation. They provide heart healthy fats from peanut butter and essential fiber from oats, though the honey adds concentrated sugars.
Can granola help lower cholesterol?
Yes, potentially. The soluble fiber found in rolled oats binds to cholesterol in the digestive tract, helping the body eliminate it more efficiently.
What holds granola clusters together?
The combined honey and coconut oil. These ingredients act as a binder that hardens as the granola cools, locking the oats and peanuts into chunks.
What's the healthiest granola you can eat?
One with whole grains and minimal refined sugars. This version uses old-fashioned rolled oats and honey for a nutrient dense profile. If you enjoy these sweet treats, you may also like our homemade cinnamon rolls.
How to store peanut butter granola?
Seal it in an airtight glass jar. Keep it in the pantry for two weeks or the fridge for up to a month to maintain maximum crunch.
Why didn't my granola form clusters?
You likely stirred the pan during baking. To ensure clusters, press the mixture down firmly before baking and rotate the pan every 10 minutes without stirring.
How to make the liquid mixture easier to pour?
Microwave the peanut butter, honey, coconut oil, and vanilla for 20 seconds. This creates a pourable consistency that ensures every oat is evenly coated.
Peanut Butter Granola Clusters