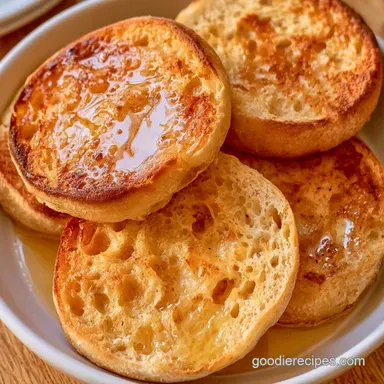
No-Knead English Muffin Toasting Bread

- Time: 15 min active + 30-45 min resting
- Flavor/Texture Hook: Chewy, cratered crumb that traps butter
- Perfect for: Busy weekday breakfasts or meal prep
The smell of browned butter and toasted grain hitting the air at 7 AM is honestly the only way to start a day right. I used to buy the store-bought packs, but they always felt too airy , worse, completely flat.
I wanted that specific, cratered texture that makes a toasted muffin so satisfying, but I didn't have the patience to poach twelve individual little cakes on a griddle.
Then I started playing with the hydration levels. I realized that if I stopped treating it like a traditional dough and started treating it like a thick batter, the air bubbles stayed trapped and grew larger. It turns out that a "gloopy" consistency is exactly what you need to get those deep nooks and crannies.
This English Muffin Toasting Bread gives you the best of both worlds. You get the ease of a loaf cake with the specific, chewy bite of a muffin. It's a family favorite now because it's reliable, and you can slice it thick for a real treat.
English Muffin Toasting Bread Recipe
High Hydration: The wet batter prevents gluten from tightening, which lets large bubbles form. This is similar to how my no knead bread recipe works, but the wetter mix here creates bigger holes.
Double Lift: Using both yeast and baking soda provides an immediate rise and a sustained one. This ensures the loaf doesn't collapse under its own weight.
Bread Style Comparison
| Method | Time | Texture | Best For |
|---|---|---|---|
| Griddle Muffins | 90 mins | Airy & Light | Traditional Brunch |
| Toasting Bread | 60 mins | Chewy & Hearty | Weekday Mornings |
| store bought | 0 mins | Uniform & Soft | Emergencies |
The biggest difference here is the density. While griddle muffins are lighter, this loaf has a more substantial chew that holds up better under heavy toppings like avocado or thick jam.
The Right Ingredients
Water and butter are the key players in this recipe. While the warm water quickly wakes up the yeast, the butter adds a velvety richness that prevents the crumb from becoming rubbery or too lean.
I recommend all-purpose flour for a more approachable texture, though you can adapt the ingredients based on what you have on hand.
Dry Mix:
- 3 cups (375g) all purpose flourThe goal: Balanced protein for a soft yet chewy crumb
- 1 tbsp (12g) granulated sugarThe goal: Feeds the yeast and assists with browning
- 1 tsp (6g) saltThe goal: Improves the crumb structure and adds flavor
- 2 ¼ tsp (7g) active dry yeastThe goal: Provides the traditional bread aroma
- ½ tsp (3g) baking sodaThe goal: Gives a quick lift to create airy pockets
Wet Mix: - 1 ½ cups (355ml) warm water The goal: Hydrates the mix and activates the yeast - 2 tbsp (28g) melted unsalted butter The goal: Adds richness and ensures a softer crust
| Original Ingredient | Substitute | Why It Works |
|---|---|---|
| All purpose Flour | Bread Flour | More protein. Note: Leads to a denser, chewier loaf |
| Granulated Sugar | Honey | Natural sweetness. Note: The bread browns slightly faster |
| Unsalted Butter | Coconut Oil | Plant based. Note: Adds a subtle tropical scent |
| Warm Water | Warm Milk | Extra fats. Note: Creates a softer, richer crumb |
Necessary Kitchen Tools
No special equipment is required. I typically rely on a large ceramic mixing bowl and a strong silicone spatula. Since the batter is quite tacky, a spatula is essential for smoothing out flour lumps where a spoon would struggle.
Two 8x4 inch loaf pans are ideal. While a single large pan works, the bread will be taller and will require more time in the oven to bake through the middle. I also suggest lining the pans with parchment paper to ensure the loaves lift out effortlessly.
Step-by-step Process
Phase 1: The Shaggy Mix
Combine the flour, sugar, salt, yeast, and baking soda in a large mixing bowl. Mix in the melted butter and warm water. Use a spatula to stir just until everything is moistened. The mixture will appear quite sticky and gloopy.
Note: Resist the urge to incorporate extra flour, as the high moisture level is key to forming those airy holes.
Phase 2: The Quick Rise
Drape a clean towel or plastic wrap over the bowl. Place it in a cozy, draft free area to rest for 30 to 45 minutes. Ensure the dough has expanded and small bubbles are surfacing before proceeding.
Phase 3: Pan Prep and Bake
Set your oven temperature to 375°F (190°C). Prepare two 8x4 inch loaf pans by greasing them or adding parchment paper. Carefully divide the batter equally between the two pans.
Phase 4: The Bake
Bake for 20–25 minutes until the crust reaches a deep mahogany hue and the loaves sound hollow when tapped. That hollow sound confirms the center is fully cooked.
Phase 5: The Cool Down
Allow the loaves to remain in their pans for 5 minutes. Move them over to a wire rack until they have cooled. Note: Cutting into the bread too soon allows steam to escape, which can result in a gummy texture.
Troubleshooting Your Loaf
Dough Stayed Flat
This usually happens if the yeast is old or the water was too hot. If the water exceeds 130°F (54°C), it kills the yeast cells. Next time, make sure the water feels like a warm bath, not a hot shower.
Batter Too Sticky
It's normal for this English Muffin Toasting Bread to feel more like a cake batter than a traditional dough. If you add more flour to make it "manageable," you'll lose the air pockets and end up with a dense brick. Trust the gloop.
Slices Collapsing
If your slices feel squashed or gummy after toasting, you likely sliced the bread while it was still warm. The internal structure needs to set as it cools to maintain those nooks. Give it at least an hour on the rack.
Serving Your Toast
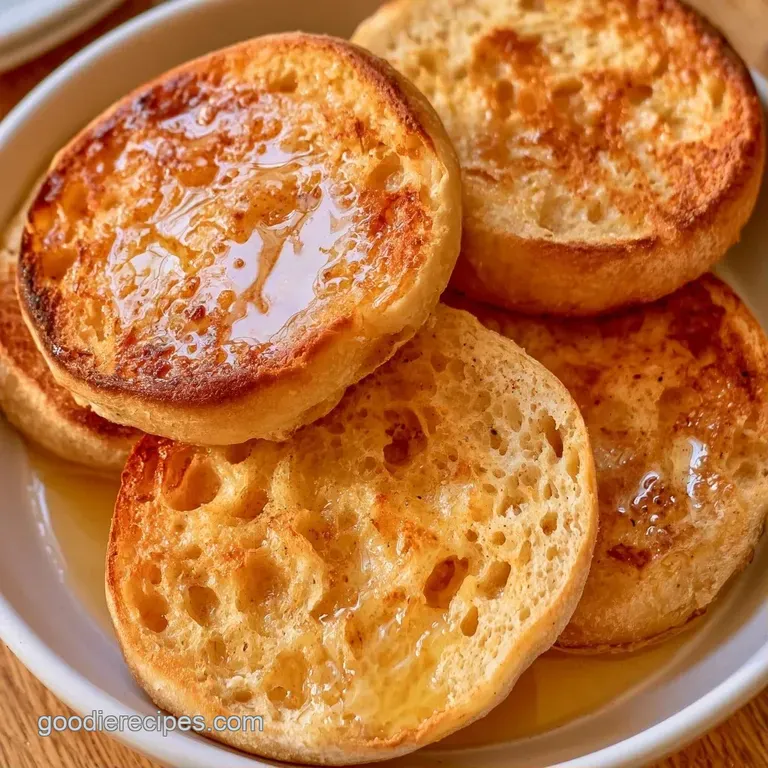
The real magic happens in the toaster. Since this bread is denser than a store-bought muffin, I like to slice it about 1 inch thick. Toast it on a medium high setting until the edges are charred and the center is steaming.
For a classic breakfast, slather the hot slice with salted butter. The holes will soak up the melted fat, creating little pools of richness. If you're feeling fancy, try a savory brunch version with smashed avocado, a squeeze of lime, and red pepper flakes.
It's a great base for eggs Benedict too, as it doesn't get soggy as quickly as white bread.
Storage and Leftovers
Store your loaves in a reusable beeswax wrap or linen towel on the counter for 2 days. If your environment is very humid, the fridge is a viable alternative for 5 days, though it may cause the bread to stale more quickly.
For long term keeping, use the freezer. First, slice the bread and separate the pieces with small bits of parchment paper. This allows you to toast a single slice without thawing it first. They stay fresh for roughly 3 months.
To reduce waste, turn stale slices into croutons. Cube them, toss with salt and olive oil, and bake at 350°F (175°C) for 10 minutes. These have a superior chew compared to typical bread croutons.
Custom Flavor Ideas
Feel free to customize this dough based on your preferences. For a savory version, mix in a tablespoon of dried rosemary and coarse sea salt prior to the rise. The result is a flavor profile somewhere between a muffin and my garlic homemade bread.
To make it heartier, replace one cup of all-purpose flour with whole wheat flour. Since whole wheat is more absorbent, you may need an additional tablespoon of water to maintain that "gloopy" texture. To keep it vegan, substitute the fat with melted coconut oil or a neutral tasting vegan butter.
Quick Customizations:
- More tang? → Stir 1 tsp apple cider vinegar into the water.
- Cheesy topping? → Top with shredded cheddar before it goes in the oven.
- A touch of sweetness? → Blend 1 tsp cinnamon into the dry ingredients.
Now that you're prepared, remember that making this English Muffin Toasting Bread requires a bit of patience and a willingness to get messy. When bubbles appear in the pan, you'll know you're doing it right. Time to start baking!
Recipe FAQs
Are you supposed to toast English muffin bread?
Toasting creates the signature charred, bubbly texture.
Tip: Use a griddle with butter for a diner style finish.
What distinguishes this bread from standard loaves?
This version uses a sticky, high hydration batter rather than a kneaded dough.
Tip: Avoid overmixing the flour to keep the crumb tender.
How do I toast slices at 400 degrees?
Place slices on a baking sheet and heat for 3 to 5 minutes.
Tip: Flip halfway through to ensure both sides are golden brown.
Is it true that these muffins must be toasted to be edible?
False. They can be eaten plain, though the texture is significantly softer and denser.
Tip: Try a light toast if you prefer a middle ground texture.
Why does the batter need to rest?
Resting allows the yeast to produce the essential airy bubbles.
Tip: Keep the bowl in a draft free area to help the dough expand.
Where can I buy this type of bread?
Specialty bakeries often carry it, but making it at home is more cost effective.
Tip: Serve your toast alongside a chopped salad for a balanced breakfast.
English Muffin Toasting Bread